The best way to Stabilize Soil

Soil tends to to clean away on sub-soil that will not nourish landscaping, resulting in ugly erosion ditches and a minor slope. The effects of soil that is unstable could be significantly worse than just looks. A home on soil that is unstable are at danger of being dropped into a mudslide. The greatest protection would be to avoid soil structure, but this is usually unavoidable in gardening or building locations. Fortunately, it is possible to regain balance and construction remarkably effortlessly.

Top gown with organic components, including manure, sawdust, woodchips or gravel. Top dressing in case of natural components, can enhance the standard of the soil over time and, holds soil in place. Biodegradable topdressing releases nutrients every time it rains and enhancement that is natural aids soil that is disturbed re-gain balance and its construction. Top dressing breaks the pressure of water falling on the soil therefore it can cure compaction.

Mini, or use baffles -terraces, and retaining walls to stabilize soil on a hill-side that is steeper. Baffles produce little islands of level floor that are likely to be stripped of soil by water. A well made soil particles can be collected by collection of baffles from running-water by permitting soil particles to drop out of solution and slowing it down. Baffles may be supported with landscaping blocks or stone, wood timbers. In a pinch, use landscape edging to to keep aid baffles maintain their form.

Avoid disturbing or tilling the soil. Soil has its own framework and when soil is tilled, or turned over, the organic construction is ruined. This makes soil more susceptible to erosion by water and wind.

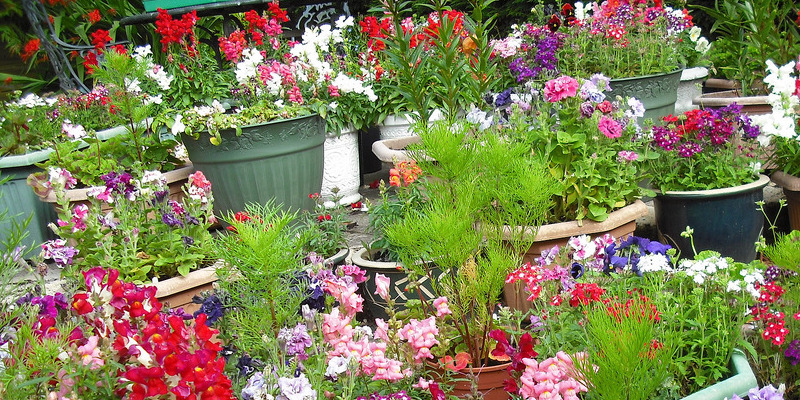
Plant ground wild flowers cover or little shrubs. An established program of roots encourages s Oil aeration, holds s Oil in location and enables water to infiltrate without washing a way s Oil or compacting the framework. Crops shade the s Oil and guard it from becoming dry too significantly in immediate sunlight besides being mo-Re more desirable than bare grime. Plant nitrogen-repairing legumes, including alfalfa or clover, in the event you if you wish to to re build soil fertility. Water watchfully using a light sprinkle therefore that top-soil, seeds and seedlings will not clean a way before the crops are established.

See related

The best way to Repair a Pond Liner With Tree Root Damage

Water fountain and every yard garden pond is lined using a liner over the interior part. The liner functions as a barrier to to to keep in water and keep soil and tree roots which may harm the health of the pond out. It might naturally entice the roots because of the presence of water in the region in case your pond is found near a tree in the lawn. Roots developing underneath the soil beneath your pond puncture your liner, creating leaks and issues for life including fish and crops that are specific and might ultimately work their way up.

Turn the pump to stop the movement of water off.

Drain the pond using hose or a pond vacuum.

Remove fish out of your pond with fish nets that are specific and spot them in a tank or alternative area that is holding for for now. Add water in the pond to the tub to lessen shock as a result of change in water surroundings.

Move pond plants and rocks taken care of to help you locate the puncture in the roots. As it drains in the pond you need to be in a position to find out the water bubbling across the hole.

Carefully slice the the liner to open the hole in order to peel it back and expose the tree root and the underlayment pad. Cut in lines can be cut back in a seam.

Cut through the padding using a scissors or boxcutter to expose the tree root.

Trim back the root together with the observed as far as you can without more tearing the underlayment or liner pad. If required, make extra clear cuts in padding and the liner make it possible for one to remove the root from underneath the pond. Discard the part of the root you stop.

Pull the pad again together and seal with duct or other water-resistant tape.

Place still another little bit of padding that is underlayment as a patch on the area which is sealed to a-DD reinforcement, and tape the patch in position. The patch should overlap the edges of the seal by at least 6″ on each and every side.

Return the liner to its authentic place and pull edges. Apply a patch created from an extra bit of liner or a pre-cut patch from a retailer that was pond depending on the dimensions of the hole. Seal whatever patch you use with glue in spot made with this purpose. Allow the patch to dry over-night. Patches and the glue are obtainable a T shops promoting products that is pond.

Replace crops and rocks and fill your pond. A-DD de-chlorinator and other pond chemicals to balance the water for the fish when the pond is total. Test the pH by means of your testing package and change as essential. Turn on the pump and reunite the fish. Pour the contents of the tub together with the unique pond water again in your pond.

Check along the exterior portion over the fringe of of the pond to to discover tree roots which will be threatening the medial side of your pond. Dig down and slice the the roots straight back to some distance that can keep them. Place a bit of tin roofing or metal barrier that is alternative under Ground along the medial side of your pond once it really is dug-out to stop the roots from r e-penetrating.

See related

The best way to Cut Sod for Landscaping

Sod consists of carpet-like strips of grass covered turf. Typically offered in rolls that are long, it measures about X feet and may be cut to to suit any location. Sod is is recommended by several homeowners and landscapers over-seed as it gives a level, well-produced grass covered area instantly upon installation. Waiting for the garden to complete and spreading grass seed requires significantly more time with outcomes that are uneven. Form and you usually need to cut the sod to to match when installing sod in your landscape.

Lay your sod turned soil to make sure that it attaches and requires root to the current landscape effectively. Before you seize the roll of sod put on function gloves. Then begin at one corner of area or the pathway as you’d, and spot the sod down a carpet. Kneel on the sod, when you get to the obstruction or corner.

Use a knife to ensure it fits across the obstruction to slice the the sod. Insert the knife through the sod near its middle stage, and use a gradual, gentle sawing motion to reduce it to the form that is preferred, before the entire strip was cut sawing in one course toward the exterior edge after which in another. Use utility knife or a kitchen having a blade that is sleek to avoid tearing through the cutting procedure as well as the edges that are jagged it may produce.

Measure your sod where a full-length doesn’t match to to suit any tiny gaps or oddly-shaped places. Use your tape measure to transfer the measurements and use your knife to create the cuts. Place these pre-cut sod items to their corresponding plots until all blanks are filled in.

See related

The best way to Grow Plumeria in Small Spaces

Plumeria trees achieve 20 to 25-feet tall, using the canopy spreading similarly extensive. The canopy is a vase form with this tree, whose aromatic flowers are used to make leis. The petals are organized in a open spiral routine. This tree grows as a container plant, which enables the gardener to transfer it to shelter — an essential attribute, since it’s sensitive to the wants and cool defense. As the plumeria grows nicely in small areas that makes it an outstanding patio tree.

Using water, clean huge plant pot big enough to contain the the plumeria roots. Rinse the container using 10 percent bleach combination. Mix equal parts of potting shredded redwood bark, soil and pumice. Fill the container and plant the plumeria straight in the heart using its roots.

Move the container. Avoid putting the pot because plumeria doesn’t do well when subjected to reflected heat. The finest place for the plumeria is one-with the canopy in the sunlight as well as its roots in the shade. For those who have an area with soil consider plunging pot and the plant in the floor. This stops the tree.

The soil the best is dry. Don’t Over Water the plant — when in doubt, wait a day before watering. Over-watering is a difficulty when developing plumeria trees. Check the container in the event the climate is sunny and warm.

Feed the plumeria using a large-phosphate fertilizer, like 105010. The center number, which signifies the proportion of phosphate, is essential for flowering trees and shrubs. Use bloom method or a blossom booster every two months throughout the growing period. As the tree grows new branches when it blossoms you want to motivate flower creation.

Pick an area on the trunk to begin the canopy and cut a way the branches. The plumeria is formed by this in to a solitary-trunk tree. Trim the canopy again a small each yr to to regulate its dimensions, but re-member that plumeria blossoms. Repot the plant in a somewhat greater container each yr utilizing a potting mixture that is fresh.

See related

The best way to Feed Arborvitae

Arborvitae (Thuja occidentalis) is most frequently planted in rows in the backyard as a privacy hedge. This ever-green can also offer a focal point in your backyard if planted and held trimmed. Select a sunny place in your lawn with free, fertile soil when planting arborvitae. Once proven, these conifers are resistant to the majority of pests and need little treatment. From an annual feeding, your arborvitae will gain through the first five years of development. Providing the proper amount of food in the proper time of year is to feeding your arborvitae important.

Wait till late drop to fertilize your arborvitae. Your plant can be stressed by fertilizing during the growing period.

Measure the peak of your arborvitae. This does not have to be an exact measurement, but should give you a rough estimate of the peak of the plant.

Calculate just how much fertilizer to use. You may need one third of a pound of fertilizer for every foot of the peak of your arborvitae. As an example, in case your arborvitae is 5 feet tall, you’ll need 1-2/3 lbs of fertilizer.

Use the measuring cup to measure out the fertilizer (two cups is equivalent to one-pound). Spread or sprinkle the fertilizer beneath the arborvitae. From touching the trunk of the plant keep the fertilizer.

Use the trowel to perform the 2 to 4″ to the soil across the arborvitae. Don’t permit the fertilizer to come in the trunk of your shrub or contact with all the roots. Water your arborvitae properly once completed.

See related

The best way to Install Fridge Water Filtration

There are only a few things as refreshing as a glass of ice cold water on a warm day, unless that glass is full of objects that are unidentified. If the source of the particulates is refrigerated ice or water from a fridge icemaker, filtration is the solution. To save lots of time now and aggravation at filter-change time, appear for an in-line filter package that comes complete using a quick change bracket and most of the components that is required.

Turn off the water-supply to the fridge. Select an area for the water-filter which is hidden from view, however readily available for filter adjustments. Place a bucket below the water line in the chosen area to catch leaks throughout installation.

Mount the filter bracket to the wall using the screws supplied in the package. Tighten stays immobile.

Wrap three turns of plumber’s sealing tape across the bracket aspect of equally compression fittings provided with the kit. Thread the fittings on the bracket to the outlet and inlet ports. Tighten the fittings.

Cut the waterline using a utility knife for plastic or a cutter for copper tubing. Inspect the ends to produce sure they’re square, clear and free.

A compression nut on the conclusion of the tubing from the water-supply, accompanied by with a compression ring. Install an end stiffener if one was provided with the kit to the finish of plastic tubing. Insert the conclusion of the tubing to the fitting and tighten the compression nut. Repeat the procedure for the outlet side of the tubing.

Install the filter in the bracket in accordance with the directions of the manufacturer’s. Turn on the fridge water-supply and look for for leaks. Discard the two gallons of water in the dispenser; alternately, discard the first three batches of ice.

See related

The best way to Replace an Old House Thermostat

Replace your old thermostat to eliminate ugly, steel or discolored plastic housing – thermostats with sleeker, more cost-effective electronic-show thermostats. Thermostats made using change knob or a tab usually have a glass vial of mercury which is used to to operate the furnace before 2005. These thermostats may be safely re-cycled at HVAC wholesale distributors, that there are more than 350 350 selection areas in California, to make sure that mercury is re-used.

Turn off the power to the thermostat in the circuit breaker box of your house.

Pick out the housing from the thermostat. Remove the screws which are holding the thermostat and pull the thermostat from the wall.

Examine where the wires are attached to to the final screws of the thermostat. There’s a wire for the heater and there might be a wire for the AC at the same time. The final screws for every single device the thermostat is attached to to should be marked with letters like RC, Y, G, W and R. Wrap a bit of masking tape around each wire to to make a tag together with the tape before you eliminate the wires. Mark the tape with the letter designation of the final of every wire screw using a felt-tipped pen.

Loosen the terminal screws using a screwdriver and unhook the wires in the screws. In the event the wires want to pull-back to the wall, tape them down with masking tape to to keep them. Put the thermostat in a secure location as most aged thermostats include glass tubes so you could recycle it correctly.

Remove the thermostat’s mounting-plate screws and go unusual. Hold the thermostat plate up to the wall to verify whether you need to drill holes for the -plate screws. In the event that you do, as versions certainly are a different-size and form than thermostats that are older, contain the the plate check always its position having a carpenters le Vel and alter appropriately to make it straight and even. Mark the areas for screw-holes on the wall using a pencil.

Drill holes into the wall in the pencil marks. Before the ends are flush with all the wall drive drywall anchors to the wall using a hammer. Place the mounting plate on the wall, thread the wires and then set the screws that are offered to the dry wall anchors and tighten them using a screwdriver.

Inspect the ends of the wires that are thermostat. Whenever they corroded or are frayed, use wire-cutters to cut the ends off. Strip 3/4 inch of the insulation jacket off to expose the steel underneath.

Loosen the thermostat’s screw terminals. Wrap the wire together with the letter clock-wise around each screw final. Tighten the screws. In the event that you discover the screw final designations are diverse on the thermostat, the guidelines that included the packaging of the thermostat should have a chart or directions to direct you using the wiring method. For those who have wires marked C C 1 or C that connected to final screws on the outdated thermostat, don’t link them. Separate the C-1 and C wires in the wires. Wrap the end-of the C-1 and C wires to totally protect the metal conclusion that is bare. Insert the wires to the wall. Wrap the ends whether there are any wires in the wall close to the aged thermostat that weren’t attached to to the outdated thermostat and place them to the wall.

Push the wires in to the wall. Insert the offered batteries to the thermostat as-needed. Attach the thermostat to the wallplate by snapping it in to spot and sliding the tabs of the wallplate to the again slots of the thermostat. Turn the power-back on in the circuit breaker box.

See related

The best way to Repaint Refrigerators

Equipment enamel paints and epoxy enable homeowners to give their refrigerators a brand new look with no expense of really purchasing a new equipment. These paints that are specially-formulated resist cracking and peeling and therefore are designed to protect plastic and metallic surfaces, can withstand hot and cold weather, and may be obtained in spray-can fluid type or. In several hours, painting your fridge could be achieved having a comparatively little area to protect. To ensure professional-looking results, sand down the paint work into a dull end and use a primer.

Visit a home improvement retailer to acquire equipment enamel or equipment epoxy in the colour of your selection. Will signify more conventional colours, including white, black, bisque and stainless steel, while enamel comes in many different hues.

Open doorways and windows, where suitable, to permit correct ventilation and pull the refrigerator from the wall.

Wash the front and sides of the ice box with a household cleaner or warm, soapy water to remove caked on grime and dirt. Dry the the applying entirely.

Lay newspaper or a drop cloth round the foot of the ice box. Sand down the unique paint with fine- sandpaper so paint can be accepted by the area. Wipe away any dirt that accumulates.

Painter ‘s tape to any parts of of the fridge you do not want to paint, such as door hinges and handles.

Set up a painting station near-by along with your roller brush and paint tray. Apply a coat of primer, and permit it to dry.

A coat of paint and followup, if required, following the first dries using a second coat totally. Use smooth any drips away, and strokes.

Allow the paint to dry. Remove the tape in the morning of the painter. Push again the ice box back to location, and clean the region up.

See related

The best way to Compare House HVAC Units

HVAC is short-hand for “heating, ventilation, and air conditioner” and can be used to refer to the entire system utilized to heat and cool properties. Investing in a furnace or AC unit to get a house is an important purchase, and ensuring that you will be receiving the right choice for the house requires some preparation and decisionmaking. Realizing the regions to examine assists you discover which is going to meet your requirements.

Producers’ Data

Manufacturing companies do their utmost to offer plenty of stuff to allow it to be simple to compare the specs of just one unit head to head against another. Internet info or gathering booklets lets you create an easy grid using the HVAC manufacturers under their title across the very top of the page as well as their specs in a column. Vital tips for every single potential unit contains the complete BTUs — the optimum quantity of heat which you need to notice or cooling system that the device efficacy is produced, by a unit, the background level it makes, the amount of the guarantee as well as the price.

Consumer Evaluations

Other resources of info for HVAC models are publications like Good Housekeeping, Consumer Reports and Popular Mechanics. These use equally panels and equipment specialists of customers to to evaluate and evaluate worth and the worthiness of varied HVAC units. Reviewing their re Search can assist you to stay away from difficulties. E-tailers and websites like Consumersearch.com are sources where it is possible to read what other individuals are assert about a certain product. Frequently these websites permit the customers to rate from bad to outstanding the models.

Size as well as Efficacy

The dimension of its own efficacy and the H-VAC device are of vital significance. Both an over-powered unit or an under-powered will squander cash as they strive to correctly warm or cool a house. A high efficiency unit working a-T above 90-percent efficacy will be more expensive install and possibly to buy, but nevertheless, it’s going to definitely cost less to run when compared to a unit functioning in the 80 percent efficacy that is normal. A bargain priced on a tiny, ineffective HVAC unit will most likely be repented after an early alternative and higher statements.

HVAC and Networking

Electronic Equipment present them much more flexibility and play an increasing function in commanding HVAC units then they’ve ever had. Some models have zone controls which permit you to correct the specified temperatures in every single chamber. Higher-conclusion versions even enable the HVAC component to follow equally the present weather and predicted weather on the Net to enable it to “make its choices” about heat and cooling. This provides you with the ability plan and to track it from any Web-related pc while you happen to be away from your home. This benefit could possibly be the level when other variables are identical between two models.

See related

Painting Faux Tin Ceiling Tiles

Whether your ceiling is simply plain or unattractive, painting fake tin ceiling tiles make it something you’re happy to showcase and can liven it up. Many real tin tile ceilings were installed during the 1800s, which makes a fake tin ceiling suitable in a broad variety of architectural designs in houses. However, this appearance isn’t limited to houses that are elderly. So apply your creativity it’s your area.

Setting Up the Grid

Among the features of a classic tin ceiling is the grid-type layout. Mark you paint as well as the procedure will go a lot smoother. To create a grid that is well-balanced, you’ll must get to the middle of the area and mark off the grid on the ceiling equally using a pencil or painter’s tape. Breaking up that measure in half and quantifying the amount of a wall gives the centre point of the wall to you. From that point, mark lines that are straight over the ceiling for the grid. Yours can be any size you want, although many aged tin ceiling tiles were about 12 inches square. If you’re utilizing painter’s tape, consider painting the ceiling a solid colour much like the paint you’ve before applying the tape, selected. Peeling the tape following the fake tiles are painted off shows lines that resemble seams between tiles.

Paint and Stencils

Depending simply on stencils and paint for the layout needs lots of patience as well as a little precision. Tin ceiling tiles have lifted designs pressed to the steel, and copying that appear with paint needs adding shadows and highlights. Stenciling with just one colour can leave your layout appearing clearly counterfeit and level. Almost any stencil will operate for fake- but elaborate layouts with a lot of details tend to be more persuasive. You polish black seem more real and can use any colour of paint you want, but metallics. A DD paint that is darker to paint in places for highlights and some places for shadows after painting the layout through the stencil on the ceiling.

Plaster or Dry Wall Joint Co Mpound and Stencils

There’s one other way to repeat the dimensional appearance of pressed tin if you’re maybe not easy with painting high-lights and shadows. Utilizing the exact same stencils as you’ll for paint, remove the stencil and record a stencil to the ceiling, distribute plaster or dry wall joint co mpound on the stencil. What stays on the ceiling is an elevated style that dries difficult. Permit it dry over-night after stenciling the complete ceiling with plaster or joint co mpound and buff off the tough edges with sand-paper. Dry wall joint co mpound and both plaster stick to nearly every paint, s O don’t worry regarding the stuff falling off. Sanding it may assist the plaster or joint co mpound hold better in case the ceiling is extremely slick. Basic plaster or joint co mpound nevertheless needs paint, s O roll-on a glossy or metallic black paint in order to complete the layout.

Textured, Paintable Wall-Paper

Especially made wallpaper can be obtained in a number of designs, a few of which appear like tin that is pressed. Even layouts that do while they’re on the wall paper roll n’t particularly look like tin may seem more persuasive in the event you slice the the wall-paper in to squares. Paintable wall paper is a great option for ceilings that are imperfect, as the paper is somewhat thicker than regular wallpaper. Just apply the wall paper in case the paper you select has a tin ceiling tile layout and paint the layout to be brought out by it. Start using a grid layout on the ceiling to make certain rows of wall-paper squares in the event that you reduce the wall-paper in to squares. A wallpaper seam roller along the seams aids the borders lie flat.

Safety

Picture on the ceiling needs tools with extension poles, perhaps scaffolding and ladders. Including a layout that is faux into a ceiling is a lot more boring than rolling on a solid shade of paint, s O give yourself sufficient time for rests, when your neck is strained and don’t perform. Continuing to work on a ladder or scaffolding past the stage of exhaustion may lead to light-headedness, neck accidents and falls.

See related