Watering Systems for Rose Beds

Essential to great growth and plentiful flowers, a rose garden requires careful watering. During active growth, garden roses (Rosa x hybrida) typically require a deep watering once a week to a depth of 5 to 6 inches. One of the most effective strategies to water roses is by hand using a garden hose and a water wand attachment, but this is time-consuming. Rose watering methods can save water and time without affecting rose health. All watering systems require time to set up and maintain.

Soaker Hoses

Efficient, low-cost, low-maintenance and easy to install — soaker hoses have a lot going for them. Water seeps out straight onto the soil through micropores from the hose wall, allowing water to penetrate deeply without flood. Take the soaker hose during the established rose bed at light curves to soak all of root canals or make a loop around the root zone of each rose bush. Hold the hose in place with wire pins meant for landscaping fabric. Do not run more than 100 feet of soaker hose connected together to keep water pressure during the length of the hose. Cover the hoses with mulch to hide them and to help retain soil moisture. You will want to experiment with just how long to let the water rush for water to reach 6 inches into the soil.

Drip Irrigation

Drip irrigation takes the most planning and maintenance, but it might conserve water. These systems utilize 1/2- to 1/4-inch-diameter plastic tubing and emitters for water delivery to each plant. Create a system plan so that you understand exactly what parts to buy. Manufacturers offer different kinds of emitters. Standard emitters discharge 1 to 2 liters of water per hour and require a longer run time. Assess for watering depth with a moisture meter by digging into the soil. For faster watering, utilize microsprayers, which set out 8 to 20 gallons of water per hour. Use several emitters for each rose bush, adding more as the rose rises. Examine the tubing and emitters each week to be sure everything is functioning as it should. In winter, you could have the ability to turn the system off. Most roses grow in U.S. Department of Agriculture plant hardiness zones 5 through 10, though this varies depending on cultivar. Install drip systems before or after putting the bed.

Sprinkler Systems

Because roses are often vulnerable to fungal diseases, such as powdery mildew, if their foliage gets wet and stays wet, overhead sprinkler systems are not a great selection for increased beds. Rather, look at flat-head sprinklers which you install at ground level, since they deliver their water straight out above the soil instead of up into the foliage. Water early in the afternoon so any moisture on leaves dries before day. Sprinkler systems are best installed in rose beds before the bushes move in.

Semiautomatic and Automatic Systems

Once you understand how long you have to run your system to acquire the dirt moist to 6 inches down, you may use a controller to automate watering. Programmable timers may turn the water off and on for you. They vary in price and elegance. Reprogram your controller if the weather changes and watering needs are different. Wise controllers automate more fully since they feel conditions from the garden and determine when watering is necessary and for a long time, and shut on and off automatically.

See related

Privacy Screen Perennials

Good fences may make good neighbors, but living privacy displays take it to a different level. Plants soften the utilitarian appearance of wooden or chain-link fencing, and they offer habitats and food to birds while blocking undesirable views. You can custom-design a perennial privacy screen by choosing a single plant type or a mix of plants.

Add Some Color

A plant privacy screen does not have to be solid green. It is possible to plant flowering perennials which also add color and scent to your backyard. Silverberry (Elaeagnus pungens) contains many benefits in its perennial selection of U.S. Department of Agriculture plant hardiness zones 7 through 9. Fragrant white flowers bloom in fall against a backdrop of grayish-green foliage, and spiny branches discourage interlopers. Silverberry rises rapidly to form a sync display — 36 inches per year — and may reach a height of 20 feet. In USDA zones 5 through 8, Cornelian dogwood (Cornus mas) is awash with fragrant yellow flowers in late winter or early spring. Like silverberry, Cornelian dogwood reaches a height of 20 feet and can form a privacy screen. Although it’s a deciduous plant, it is possible to plant it in front of evergreens to delight in its reddish-brown exfoliating bark in winter.

Feed the Birds

Pacific wax myrtle (Myrica californica), also known as California bayberry, is an evergreen, multitrunked tree in USDA zones 7 through 10. Reaching a height of 25 feet, wax myrtle produces purple berries, which have a white, waxy layer that feed birds, such as robins, finches and flickers, in late fall and early winter. Also reaching a height of 25 feet, toyon (Heteromeles arbutifolia) is widely known as California holly or Christmas berry because of its striking display of crimson berries in winter in USDA zones 9 through 11.

Enjoy the Fragrance

Fragrant foliage enhances the attractiveness of a privacy screen. Bay laurel (Laurus nobilis) has fragrant evergreen leaves at its perennial selection of USDA zones 8 through 10. This Mediterranean native can reach 60 feet tall, however, typically remains under 30 feet. In USDA zones 6 through 9, lavender cotton (Santolina chamaecyparissus) is a shorter tree with fragrant, silvery leaf which reaches only two feet tall and 3 feet wide. If you would like a solid privacy screen, lavender cotton helps fill at the decreased gaps that larger plants may create.

Mix It Up

Rather than planting a soldierlike row of one plant type to produce a privacy screen, design cluster plantings or staggered plantings to make a multidimensional effect. If you would like a privacy screen in just 1 section of the yard to hide a specific eyesore, cluster plants in groups of three, five or another odd number in front of the undesirable view. Multiple cluster plantings can create groves and walkways through the garden when hiding unattractive scenery outside your yard. Staggered plantings feature plants of different heights, textures and colors to make a tiered appearance that accentuates your backyard by breaking up a monochrome design.

See related

Terra Cotta Pots With Salt Damage

A white crust marring the earthy finish of your terra cotta pots is a indication of deeper problems than a unsightly blemish. Fertilizers include soluble salts that could build up in the soil of potted plants. Over time these incisions leach through the permeable surface of terra cotta pottery, leaving a white crust around the rim, drainage holes or side walls of the grass.

Salt Sources

Fast-acting chemical fertilizers provide nutrients to plants but leave behind water-soluble salts in the soil. Using a slow-release fluid limits the amount of salt in the grass by decreasing the frequency of fluid applications. Tap water in areas with soft water is another common source of salt in terra cotta pots, but typically it only adds modest amounts of salt unless implemented frequently in huge volumes. Using bottled or filtered water eliminates this source of salt.

Salty Sand

Terra cotta pots cradling plants at a sandy, fast-draining dirt are more prone to salt damage. Sandy soils make it possible for the nutrients that they contain to leach from the dirt and in the walls of terra cotta pots more readily. Potting mixtures having a reduced of concentration of sand can hold more nutrients and are less likely to leach salt to the walls of a terra cotta pot. Frequently applying light doses of fluid over a span of weeks adds salt to the soil more quickly than it drains out.

Problems With Salt

Excess levels of salt may harm plants if left unchecked; typical signals of plants suffering from excessive salt include wilting and yellowish or brown discolored leaf that does not perk up following the plant is watered. The first signs of a plant suffering from salt damage are wilting and discoloration during its leaf tips. The damage also goes to the roots; salt-damaged roots often appear dried and shriveled.

Washing Pots

Flushing the dirt with water every four to six months is the simplest way to remove salts and stop them from accumulating in the soil and washing to the walls of a terra cotta pot. The best method to flush the dirt with water would be to take the plant out and remove any catch tray so that water can drain freely. Water the soil steadily until the soil is saturated. Wait 15 minutes for the excess water to drain from the soil and then water it. Water the grass slowly to avoid developing a pool of water on the surface. Soaking terra cotta pots in a solution of 1 part vinegar and 3 parts water helps remove salty buildup.

See related

Roots of Style: Spanish Eclectic Homes Locate a Place in Sunlight

When you see a clay tile roof in the U.S., you will likely find a palm tree nearby, for Spanish eclectic architecture overlooks large areas of California, Arizona and Florida. The orange and crimson terra-cotta roofing defines the neighborhood architecture, comfortably reflecting the abundant sunshine in these areas.

Stucco is your next most crucial element in this style. Historically it covered adobe brick walls, but it had been adapted to wood-frame construction and has been demonstrated to be remarkably flexible and pliable. Its vinyl quality means that it moves across buildings, as a painter’s canvas does a frame, allowing perceptible and complex details to stand out, complementing the visual texture of the roofing tiles.

Dennis Mayer – Photographer

Spanish eclectic design developed in the early 20th century and falls under the umbrella of Victorian architecture. Spanish, African, Latin American and Native American influences combined to supply a varied and rich palette where the design is built. The previous Spanish colonial and mission styles confirm the eclectic’s base individuality, which can also be referred to as Spanish colonial revival. Spanish colonial architecture is more straightforward, without detail, and assignment style reflects the characteristics of California’s Spanish missions established in the 18th century.

The 1915 San Diego Panama–California Exposition prompted enormous interest in the wealth of Spanish architecture. The fast growing population in California readily adopted the architecture and incorporated the aesthetics to several different construction types. It is popular; the majority of California dwellings are in the design, whether they’re loyal translations or loose interpretations. A lot of Florida still assembles in the tradition, also, and examples can be found around the nation, although most are located in Southern areas. Texan examples often prefer brick veneer over stucco as the primary siding.

Defining Characteristics of Spanish Eclectic Style

Mission-style tiles cover this Los Angeles–region home. Originally there were two roof tile types: Spanish, which comes with an “S” shape, and assignment, which will be a half barrel laid down or up in an alternating sequence. Current roof tiles come in infinite colours and contours, and artificial clay tile is available also.

Shallow gable and hip roofs cover many examples. Towered elements such as this entrance porch contribute to special variations in massing. Note the picture window into the right; this feature is often arched or parabolic in other examples.

Steven Corley Randel, Architect

Envision this California home with no elaborate cast rock relief door surround and spiraled columns put involving the windows. Without these elements it would be an easy side-gabled rectangle. These elements define the design and include enormous attention and charm.

RCDF Studio

This newly remodeled two-story Los Angeles home has excellent curb appeal. The chimney on the left helps balance the two-level elevation on the right side. Deeply inset, little stained glass windows flank the chimney, demonstrating solidity and strength.

Colorful and elaborate tiles announce a certain rectangular entrance, though a cast stone detail draws attention to the focal point window to the right. Wrought iron light fixtures and a balcony rail above the window are other traits of Spanish eclectic design.

Ken Gutmaker Architectural Photography

San Francisco could be renowned for Victorians, but it’s also home to several Spanish eclectic dwellings. Arched windows and spiral columns with just enough tile roofing provide lots of character here.

Note using wrought iron for the plant balcony and using leaded stained glass in the flanking arched windows.

For those not knowledgeable about the city’s architecture, two apartments, because they’re known, comprise the arrangement. A garage space runs the thickness of the home; it might hold three or four automobiles. A slightly smaller flat makes up the middle level, and a bigger flat makes up the top level.

HartmanBaldwin Design/Build

In a different Los Angeles home, an inset scalloped entrance folds to the facade, demonstrating the flexibility of this stucco finish. Other identifying particulars include colorful tiles set to the risers of the steps, clay tile roof vents piercing the stucco just below the gable peaks, and tall casement windows in a dark contrasting shade.

STUDIO+ONE:DESIGN

Note the intimate scale achieved with this San Francisco–region home. Small-scale windows, a plant balcony plus a second bigger cantilevered balcony split down the bulk into approachable elements.

An arched inset entrance door is tucked in at the corner of both major elevation masses and is flanked by little windows. Note the spiraled columns between every pair of arched windows.

This stately Pasadena, California, dwelling slightly departs in character from the preceding examples. It lacks arches and intricately detailed bigger elements. It more closely resembles Spanish colonial architecture by its easier articulation. But, Spanish eclectic expresses itself in the Renaissance-inspired entrance surround and asymmetrical front watch. Note the roof vents near the gable peaks, which pierce the solid walls.

EASA Architecture

This Hillsborough, California, home rambles across the landscape similar to the sprawling missions that bear its ancestry. Found here are many elements seen in smaller examples, such as clay tile roof vents at the gable peaks. A roofed chimney leading peeks through at centre, and exposed timber rafter tails underline the tile roof.

Jorge Ulibarri Custom Homes

Recent interpretations of this design, such as this Florida home, additionally sprawl across the landscape with ease. Note using this tower element for its entrance. Garages are tucked into flanking wings. A complex mixture of window shapes, types and sizes contributes to the design as well.

James Glover Interior & Residential Design

In another newer case, a large and comfortable California home, a towered entrance element dominates. Garages placed perpendicular to the front elevation help emphasize the entrance and other defining elements. Deep inset and tall windows include permanence.

Friehauf Architects Inc..

Notice the chimney leading in this San Diego–region home. This detail can be found in many original examples. A towered entrance, wrought iron railings and light fixtures, and also a rambling layout supply the Spanish eclectic character of this house and the entire neighborhood. California still retains this style in high esteem, according to all types of development that continue the aesthetic.

Maybe the adaptability of these materials and also the flexibility of layout elements have contributed to the longevity of this architecture. With infinite variations possible, it’s likely that Spanish eclectic will maintain its existence for several years in the sunny areas of the U.S.

Can you live in a Spanish eclectic house? Please show us a photograph in the Remarks section!

More: Many Cultures Make Their Marks on Mediterranean Design

See related

6 Dependable Ground Covers for Warm Climates

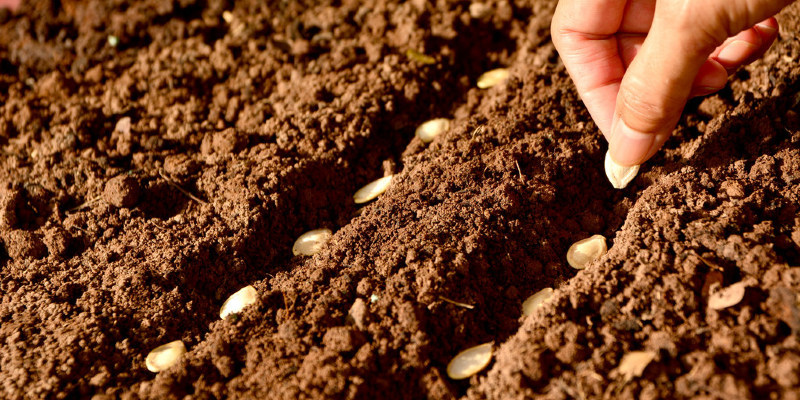
Gardening in hot regions includes a whole set of challenges: warm summers, dry shade, heavy rains, droughts and soils ranging from pure sand to impenetrable clay and soggy muck. But believe it or not, there’s certain to be a appropriate ground cover to your garden, no matter how warm, dry, shady or soggy it may be. These ground covers will give your garden a place where the eye may rest, and will give you a little more rest too, thanks to their undemanding nature.

A number of the crops listed here are also grown as shrubs or specimen plants, but they are too helpful to ignore as ground covers. Firecracker plant is often considered a shrub, but its delicate arching stems cover a whole lot of ground without obstructing the view. Cinnamon ginger is a bit on the taller side if you permit it to grow unchecked, but even then it creates a weed-suppressing tall ground cover that seems excellent paired with shorter ground covers like lilyturf.

Speckled Cast Iron Plant
(Aspidistra sichuanensis ‘Ginga’, syn. ‘Milky Way’)

This is a little and speckled relative of cast iron plant (Aspidistra elatior, USDA zones 7b into 11), which is generally grown as a houseplant, but expect to see it branded as Aspidistra ‘Milky Way’ in nurseries. To be entirely honest, any Aspidistra plant will probably do the job very well as a ground cover in the landscape, irrespective of its title. This one just happens to be short enough to be utilized as a lawn substitute, superbly seen and readily available at local nurseries.

The only maintenance you will want to do for cast iron crops is that the occasional removal of dead leaves as they appear and division every couple of years. Not that you really should dig and replant them; they are so amazing and helpful that you’ll look forward to spreading them across the landscape.

Where it will grow: Evergreen in zones 7b into 11; find your zone
Water requirement: Reduced to ordinary; well-drained soil
moderate requirement: Full shade to partial sun
Mature size: 1 foot tall and two feet wide
Seasonal interest: Inconspicuous flowers; evergreen foliage year-round
When to plant: Spring to autumn

Dig Your Garden Landscape Design

Bulbine
(Bulbine frutescens ‘Hallmark’)

It has the drought tolerance of a succulent, the low and mountainous feel of a turfgrass, and spikes of the bright orange flowers of a, well, bulbine. Plant this South African indigenous as a foil for coarser plants, in the edge of flower beds or along paths, where the waving stalks of crimson blooms will bring in honeybees and butterflies. While any bulbine will work wonders for an outside area, the ‘Hallmark’ variety reseeds significantly less and is much easier to find in your nursery.

Bulbine Is drought tolerant and largely maintenance free, however it can benefit from mulching, deadheading and division in spring or autumn. In extremely hot, bright or dry situations, it may need extra irrigation or shade in summer to keep it moving until a rebloom in fall.

Where it will grow: Hardy to 20 degrees Fahrenheit (zones 9 to 11) however resprouts in zone 8
Water requirement: Low; well-drained soil
moderate requirement: Partial to full sunlight
Mature size: 1 foot to two feet tall, eventually forming a two- to 3-foot clump
Seasonal interest: Orange flowers spring and autumn, sometimes in winter and summer
When to plant: Spring to fall

Cinnamon Ginger
(Alpinia nutans)

If your garden is too soggy or too shady for other ground covers, then you will love this plant. Also known as untrue cardamom ginger, cinnamon ginger appears like a dwarf version of the more widely increased shell ginger (Alpinia zerumbet, zones 9 to 11) in each respect. Another noteworthy difference, however, is that the incredible scent of cinnamon you are able to smell upon crushing the leaves or cleaning up from the plant. Use cinnamon ginger for a ground cover or a accent in shade gardens or where you desire a lush and tropical look, no matter how small the space.

Its slow expansion allows you to trim the taller stems back every few years to keep it short, or you may allow it to grow up to 4 feet tall as a tall ground cover, so you will have a chance to witness its rare porcelain flowers.

Where it will grow: Remains evergreen to 25 degrees Fahrenheit (zones 9b into 11) however resprouts in zone 7b into 11
Water requirement: Typical; tolerates standing water and drought once established
moderate requirement: Full shade to partial sun
Mature size: 3 to 4 ft tall and 4 to 5 ft wide
Seasonal interest: White and orange shell-shaped flowers are rare; develop it to the lush foliage.
When to plant: Spring to fall

Carolyn Chadwick

Society Garlic
(Tuhlbaghia violacea)

Edible garlic-flavored purple flowers on a drought-tolerant and grassy ground cover — what other reasons do you want to replace your yard with society garlic? Suffering colonies of this plant are seen in parking medians and hell strips where it’s hardy, but it responds well to routine watering and a occasional increase of fertilizer, and it may fill into form a weed-suppressing ground cover in just a few years.

The big blue and white flowers looming overhead in the photo below will be those of the oft-planted lily of the Nile (Agapanthus africanus, zones 7 to 11). It makes a great companion for society garlic, because both plants bloom at the same time, are from South Africa and thrive in more or less the very same problems. Insert a yellowish bulbine (Bulbine frutescens, zones 9 to 11) into the mix for a much more impressive display.

Where it will grow: Hardy to 20 degrees Fahrenheit (zones 9 to 11) however resprouts in zone 7
Water requirement: Low; well-drained soil
moderate requirement: Partial to full sunlight
Mature size: 1 foot to two feet tall and wide
Seasonal interest: Purple flowers in summer and spring, occasionally in autumn and winter
When to plant: Spring to fall

Lilyturf
(Liriope ‘Evergreen Giant’)

Lilyturf is common in households throughout the world because it gives the eye a place to rest on — much like turf grasses — but without the maintenance. It needs to be trimmed just twice a year, once in summer months before the first flush of new growth, and in autumn to eliminate the stalks of spent purple blooms and ripening berries. It’s not the end of the world if you fail to prune it all, however, and it will continue to form a much sexier deep green mass with each passing year.

Clumping lilyturfs like this one are not considered invasive. While I have not had any difficulties with Liriope spicata, a creeping relative of ‘Evergreen Giant’, it can spread rapidly via runners and is considered invasive by a few. But then again, are turfgrasses like St. Augustine. It should also be mentioned that Liriope is often confused with mondo grass(Ophiopogon, zones 5 to 11), and is an actual grass.

Secret Gardens

Where it will grow: Hardy to 20 degrees Fahrenheit (zones 9 to 11) however resprouts in zone 7
Water requirement: Low
moderate requirement: Partial to full sunlight
Mature size: 1 foot to two feet tall and wide
Seasonal interest: Purple flowers in summer and spring, occasionally in autumn and winter
When to plant: Spring to fall

Noelle Johnson Landscape Consulting

Firecracker Plant
(Russelia equisetiformis)

Firecracker plant is a bit more unkempt than the other ground covers recorded here, but its airy and translucent demeanor keeps it from becoming overly visually obtrusive. It’s excellent for slopes or retaining walls, where its billowing and fragile stems can arch downward into a waterfall of tubular red flowers that hummingbirds can not resist.

It’s drought tolerant enough to be generally planted in the warmer regions of the American Southwest, also besides pruning errant stems, there’s minimal maintenance to worry about, particularly in the event that you plant it a few feet away from paths. The long and wispy stems seem fantastic when planted amongst architectural plants like agave and crinum, and firecracker plant can even be trained from walls and trellises in small spaces.

Where it will grow: Hardy to 20 degrees Fahrenheit (zones 9 to 11), however resprouts in zone 8b
Water requirement: Reduced
moderate requirement: Partial to full sunlight
Mature size: Feathery stems form a mass around 3 ft tall.
Seasonal curiosity: Red tubular flowers spring through autumn, sometimes in winter
When to plant: Spring to fall

See related

7 Pro Lighting Tips for Budding Home Photographers

It’s simple to decide on a camera to car mode and let it do everything for you nowadays. Frequently the photos seem pretty great. However, the difference between creating average photographs and a few of the best interior and architectural graphics comes from becoming more intentional.

While spontaneous photos can be whimsical and beautiful, photographing interiors takes more control over the lighting. Picking out the proper time of day, fill-in Photoshop or light touches can help create the best photo.

Professional photographers develop a style and look to their lighting, which can be very subjective and change with time. Many inside photographers now go to get a more conventional, soft feeling into the lighting. The view outside any windows is bright and a little blurry, which helps the viewer focus more on the inside.

Whether you are shooting on the move with your telephone or using professional equipment, below are a few lighting advice that could take your photos from average to amazing.

Amy Lau Design

1. Soften the lighting. Cameras are essentially light recorders, however the range of what you are able to see and what a camera could see (or record) differs. The tonal selection of light areas and dark regions needs to be less intense, fitter and balanced than that which we could see for the photograph to be properly exposed with today’s cameras.

In this photo the photographer additional side lights around the left and right to provide dimension to the chairs and balance the lighting levels.

Butler Armsden Architects

2. Utilize all lighting. If you are a nonprofessional, try using only natural light first. On-camera flashes often light things up near the camera too much and do not offer enough lighting in the background.

The north-facing window in this photograph provided the most of the light, although I did add some fill light into the foreground.

LLC & Sons, Ellen Grasso

3. Plan your take time. If you can plan your take at the early morning or late day, when the tonal range is smaller, the need for additional lighting declines. The sunlight is not as direct at those occasions and will filter in through windows to create organic shadows that add life into a photograph.

Avoid shooting right into sunlight, too — it is better for sunlight or daylight to come in the side. And research how fixing the drapes can control the lighting.

Alexander James Interiors

4. Maintain the light consistent. Certain spaces also need various kinds of light to minimize color distortion. Ideally, all the light types from the area should be the same. It’s often necessary to utilize fill lights using a flash that is separate from the camera to diffuse light through a space.

This photograph has a great deal of fill light to match the light level inside with the light level outside.

Koo de Kir

5. Change the lighting with various bulbs. Artificial fluorescent lighting have a tendency to create a cooler feel, providing a space a blue-green cast. Turn off these lights when you can. Tungsten lights produce a warmer feel, like the light a candle would exude. Now the tendency is to turn off tungsten lights and have a brighter feel with natural lighting.

This photograph has all daylight coming from the windows and bouncing back into the space off the wall out of the frame on the right side.

6. Maintain the specifics sharp. Most architects and designers need the details of a space to be in focus. Attempt to keep your f-stop at f/16 or greater when shooting interiors.

The f-stop lets you know how big the aperture (opening) the lens is using to select the picture. The f-stop number is somewhat counterintuitive; the bigger the number, the more light will come through the lens. But using a bigger aperture, less area in the photograph will be in focus, which means you ought to find the appropriate balance.

Heydt Designs

7. Utilize a tripod. Placing your camera onto a tripod is able to help you utilize a more exposure whenever you are using a small aperture and prevent blurry images. The target is to stay away from deep shadows and decrease blown-out (overexposed) regions where there’s too much light.

This photograph had an exposure that has been four seconds long, and the camera was on a tripod.

Inform us : What lighting tips and tricks have you heard?

Get additional guides on how to photograph Your Home

See related

3 Reasons Why You Might Want a Designer's Assist

Let us get 1 thing out of the way right now: You do not have to be rich to work with a designer. In fact, working with the perfect professional can actually help you save money, stress and time, and may stop more than a couple DIY disasters. I am not saying that we could all manage the fabulous Martyn Bullard (since we can’t), however there are lots of fantastic designers who are delighted to work with individuals within an affordable, per-project basis — selecting paint colours, finding the ideal window coverings and so on.

Interior design today is all about creative cooperation. Gone are the times of designers coming in and implementing their aesthetic on everyone at any price — unless you need that, of course. The most gorgeous homes frequently are a direct manifestation of a great client-designer relationship — one which you could have, too.

Charlie Barnett Associates

Why and How to Collaborate With a Designer

1. You have the vision but just can’t seem to pull it all together. Sometimes you know what you want, but you do not understand how to get it. For many homeowners, picking out a nice sofa is not the problem; it’s hoping to pair that sofa with a rug. Maybe you have all of the base pieces set up, however your living area lacks personality or warmth. Maybe you want an integrated breakfast nook but have no idea whom you need to call or how to arrive.

I have had multiple customers tell me how ashamed they are that despite spending hundreds of bucks and trying over and over again they can’t obtain their rooms to appear the way they want. The truth is, not everyone is a style expert; just like I wouldn’t ever try to do operation, not everyone should construct a bookcase.

Design truth: There’s no right or wrong way to look for a home where lifestyle and functional needs are met. There are merely different interpretations of objects and space and how they relate to one another.

Reiko Feng Shui Design

2. You are in the breaking point and require help with a new beginning. Several years ago I needed a late-night powwow with a customer and her husband. Matters had been tense, so I requested the husband to voice his concerns. He said, “I truly don’t mind that we’re working with a designer, but what I do mind is spending a lot of money on more stuff that we’re probably going to end up replacing following year.”

This was a moment of ephiphany. His wife, in her well-meaning attempts to make the home of her dreams, had invested a good deal of money on stuff that didn’t fit the space, eventually boxing up it and buying more stuff. All her husband watched was money flowing out, rather than relaxation coming in.

Often, by the time individuals have called at a designer, they have given it their best shot (many times over), and a person at the house is at the breaking point. Regrettably, not everything that’s been bought should remain. You might want to clean the decks a little to build a better base for the space. If you aren’t eager to part with specific pieces, make sure to let your designer understand up front.

Design truth: It shouldn’t be a designer’s way or the highway. Layout is a collaborative process where a designer honestly tells you what works and what does not to make the space of your dreams.

Emily A. Clark

3. You’re ready to get what you want. Above all, interior design is a service-oriented profession — the customer’s satisfaction is the main aim. These tips may help you have a positive and productive encounter with a designer:Have a general idea of what you want to spend, including designer fees. Remember that it does not all need to happen at once (you can decorate in phases), but be realistic about what you’re willing to devote a whole lot on (a sofa, a new mattress) and what matters are less durable (throw pillows). A designer can help you understand if you are on target or will need to expand your vision. Figure out what you are willing to part with and what absolutely must remain. Consider which things will really work in a refreshed space and do your best to be receptive to ideas. If you have a partner, make sure you’re both on precisely the same page in regards to everything you’re looking for. A designer will help alleviate compromise and illustrate points, but probably won’t be able to solve profound domestic disputes. Respect each other. A designer’s “product” is your ability and expertise he or she brings to every project. The way a space is staged along with the positioning of objects is a concrete manifestation of a designer’s worth. Request your designer about his or her conclusions. You bring precious viewpoints to a project which can make it all come together. A climate of mutual respect can go miles toward a positive relationship.

Coveted Home

Remember, a designer’s chief goal is to transform your space into a awareness of your own likes, wants and requirements. But most designers are only as good as you allow them to be. Honesty, open communication, trust and a willingness to stretch your creativity are the keys to making the most of a client-designer relationship.

More: Use the directory to find a designer near you

See related

One Pot, One Huge Shot of the Tropics

To add a stunning touch to your house with something tropical and tall, look no farther than the Kentia palm (Howea forsteriana). It’sone of the all-time-most-popular palm houseplants. Unlike many other palm species, Kentia can manage low sun exposure, ac and heat. Additionally, it is quite tolerant of neglect. Just 1 consideration: Make sure you have plenty of space and an adequate ceiling height, because these tropical infants prefer to grow and grow and grow.

Period Homes, Inc..

This collection of three potted palms at an Dallas display house space conveys the sensation of a traditional conservatory, as a result of the lush tropical underplanting in each container, using arching fronds which fill the vertical space.

Whether a fantasy decor is a casual beach fashion or something nearer to the formal grandeur of a Victorian hand court, Kentia palm can help you get there.

Todd Peddicord Designs

A billiards room filled with antiques and old-world style appears to be an exotic empire-style jungle destination. Large pots filled with Kentia palm since the “thriller” and Boston fern since the “spiller” make a tropical ambience that is incomparable.

Henderson Design Group

An elegant Victorian home furnished with neutral decor is the best place for a tall Kentia palm, which makes a connection to the lush landscaping outside. Orange and yellow pillows and decorative accessories produce a joyous dance of color together with the philodendron leaf arrangement and also the feather-like green palm fronds.

Not surprisingly, a Kentia palm appears right at home at a timeless house in Portland, Oregon, built at the close of the Victorian era; palms became popular in that period and were a key element of Victorian parlor style.

Bon Vivant

An elegant Miami house with white walls and hardwood flooring (and of course a great skylight, which crops adore) becomes a taste of heaven with the accession of Kentia palms.

Integrated

A single palm appears right at home amid contemporary furnishings in this New York coastal high-rise, and is a nice diversion from the massive column one often finds in contemporary construction.

As is clearly seen here, at least 2 Kentia palms are usually needed in 1 container for a full-looking arrangment, depending on the size of these plants.

Get Back JoJo

How to Take Care of Your Kentia Palm

Temperature: 50 to 75 degrees Fahrenheit (10 to 20 degrees Celsius) is Best.

Light: It prefers areas with partial shade, not full sun. It’ll tolerate a somewhat dark corner inside.

Water: Water only when the uppermost soil layer is dry. Mist the plant to simulate humidity and to stop spider mite infestation, which may happen with dust buildup. Overwatering will cause root rot, and underwatering may cause yellow tips which can turn to brown. When the leaves and stalks aren’t standing upright, as they ought to, try out a deep watering, assuming there is enough drainage.

Soil: Sandy with good drainage, though Kentia is flexible to many different soil conditions. Since the plant is quite slow growing, you’ll most likely keep it in the exact same container for many years. Replace old, spent dirt (above the root ball) occasionally.

Feeding: Employ an 18-18-18 slow-release specialized palm fertilizer in accordance with the package instructions once or twice per year, at the summer and spring.

General: Avoid repotting, however it’s necessary, be very cautious when handling the main ball. The Kentia is a palm with roots.

Other Considerations

Air purification:
Kentia is good at cutting edge VOC levels — toxins that are released by cleaning supplies, printers and other family items.

Pets: Kentia is nontoxic.

Natural surroundings: Lord Howe Islands, east of Australia, where the single-trunk tree grows relatively slowly, attaining an average mature height of 20 feet. Long stalks produce bunches of white flowers, which turn into little, red, egg-shaped fruits.

A note on identity: The Kentia palm may look similar to the Parlor hand, and can be wrongly called by this name. While they both make good houseplants, the Parlor palm will stay quite small and is generally utilized at a pot onto a tabletop, while the Kentia can become quite tall.

See related

An Atlanta Attic Welcomes a Light-Filled Toilet

Having a baby on the way, this couple required to make more room in their starter home, so they hired designer Brian Patterson to reestablish their unfinished attic into a master suite and nursery. The loft’s architecture introduced a few challenges for designing the restroom, but Patterson made the most of its magical slants and nooks, developing a classic 140-square-foot space full of light. The renovation included period details that honor the home’s history when creating a brand new, light-filled room with all the amenities on the couple’s wish list.

Brian Patterson Designs, Inc..

Patterson made the most of the low-ceilinged spaces, tucking the tub, which necessitates less headroom, into this particular corner. “The pitches in here feel quite magical; they give a room a cabin feel,” he says.

Bathtub: Vintage Bath, Kohler; flooring tile 3/4-inch hex tile, American Olean; wall tile: 3-by-6 subway tile, American Olean; wall paint: North Star, Sherwin-Williams

Before Photo

Brian Patterson Designs, Inc..

BEFORE: The raw area contested Patterson to match in everything about the couple’s wish list, including his-and-her sinks, another water closet for the bathroom and another tub and shower.

Brian Patterson Designs, Inc..

AFTER: Soothing monochromatic neutrals give a good backdrop for private rolls. “Your spouse has really great flavor, and her picks actually warm up the area,” Patterson says. These include the classic table, Oriental rug and basket for the towels.

This new window with an arched transom altered the window seen in the prior picture. Patterson made bouncing tons of natural lighting around the area a priority.

Chandelier: The Big Chandelier; sconces: Belle Sconce, Pottery Barn (discontinued); pedestal sinks: Elizabethan Classics; taps: Colonial in polished chrome, Jado; mirrors: Pottery Barn, (discontinued; see a similar model here)

Brian Patterson Designs, Inc..

“We used basic and traditional materials and allowed the architecture to dictate the experience,” Patterson says.

The walk-in shower is tucked into a dormer. Patterson changed the hip of this dormer to a gable to match it. The arched window is cleverly disguised as a complete window on the facade of the home (see below).

Brian Patterson Designs, Inc..

The architecture also inspired classic stage information, such as subway tile in the walk-in shower, hexagonal tile on the ground and beadboard on the walls, honoring the pedigree of this 1930s home.

A clear glass shower door allows the rest of the room to gain from the window’s natural lighting. Similarly, the toilet is split from the rest of the suite by French doors, which allow the bedroom to profit from all the pure lighting.

Before Photo

Brian Patterson Designs, Inc..

BEFORE: In addition to renovating the attic, Patterson added curb appeal to the home. This included changing out the windows and dormers, beefing up the woodwork around the front doorway and camouflaging the strange woodwork on the left side of the home with shutters.

Brian Patterson Designs, Inc..

AFTER: The dormer on the far right is the one that houses the walk-in shower; the arched window between the sinks is about the right side of the home. Patterson added shutters beneath the arch on the exterior to trick the eye into thinking there’s a complete window there. The home is now big enough for a family, having a relaxing retreat for Mother and Dad.

See related

Oh Say, Can You Believe These 200 Star-Spangled Stairs?

After quitting her town job and moving into a beach cabin in northwest Michigan to start a new life together with her loved ones, Erin Southwell was in no place to invest additional money. “We had been living on savings and a prayer, literally,” she says of the first year in her new residence. But she wanted her family to live in a gorgeous property. Tackling the stairs was on her record.

Project at a Glance
What: Staircase makeover
Location: Northwest Michigan
Cost: Under $200

With $200 and elbow grease, Southwell changed a 1970s shag-carpeted stairway into a cheery beach-inspired space.

“We’re delighted with how it turned out,” she says. “I just wanted a casual, bright, whitewashed look for a beach cabin for our young family. My husband did not want me to run up a credit card. We call it a win-win.” The stairs lead from the home’s living area into the upstairs bedrooms.

Before Photo

BEFORE: Although the cabin was constructed in 1888, it was remodeled in the 1970s: shag carpeting, wood paneling, the functions.

Before they place a deal on the home, Southwell had uttered a peek at what had been under the carpet — luckily, it was hardwood. But once the carpet was wrapped up, she realized the wood staircase would have to be refinished.

AFTER: With the staircase professionally refinished wasn’t in Southwell’s budget. “I couldn’t stand to live with it the way that it had been, and I knew the only way I was going to have the ability to alter it was to find creative and DIY it,” she says.

After yanking the rug, she spent several hours pulling up the carpet tack strips and principles with pliers. After sanding and cleaning, she implemented three to four coats of white Kilz primer and one coat of white latex porch and flooring paint into the staircase, trim and railing.

How to Paint Your Hardwood Floors

Before Photo

BEFORE: The bannister has been required, but it had a little something special too.

AFTER: Southwell screwed in a classic newel — located online for $10 — into the end place for additional charm.

Of course, the bright yellow stair runner would be the star of this staircase. Southwell desired a bright yellow to tie with the cottage’s other beachy accents; she found this runner at Garnet Hill, installing it using carpet tacks and staples.

Southwell completed the DIY nearly a couple of years ago, and it has held up well — despite the tear and wear of a toddler running around. “You do not have to spend a great deal of money or have mad DIY skills — I truly do not! — to really have a gorgeous home,” she says.

What’s your success story? Show us your before and following below!

See related