Barberry Trees

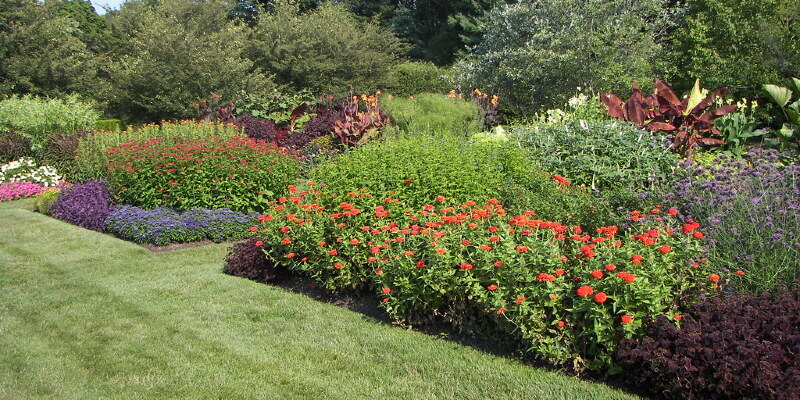
Barberries (Berberis spp.) Are dense, thorny plants desirable because of their hardy temperament and colorful leaf. They can withstand poor soil conditions, making them a popular with home gardeners who need to fill in tough regions of their gardens using a hardy but attractive plant. Although barberries can grow to heights of 10 feet or more, about the size of small trees, most are smaller and develop on multiple stems.

Species

Several hundred species of barberry exist, but just a couple are very commonly utilized in landscapes. Berberis thunbergii, or the Japanese barberry, is among the most common barberry species. This plant grows to a maximum width and height of about 5 feet, according to Ohio State University, and includes purple, pink or maroon leaf, depending on the cultivar. Berberis julianae, or the Wintergreen barberry, is the biggest, growing to heights and widths of 10 feet. It includes dark blue berries that continue into autumn. The Mentor barberry (Berberis x mentorensis) is just a fast species which can grow as many as 2 feet per year. It attains maximum heights and widths of about 6 and 5 feet respectively and doesn’t produce any berries.

Climate

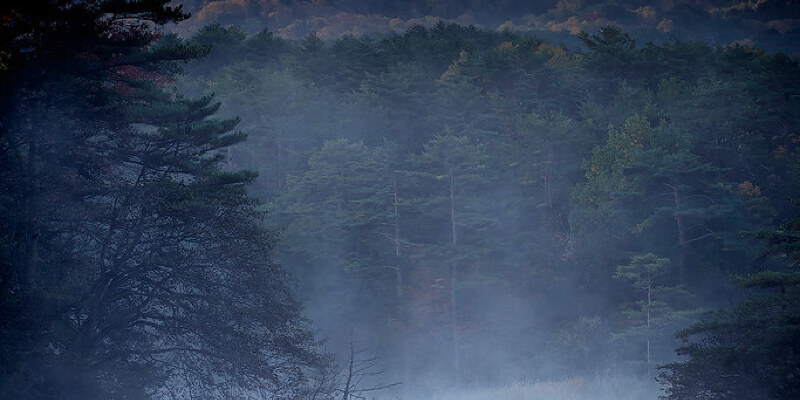
Generally speaking, barberries grow best in cooler or temperate climates, although this varies by species. They do not perform well in tropical or subtropical conditions, particularly if there’s high humidity, but will tolerate occasional bouts of intense heat. Most species thrive in U.S. Department of Agriculture plant hardiness zones 6 through 8, although the Japanese barberry and its cultivars will grow in places as chilly as USDA zone 4.

Culture

Barberries are excellent plants for beginners. They can withstand poor soils or severe pruning, and prosper in sun or shade, according to the University of California. They’re also resistant to disease and drought tolerant. However, they don’t like waterlogged soil, therefore never plant them where standing water develops or they may develop root rot.

Landscaping Tips

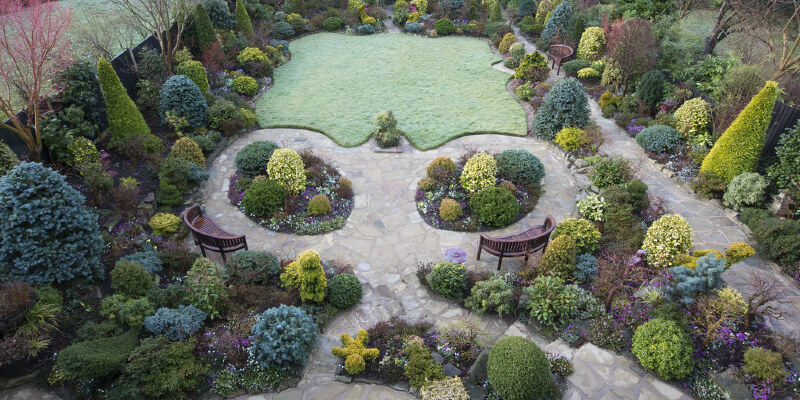
Since they comprise big spines, barberries are an superb choice as a natural hedge to keep out unwelcome intruders, for instance, two-legged selection. Some species develop very quickly and will form a thick hedge in a couple of years. If you’d rather cultivate your barberry for a tree, pick B. Thunbergii “Helmond Pillar,” which grows to 5 feet tall and just 2 feet broad, featuring masses of small dark-red leaves.

See related

Reproduction of all Seedless Fruit Trees

Seedless fruits are a relatively new occurrence in the plant world, developed to appeal to consumers who love the fruit but do not enjoy picking out the seeds. Many fruit trees are propagated by grafting or from cuttings. These asexual methods are employed for fruit trees without seeds in addition to for many using seeds. Grafting or propagation from cuttings creates a fresh tree genetically identical to the parent plant, a desirable outcome for obtaining a reliable fruit harvest.

A Seedless Fruit

Seedless fruits are a rarity in nature along with a negative trait for survival of the species, at least once not cared for a gardener. The incidence of seedless fruits is called parthenocarpy, meaning that the virgin fruit. Growers and plant breeders, comprehending the market appeal of a fruit, take naturally happening seedless fruits and breed them through asexual propagation methods to produce a lineup of fruit trees that produce fruits without seeds.

Grafting

Having a seedless fruit, sexual propagation is from the question. That leaves methods of asexual propagation to continue to breed fruit trees using the desirable trait of seedless fruits. Grafting is the most important method used to spread fruit trees. A slip small slip of a bud is taken in the desirable tree and grafted onto the rootstock of a youthful, compatible sapling. The young sapling stipulates the roots of this tree and trunk, while the branches and fruits possess the genetic material of the desired tree. Different types of grafting include bud grafting, bark grafting and cleft grafting.

Cuttings

Rooting cuttings is a very simple process that is employed for many kinds of seedless and seed-bearing fruit trees. A youthful branch is taken out of the desirable tree and also rooted in a container, nursery bed or greenhouse. When powerful, new roots develop from the base of the cutting in the leaf node. Gentle wood, hardwood and semi-hardwood cuttings are used, depending on the time of year along with the type of fruit tree. The distinction between the kinds of cuttings relies on the age of the selected branch used for propagation.

Layering

Layering is a method of asexual propagation that uses similar principles as rooting cuttings. A youthful elastic branch in a ripe fruit tree is bent down to the soil. A small part of this division is injured and treated with rooting compound and then buried beneath the soil. The section of this division that’s from the dirt sets roots. At this point, the branch is cut out from the parent tree and tucked into a nursery bed.

See related

Landscaping With Mexican Black Pebbles

Mexican beach pebbles, naturally overshadowed from the ocean to smooth, circular shapes, come in numerous sizes and colours. The black variety is particularly striking and adds an exotic touch to this landscape. Use these attractive pebbles for visual attract accent walkways, containers, water features or inside a xeriscape garden design.

Artistic Designs

Black Mexican beach pebbles will create any coloured blossom or planting container pop and then turn it into a stunning statement, whether it’s black pebbles in a white basin, dark pebbles surrounding red blooms, or used in a simple Zen garden. For a more permanent attribute, embed black pebbles in mortar to create a decorative mosaic, alternating the seams with coloured stones or marbles. You can also create a little patio using the pebble-and-mortar technique.

Mulch Alternative

Pebbles create a synthetic mulch that cuts down on the need for weed killers, and including a layer of vinyl under will help keep grass from poking through. Pebble mulches can also be fire-resistant, don’t harbor diseases or insects and don’t soften the soil of nitrogen and other nutrients. Add a layer of dark pebbles as mulch around base plants to make an interesting distinction between the dark stones and the exterior wall color of your house.

Walkways

Pebbles are an inexpensive, easy, low-maintenance pick for gravel paths that receive light to medium foot traffic. Additionally, using the dark pebbles to lay a path around trees means you wo not have to disturb the roots. Offset the dark hues of this Mexican beach pebbles by placing them between a boundary of white flagstones, red brick or stone pavers.

Water Features

Water enhances the sleek and smooth surface of Mexican black pebbles, including a sparkling touch to garden ponds, waterfalls or fountains. In dry areas of your yard, recreate the ripples and flowing waters of a stream by laying out changing shapes and sizes of pebbles in curved patterns that mimic currents and eddies. These dry riverbeds will appear like the actual thing each time it rains.

Xeriscaping

Xeriscaping is a water-efficient technique employed in landscaping and can be particularly beneficial in desert areas or in a backyard garden where you would like to recreate a desert layout. Use Mexican black pebbles as a foundation and include cacti, succulents and other drought-tolerant plants to reduce the need for watering. Because the black surface of the pebbles means they will absorb and retain heat, only add them around plants that could tolerate the higher temperatures.

See related

How to Winterize Raspberry Plants

Raspberry shrubs are among the hardiest, low-maintenance berries you may grow. Not only are they a source of fresh fruit, but they can also add vibrant colour to your own backyard. While raspberry plants are hardy, generally growing in U.S. Department of Agriculture plant hardiness zones 4 to 9, they do require special care to protect them through winter.

Continue watering the raspberries long after the crops have stopped producing fruit, and also don’t hold off on watering until the first frost. This extended watering prevents over-drying during the winter and helps harden the plants and also prepare them for your cold.

Eliminate any of the brown canes which produced fruit through the summer but abandon the green canes alone. When pruning the canes, cut them down to the ground level.

Bury the rest of the raspberry canes if these are plants which haven’t experienced winter nevertheless, since these plants are extra-sensitive to winter’s chills. Push the elastic canes down to the floor and bury them beneath a few shovelfuls of dirt.

Erect a simple fence barrier around the raspberry bush, as raspberries attract rabbits and other insects during the winter who prefer to feed the plant’s stems. Use traditional 1/4-inch mesh cable, which you may purchase at garden shops and nurseries. The fence should move 3 inches into the ground, to prevent rabbits from digging beneath it, and stand 20 inches over the dirt to keep rabbits from jumping over it.

See related

Damage to Arborvitae Branches

Western arborvitae (Thuja plicata), also referred to as red cedar, which is a coniferous evergreen tree that grows in U.S. Department of Agriculture plant hardiness zones 5 through 8. The tree grows 50 feet tall or more in well-draining soil and full to partial sun. Overall the arborvitae is a low-maintenance tree, but occasionally damage to branches does occur.

Deer

Deer have a huge preference for arborvitae. They enjoy the eastern variant but will nibble on the western variant too. At the spring, they will strip the new foliage from the lower portion of their tree. In the winter they’re content to consume the old leaf when food is less plentiful. Besides leaving bare branches, they also break the wood when they pull to the strategies or scratch their antlers on the tree. A tall fence can keep deer in the tree, however, sprays that produce the tree odor or taste awful will also assist. If the branches don’t start to recover by the next spring, remove them.

Bagworms

Bagworms infest trees in the spring and summer months. Bagworm moth eggs hatch in the spring and the larvae feed on the tree while they construct the hanging cocoon that will protect them as they grow into moths. The cocoons look like cones with fringe-like extensions. Bagworms hurt the branches, causing them to lose leaf that may not return. Remove the bags in the branches before spray and spring using a bt insecticide to control the worms.

Winter and Salt

Winter frost damage and salt damage are similar in appearance. Winter frosts are more likely to affect younger trees. The damage from frost or salt seems as brown or red needles on the outer borders of the tree in which the contact occurred. Winter damage is usually worse on the face of the tree that gets hit by wind. The broken sections of the branches should be trimmed back to healthy growth. If the damage affects all the needles on the branch, remove the whole branch. Add a wind or salt screen to protect the tree in repeat damage if at all possible.

Passion

Passion is frequently fatal to western arborvitae, and the broken tree is lost. According to the University of Nevada’s JoAnne Skelly, so long as there is some green to the tree and it is not a hazard to people or buildings, it can be left until the next spring so that the damage could be better assessed. When there is some blackening at the tip of the branch, but it still contains live foliage, just trimming the tips back to a grass. If the branch has no leaf or buds, it will most likely need removed. Waiting until the next spring will permit the buds time to develop and either die off, or form new leaf.

See related

The way to Install a Bath Light & Fan

Bath exhaust fans vent to the exterior of the building to get rid of excessive heat and moisture from your restroom through showers and hot tubs. A number of these exhaust fixtures incorporate a light kit which could be operated in the identical light switch or separate wall switches. Replacing an existing bathroom lighting with a light and fan kit to be controlled by separate switches would necessitate running new wiring to the switch box, however a port and light kit operating off the same single switch won’t require extra wiring or a change of the switch.

Switch off the circuit breaker that controls the power to the light switch in the restroom. Then loosen the mounting screws and remove the switch plate with a screwdriver. Position the suggestion of a non-contact electrical tester against the wires on the side of the switch. If the lighting on the tester comes on, turn off other breakers or the main breaker to the home until the lighting no further illuminates when testing the wires. Replace the switch cap.

Rank a stepladder beneath the present lighting fixture. Climb the ladder and get rid of the planet and light bulbs in the fixture. Then loosen the mounting screws and disconnect the fixture in the wiring in the junction box.

Loosen the wire clamp inside the junction box, and take out the junction box in the hole in the ceiling. Push the wiring through the hole and to the attic space above.

Remove the plastic grille in addition to the light and fan assembly in the fan housing. Then access the attic over the restroom and find the hole in the ceiling vacated from the junction box. Position the fan housing over the junction box hole between the ceiling joists and mark the outline of the housing onto the drywall with a pencil. Cut out the hole along the pencil lines with a keyhole saw. Position the fan housing so that the bottom border of the housing is flush with the bottom of the drywall, and attach the braces to the corresponding ceiling joists with 1 1/2-inch wood screws using a power drill. Slip the electrical wiring you removed from the lighting fixture through the hole in the access panel of the fan housing.

Find the nearest exterior wall where you would like the wall cap to be mounted for the port. Drill a pilot hole in the middle of the desired place with a 1/4-inch drill bit.

Move outside and position a extension ladder so that it is possible to get the 1/4-inch pilot hole against the side of the home. Put in a 4-inch hole saw to your power drill, and drill a 4-inch hole during the siding and sheathing.

Apply a bead of exterior caulk around the mounting flange of a 4-inch wall cap, then insert the wall cap’s duct to the hole in the wall, and mount the cap to the wall using 1 1/2-inch stainless steel screws.

Return to the attic and also connect a part of 4-inch flexible duct between the duct to the inside of the port cap along with the duct on the exhaust fan. Secure the joints with duct tape.

Return to the bathroom and also tighten the wiring clamp around the electric wires from inside the access panel of the fan housing. Connect the black wire from the electric switch to the black wire in the access panel with a wire nut, then link the wires in similar fashion. Wrap the end of the bare wire around the green grounding screw in the housing and tighten the screw with a screwdriver. Slide the wires to the access panel, and place the panel cover over the panel.

Slip the fan and lighting assembly to the housing, and link the electric plug to the socket to the access panel. Then tighten the mounting screws to fasten the fan and lighting to the housing.

Install one of the light lights in the preceding fixture to the lighting fixture of the fan. Rank the plastic grill over the housing and sprinkle the mounting wires into their slots before pushing the grill against the housing.

Turn the circuit breaker and test the operation of the fan and lighting.

See related

How to Grow Garden Tomatoes & Jalapenos in Elevated Planters

Rumors and jalapeno peppers are natural companions — and not just in salsa. Both love hot, sunny weather, and both are at home in a container as they have a garden bed. If you choose to grow them in a raised planter, choose a compact tomato variety bred for containers and place them supporting the more naturally diminutive jalapeno pepper plants, In case your increased planter is big enough, you’re going to have the ability to fit more than one of each vegetable plant into the container. Purchase nursery seedlings or start tomatoes and peppers inside, six to eight weeks before placing them into your raised planter, In Mediterranean areas, both jalapeno peppers and strawberries are ready to start growing outside in May.

Ensure that your planter has sufficient drainage before filling it with dirt and plants. Drill holes in the base of the planter if it doesn’t already have them and cover the holes with a 1-inch layer of gravel.

Establish your raised planter in a sunny site. Both tomatoes and jalapenos require at least six hours of sunlight each day.

Fill the raised planter with a loam-based potting soil to within 3 to 4 inches of the rim of the planting box. This thickness gives you room to add your vegetables along with also a layer of mulch.

Add about 2 teaspoons of slow-release plant food for each 3 square feet of growing surface within your raised planting box. Scatter the granules throughout the very top of the potting soil and lightly work them into the upper 4 to 6 inches of the soil. This step could be omitted if your potting soil already contains slow-release granules.

Set tomato seedlings along the center of the planter, spaced 12 inches apart. Before planting, strip the stems of all the top two leaves and soften the seedlings so that the soil line is right under these two leaves.

Set jalapeno seedlings across the front of the planter, about 6 inches from the edge. Space the seedlings about 12 inches apart, before and centered between the tomato seedlings. The seedlings should be put into the planter in precisely the exact same depth where they have been growing in their pots.

Apply a 3-inch layer of shredded bark mulch or other finely ground mulch around each seedling. This mulch will allow water and nutrients to reach the seedlings but will also help conserve water and suppress weeds.

Check the soil in raised planters daily. You will likely need to water at least once every day through dry spells. Strive for evenly moist soil, particularly when the strawberries and peppers start to grow on the plants.

Side-dress both tomatoes and jalapenos with aged compost four to six weeks after transplanting the seedlings into the raised planter. Wait until both the ducts and tomatoes have started to create fruits. Rake aside the mulch; scatter the compost in a 1-inch layer around the plants and replace the mulch and water well.

Begin selecting both tomatoes and jalapenos when they achieve their peak of color. Container tomato varieties are generally prepared for crop 55 to 70 days after the seeds have been sown, while jalapenos average 72 days.

See related

The way to Winterize Blueberry Plants

Blueberries (Vaccinium spp.) Are an incredibly easy-care fruiting shrub for gardeners in U.S. Department of Agriculture plant hardiness zones 3b through 10, depending on number. Although they require acidified soil, a process which sometimes requires a lot of first inputsignal, once blueberry plantings are established, they’re tough plants that suffer with few diseases or insect pests. You must prune blueberries as winter approaches to keep them productive, but they require no other major care to help them adapt to the chilly nights to come.

Trim out any branches which are damaged or seem to be bothered by insects after your harvest is complete. Thin canes that emerge close together to avoid cankers caused by branches rubbing. Eliminate all but the two strongest canes in the current year’s growth and any canes which are over eight years old, leaving a maximum of 20 canes on a mature plant.

Check the pH and nutritional content of the blueberry’s dirt in the late autumn. Add sulfur if necessary at a speed of 2 to 4 pounds per 100 square feet of bed area per pH unit reduction required, based on soil type — clay takes more sulfur than sandy soils to decrease the pH. Broadcast the sulfur as evenly as possible across the root zone without getting anywhere on the plant, nor try to work it in the dirt; powdered roots are near the surface and will probably be damaged easily.

Check with the soil test results for fertilizer recommendations, or just side-dress your blueberries with a standard application of ammonium hydrogen peroxide based on the age of the plant. Implement ammonium nitrate at the border of the blueberry’s drip line at a speed of 1 oz per plant for 1- to 2-year-old plants, 1 1/2 oz for 3-year-old plants and 2 ounces for 4-year-old and older plants.

Mulch your fertilized and acidified blueberry plant with enough pine bark or sawdust to bring the mulch layer to 4 to 6 inches in depth immediately after side-dressing. Water the plant thoroughly to encourage the additives to move in the soil.

See related

How to Plant Tomatoes & Brussel Sprouts

Tomatoes and brussel sprouts are believed to be “opponents,” and popular information, from both academics and gardeners, is to separate both of these crops. Tomatoes are well known to be heavy feeders. Brussel sprouts come in the Brassica family, also heavy feeders. These two competing plants may soften all of nutrients if planted together in precisely the exact same bed. Additionally, in Mediterranean climates with mild winters, brussel sprouts are implanted substantially later than strawberries and therefore are harvested in winter. Brussel sprouts harvested at warmer times of the year may be bitter and undesirable.

Select the place for both plants at the onset of the growing season. Tomatoes and brussel sprouts should be implanted in separate beds. Both places should get whole sun. When the places are chosen, wait till midspring to plant your tomatoes, then once the soil is warming and nights have been frost-free.

Amend the soil in the tomato planting bed with 10-10-10 fertilizer. If the soil is clayey, amend it with organic matter to improve drainage.

Select your tomato seedlings in the nursery. Seedlings should not have tomatoes on them at the time of planting.

Dig holes for tomato seedlings using a trowel. Plant seedlings 18 to 36 inches apart, depending on the expected size of the adult plant. Plants that produce smaller tomatoes are normally smaller adult crops, and plants which produce larger tomatoes are normally larger adult crops.

Insert tomato seedlings into the holes, and water greatly.

Mulch around the base of the tomato seedlings to conserve moisture. Tomatoes need frequent watering and heavy fertilization because they continue to develop.

Wait till August to prepare the bed for brussel sprouts. Amend the soil with a 10-10-10 fertilizer. Amend the soil with organic matter in the event the soil heavy or clayey.

Select your brussel sprout seedlings from the nursery. Seedlings should have four to six leaves on them at the time of planting.

Dig a hole for every seedling working with a trowel. Seedlings should be spaced approximately 18 inches apart.

Insert each seedling into each accessible hole, and water greatly.

Spread mulch around the base of each plant to conserve moisture. Brussel sprouts need infrequent but heavy watering and heavy fertilization because they continue to develop.

Switch beds in the subsequent calendar year, planting strawberries in which brussel sprouts were implanted, and brussel sprouts where tomatoes were implanted. This prevents the spread of diseases from one year to the next.

See related