The Way to Eliminate Pine Needle Tannin Stain From a Wood Deck

Pine needles contain tannin, which can be a brownish secretion that could leave stains. As a result of this, it is important to sweep pine needles from the wooden deck. If you don’t, the pine needles can secrete tannin and also make walnut needle-shaped stains on the wood. The tannin can also be sticky and produce the deck unpleasant to walk . You can wash the deck using a strong cleanser to remove these stains.

Mix a tannin cleaning solution based on the manufacturer’s directions. Use a cleaning solution intended for use on wood. Most of them are made out of oxalic acid.

Dip a scrubbing brush together with the solution and wash it on the surface of the wood deck along with the tannin stains. Brush with the grain of this wood. Work until the wood is completely clean and the tannin stains are gone.

Fix a pressure washer to its lowest setting. Wood can’t handle very high pressure.

Rinse the wood deck together with all the pressure washer to remove the tannin cleaning solution.

Allow the wood deck dry for two days.

See related

Could You Use Mayonnaise?

Mayonnaise is a condiment with several uses. It excels as a salad dressing, without a preparation of deviled eggs or tuna salad would be the same without it. Real mayonnaise may also be a furniture cleaner and polish. You would not reach for it to clean scuff marks or eliminate a coating of yellowish wax, but if the finish has turned cloudy, a jar of vegetable oil-rich mayonnaise may be just the remedy you need.

Cloudy Finishes

Nitrocellulose lacquer is one of the most frequent wood finishes, also it does not perform well in the presence of moisture. If the atmosphere is humid when lacquer has been applied, the finish can turn cloudy, a state that finishers telephone”blushing.” This happens because moisture gets trapped under the top layer of the finish as it hardens. A lacquer finish can turn cloudy even after it heals if moisture penetrates the surface layer. Moisture causes the white rings that mar the finish when you leave a teapot or liquid-filled cup on a table.

Mayonnaise to the Rescue

One of the main components is vegetable oil, also it is the ingredient that makes mayonnaise an effective remedy for water marks and cloudiness. When you let oil to stand on a moisture-damaged complete, it seeps through the surface and slowly displaces the water also eliminates the cloudiness. Spreading mayonnaise on a moisture-damaged finish is more powerful than distributing oil — oil immediately melts away, whereas, mayonnaise has enough consistency to stay moist. This is important, because the petroleum needs time to penetrate the finish and do its own job.

How to Utilize Mayonnaise

To get rid of a water stain from any furniture finish, just spread a generous coating of mayonnaise with a spatula and allow it to sit for several hours — preferably overnight. When you wipe it off, the stains should have vanished. To keep your pets from feasting on what smells and looks like a yummy treat, cover the mayonnaise with a paper towel or paper. The oil penetrates better if you scatter smoke or wood ash on the stain and rub it in with a cloth before implementing the mayonnaise.

The Limitations of Mayonnaise

The components in mayonnaise — oil, lemon juice and juice — make it a fantastic furniture polish. Mayonnaise isn’t any substitute for a detergent if you’ve got to clean dirt and grime from your own furniture, however, nor can you use it instead of mineral spirits to remove wax buildup. Similarly, mayonnaise is an ineffective treatment for water stains that have penetrated the finish and stained the wood. These stains, which are normally dark instead of white or gray, often need bleaching; to effectively bleach wood and take out the stains completely, you must strip the finish.

See related

The Way to Eradicate Sour Smells in a Couch

Upholstery has a knack for holding onto filthy scents, especially sour ones. The cushions and thick material covering sofas and couches make it easy for odor-causing liquids to soak through quickly, and also a fundamental surface cleaning does little to eliminate the scent left behind. Cloth-upholstered sofas are relatively straightforward to clean, whilst leather asks a bit more maintenance. For your best results, treat scents once you notice them, and clean up spills and accidents quickly to prevent them from penetrating too far beneath the sofa surface.

Eliminate the Supply

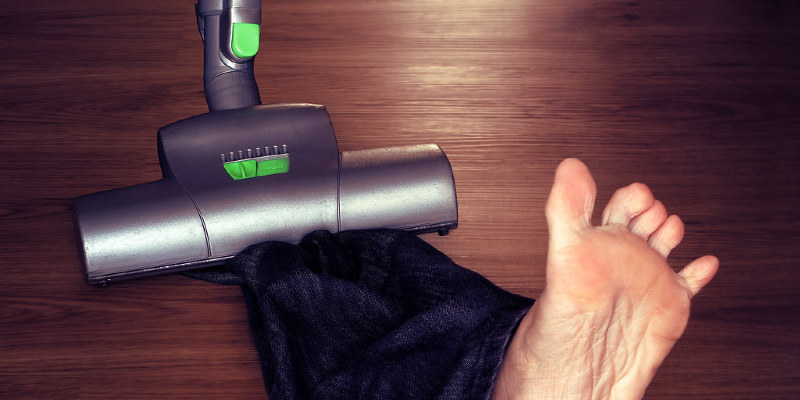
Sour odors develop as the source dries, while it’s spilled milk or pet pee. Drenching the region in water reactivates the source, allowing you to suck it away together with the excess moisture. Saturate the area where the offensive odor is most powerful with cold, clean water; don’t use warm water, as this can set the stain. Wait for about five minutes, and then thoroughly vacuum the region using a wet-dry vacuum. Allow the area dry and then smell the sofa. If needed, repeat this procedure until the place is chiefly smell free when dry. As an alternative, use an upholstery shampooer having an enzyme-based or odor-eliminating shampoo.

Neutralize the Odor

When outlines of sourness remain behind even after cleaning, use a neutralizing merchandise to freshen the upholstery. Baking soda or a charcoal-activated carpet powder break down offensive scents and freshen the fabric, instead of simply coat it in deep fragrances. Scatter either on the sofa, and let it sit for about one hour. Then vacuum it up thoroughly using a bristle attachment. Strengthen the product by misting it with water straight after you sprinkle it about. This allows it to better penetrate the fabric. Once dry, vacuum it away.

Deodorize Leather Sofas

Leather sofas need special care, since they cannot be drenched in water. Rather, mix Castile soap in a bucket of warm water, just enough so that suds form. Dip a very soft rag in the way, wring it out, and rub down a little section of the sofa. Wipe away the soap using a clean, wet rag and then a dry rag. Then move on to Another Part. With leather, it’s vital that you never oversaturate the material. When you are done, sprinkle the sofa with baking soda and let it sit for four to six hours; don’t wet the baking soda. Vacuum it up to remove sour odors. Baking soda may be abrasive, especially on untreated leather, so check these methods in a hidden place before cleaning the whole sofa.

Calling a Skilled and Other Tips

Some scents are just too powerful for household goods to manage, and certain fabrics and leathers cannot be cleaned with household methods. If cleansing and baking soda don’t or won’t function, contact a professional cleaner. Read your furniture maintenance manual or contact the sofa maker before cleaning, and analyze any options on the lower back corner of the sofa or another hidden area before treating the whole area. A light spritzing of fabric refresher after cleaning can remove any traces on fabric upholstery, while a leather conditioner rehydrates and freshens newly cleaned leather.

See related

How to Clean a Wood Desk Using a Leatherette Top

The leather-top desk is a timeless style of writing desk. While antique versions of this design feature genuine leather, modern upgrades often make use of synthetic materials like leatherette or delicate vinyl instead. Leatherette is not as porous as actual leather, and is therefore easier to clean. A very simple detergent solution will work to clean both the wood and leatherette regions of the desk securely.

Dry clean each the desk’s surfaces using a vacuum cleaner, using a soft brush attachment so as not to scratch or scuff the wood or leatherette.

Prepare a solution of 1 tbsp household dish soap or liquid soap in 1 pint of warm water. Pour the solution into a handheld spray bottle and shake to mix.

Spray the cleaning solution on the leatherette and scrub gently with a soft brush to remove dirt and grime.

Wipe with a soft cloth to remove cleaning solution residue. Rinse leatherette surface using a clean dampened soft cloth.

If the wood component of this desk has any oil-based stains or grime, dampen a soft cloth with mineral spirits.

Spot-test a small amount of mineral spirits in an unnoticeable border of the wood. If it doesn’t cause a response, use the cloth to gently rub away oil-based stains. Be careful not to press too hard or allow the wood absorb too much of this mineral spirits.

Spray a fresh cloth with the detergent solution, and use it to clean out the remainder of the wooden surfaces, working on a small region at a time. Change fabrics as necessary.

Rinse with a fresh cloth dampened with water.

See related

How to Clean Marble Stains With Peroxide

Marble is durable and has a distinctive, classic look. Whether it is on a table or countertop, daily exposure to average household living may cause it to develop stains. On white marble, the staining is particularly noticeable. A high-strength hydrogen peroxide, such as a 12-percent alternative, removes some kinds of stains from light-colored marble. Materials that can be removed with peroxide include some inks from pens and markers, stains from mildew, moss or algae, and stains left behind from liquids such as tea or coffee.

Pour a small quantity of peroxide straight onto an ink stain made from a pen or marker. Permit the peroxide to sit until the stain seems to be dissolving; check it every 10 minutes or so. Absorb the fluid by blotting it with a soft rag. Then wipe it with a moist sponge. If the stain remains evident, continue to Step 2.

Create a paste and poultice for a deep-set or difficult stain by pouring several tablespoons of peroxide to a small container. Add a few drops of honey, followed by a tbsp or so of baking soda or talc, adding a little at a time until the consistency is like creamy peanut butter when stirred with a spoon.

Scoop and smooth the paste over the stain with the spoon, making an even layer at least 1/4-inch thick, extending slightly beyond the stain.

Cover the whole paste, and a little beyond that, using a piece of plastic wrapped smoothed over the surface. Tape down the borders with painter’s tape.

Remove the plastic wrap after a day; enable the paste to harden and dry. Wipe the paste with a damp sponge, then rub on the marble using distilled water. Buff the area using a soft cloth after wiping it with a moist sponge.

Repeat the poultice process several more times when the stain remains evident.

See related

The way to acquire the Wet Dog Smell Out of Throw Rugs

If a wet dog goes indoors, he probably walks on or rests on the first comfy throw rug he finds. After this occurs once or twice, then the rug may smell more like a wet dog compared to the dog himself. But as it’s a throw rug, it is possible to fairly easily remove the odor so the carpet smells fresh once again.

Suction Power

A vacuum cleaner is the go-to tool for helping get rid of the astounding dog odor. Shake the rug out to release loose dirt, then vacuum the throw rug by standing on the end of the carpet so that it stays put. The suction removes at least some of their pet hair, dander and any dust that may be on the carpet. Baking soda sprinkled liberally over the carpet absorbs some of the odor; allow it to sit overnight, then vacuum the carpet again.

Freshen Up

If the throw rug is washable, run it through the washing machine with a gentle laundry detergent plus a quarter cup or so of baking soda. Wash the throw rugs with other throw rugs rather than with clothing or tub towels to avoid spreading dog hair or odor onto other objects. If possible, line-dry the carpets on a sunny evening, as the fresh air will help deodorize them even more.

Vinegar Wash

If the dog odor is so strong that baking soda and laundry detergent alone do not make it smell acceptable, put the carpet in the washing machine again, this time utilizing a pre-soak cycle. Add 1/4-cup vinegar to the soak to assist deodorize the carpet, then wash as usual.

Avoid Chemicals

Though you may be tempted to utilize chemical-based carpet freshening sprays or sprays on your throw rugs, they may not be safe for pets. Prevent the substances, opting rather for natural pet-odor-neutralizing products, or by combining a few drops of an essential oil like lavender in to water and spritzing the carpet using the mixture. Bathing the dog frequently and blow-drying his fur also helps cut down on dog odor.

See related

What's "Air Fluff" on the Dryer?

The Air Fluff setting in your dryer tumbles clothes or household things without heat. This provides a safe method to freshen things which might not require washing, such as drapes, throw cushions or denim which only need to be softened. Employing the lowest setting that will do the job helps to conserve energy and reduce utility bills.

No Hot Air

The vital distinction between Air Fluff and other dryer settings is that it uses only air, without heat, as it tumbles the products. This makes it a safe solution for substances that can not tolerate heat due to risk of shrinkage, damage or melting. Air Fluff also freshens items which might not be washable, such as dry-clean-only textiles. You can use if for substances which don’t have maintenance tags and may be vulnerable to heat settings.

Fluff Uses

Many things benefit from fluffing, such as bed pillows, accent pillows, comforters, afghans, bed toppers, bedspreads, blankets, blankets and tablecloths. Fluffing makes sheets and linens which have been in a closet for weeks feel softer and fresher. Sweaters, gym clothes, fleece, sleeping bags, car seat covers and other delicate items such as stuffed animals gain a renewed look from fluffing. The dryer’s activity can help to remove dust, pet hair and lint. Fluffing helps remove dust and stale odors from stored things so they smell and feel fresher. This setting also securely removes moisture from washed vinyl shower curtains, mattress covers and crib pads. Air Fluff also restores softness to line-dried objects, such as towels, cloth diapers as well as jeans.

See related

How to Dye a Carpet Bleach Stain With Coffee

A bleach spill on your carpet that leads to a white place could be a conversation starter, but perhaps not in a fantastic way. If the rug surrounding the stain is really a shade of brown, then you can use your favorite morning brew — coffee — to conceal the spot. It’s easier to dye fabrics if it is possible to immerse them from the dye, but you can not do this using a carpeting. Instead, use one of two approaches: Spray the place with strong coffee or rub it with coffee grounds.

Make a spray by brewing a pot of coffee, using approximately half the quantity of ground coffee you normally would. The colour of the dye on the carpet is decided by the coffee roast — use light or medium roast for beige or tan carpets and dark roast or espresso to get dark brown carpets.

Pour the coffee into a 12-ounce spray bottle; add a tablespoon of salt and stir thoroughly. Salt reduces the electromagnetic repulsion of this fabric to your dye and produces the spray more successful. Normal table salt is better than sea salt as it contains fewer mineral impurities.

Arrange a cloth or towel round the bleach place to maintain the dye off the surrounding carpet. Spray the coffee on the place to saturate the cloth; subsequently work the colour into the cloth with a toothbrush. Let the place dry for about an hour then remove the fabric and work the edges of the place with the toothbrush to mix the place into the surrounding carpet.

Repeat the procedure with the same a darker one if the color is not dark enough.

Rub coffee grounds to the bleach place as an alternate to creating a spray. To get the darkest colour, do not brew the coffee; rather, wet a few ounces of new grounds with hot water, then stir in a teaspoon of table salt and work the basis to the cloth with a toothbrush. Let the carpet dry; then vacuum off the grounds.

See related

How to Avoid Mineral Buildup in a Humidifier

The gentle mists out of a humidifier will help your home reduce static electricity and protect against dryness which furniture and paint cracked. Fine white dust which originated in the minerals from tap water or well water is occasionally released by humidifiers. Portable humidifiers which hold 1 to 2 gallons of water frequently need basic cleaning with white vinegar to remove this mineral buildup. Maintaining your humidifier helps you preserve your home decor and reduce any bodily discomfort.

Switch the humidifier off and detach the unit from the electrical socket.

Remove and casing of the humidifier. Eliminate or wick and place in a sink or bucket so that the water can drain.

Drain the base of the humidifier. Rinse any sediment which may have collected from the base.

Wipe the base clean with a cloth. Dry it with a cloth.

Step 1 cup of pure white vinegar. Pour into the base. Let this vinegar stand. Drain the vinegar. Brush the inside surfaces with a brush. Soak the base, if the white mineral residue persist.

Dab vinegar on a sterile cloth. Wipe the base with this cloth to remove any scale.

Rinse the base.

Reassemble the humidifier based on the manufacturer’s manual.

See related

The Way to Scour a Sink

You may enhance the appearance of your kitchen quickly before it rains by minding the sink. Sinks include a ceramic or stainless steel coating. Coffee, tea, tomato juice and food residue can leave behind stains on ceramic, while stainless is prone to discoloration from food residue and water bites. Both ceramic and sinks can scratch easily when cleaned using substances, which destroys the end. Mild abrasives which don’t scrape are required by proper scouring but still cut through the dirt.

Wet the inside of the sink with warm tap water. Wipe any dirt or dirt with a cleaning rag that is moistened.

Sprinkle baking soda or some gentle scouring powder on the cleaning rag that is moistened. Avoid highly abrasive scouring powders and cable scrubbers, because these can scratch the surface of metal and porcelain sinks.

Scrub the sink using the rag. Insert pop or scouring powder as necessary until the sink surface is scoured.

Apply baking soda or scouring powder on stains, such as tea or coffee stains. Moisten the rag and scrub the stains a second time.

Rinse out the sink with water. If they aren’t totally rinsed away baking soda and scouring powder leave behind a white haze.

See related