The best way to Take a Wall Out Between a Room as well as a Den

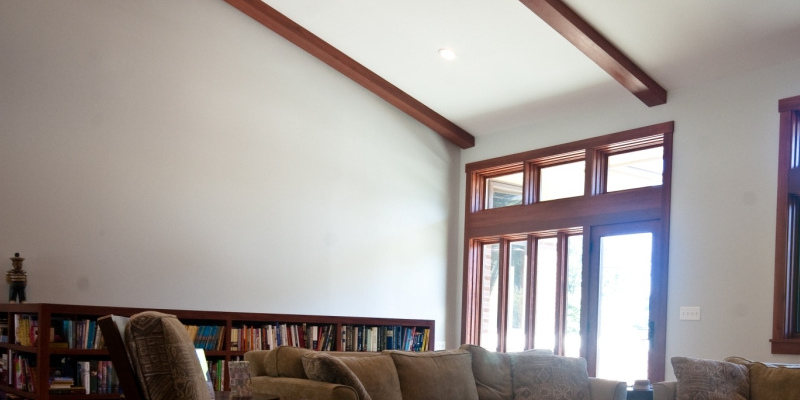
A big living area could be a big development in the worth of a house’s. Removing a wall between a parlor as well as an den can create one really large room, for amusing, a big screen tv or perhaps to convert two little regions into one big one for furniture that is bigger or new. Most walls aren’t load bearing, meaning they are able to be eliminated without weakening the home, but check first. In case a wall between a living and den room supports a 2nd or roof trusses -story, contact a specialist; eliminating a load bearing wall isn’t a job for home-owners.

Take down a wall-in the inverse sequence of its own building, beginning with pulling door trimming, crown molding, baseboards or another trim pieces off using a prybar. Get during the ceiling using a utility knife as well as the joint between the wall dry wall, thus taking down the wall will not harm the ceiling.

Switch off the electricity to any wall sockets, lights or switches in the wall in the circuit-breaker; stop up a check light in to wall sockets to ensure they’re lifeless before taking any wallcovering off.

Strip the gypsum board from either side of the wall, showing the studs. Slice the dry wall joint along in the event the whole wall isn’t to be eliminated, in the middle of a stud, or each end of the dividing wall. Knock at a hole in the gypsum board using a hammer on top of a single end as possible, and accomplish just as much drywall. Work with a pry-bar to strip off segments of gypsum board; if combined tape is shown, strip off that tape to show the screws or nails keeping the wall, then utilize a screw gun or pry-bar nail puller to remove them so bigger bits of gypsum board might be taken off. Work on a single side of the wall a-T a time and be watchful for plumbing pipes or just about any electric wires.

Call plumber, an electrician or furnace workman to get rid of any electric cables, pipes supply lines or heat vents and ducts; licenses may be required by creating codes and expert function for inexpert elimination and all these jobs can make issues that are dangerous.

Remove by knocking them unfastened using a sledge hammer from your bottom plates, then pulling the planks off the nails using a big crowbar. Cut studs having a reciprocal noticed by 50 percent, then pull the two halves free from the bottom and leading plates with a crow bar instead. Take all studs away in the top and bottom plates.

When they go past the place being removed cut plates in the wall finishes using a circular saw. Cut the plates flush using the adjoining partitions, with all the power saw blade therefore it will not cut in to ceiling or flooring joists set-to the correct depth. Cut on the plates following the ends are loosened, then pry them free of ceiling and the flooring having big pry bar or a crowbar.

Run flat or a broad scraper -bladed spade within the ceiling, floor and side-walls to eliminate any leftovers of nail fragments or gypsum board, wood splinters. Vacuum the region to scrub it eventually of rubble and dust and beginning remodeling with ceiling patching new dry wall and flooring.

See related

What’s Pulverized Limestone Utilized for in Creating a Retaining Wall?

Where early oceans employed to exist limestone is located throughout America. This gentle rock can be used for a lot of kinds of construction jobs as well as in a variety of kinds. Limestone is created by grinding or breaking the material into a dust like consistency. It’s several uses when constructing walls.

Foundation

Retaining walls rely on a basis that is good to stay vertical. Generally, the soil beneath the wall is compacted and covered using a several inches of sand and rock blended together. The blocks in the wall remainder upon the sand and rock combination. Limestone smashed to the 1- and 1/2-inch-size, combined with pulverized limestone, can be utilized as the layer between the soil and the rock blocks according to the J. A. Rutter Organization, a supplier of landscaping materials.

Limestone Dirt in Mortar

Mortar is the adhesive that holds the blocks and horizontally. It’s place at the top of every layer of blocks, just like a cake frosting, after which the layer is placed to the mortar. The mortar additionally goes between each block to to keep it to its neighbour. Mortar is a specific type of cement, which consists of lime, silica and alumina that is pulverized. A conventional mortar for stone and brick building is manufactured simply from sand and lime in accordance with the Howard Hall Farm site. The lime permits the mortar to keep a little fluidity and flexibility over intervals that are extended, therefore the brick or flagstone wall can fix without cracking to little movements, including settling to the soil.

Working with Mortar

Traditionally, people who used brick and stone to create jobs, or masons, combined the elements for every occupation for mortar. Now, you should buy pre-combined mortar a-T any given residence or hardware shop. Lime is hygroscopic, meaning that water is attracted by it. When functioning with lime-centered mortar, it’s important to not combine greater than it is possible to use up in about 90 minutes. Otherwise, the water will be pulled by the lime from your mixture and dry it before it’s used.

Grout

Grout is a kind of mortar, created with mo-Re water added to the sand and lime-stone mixture. Grout is slender enough to movement in to and fillup spaces like interior blocks to provide them with much more weight and stamina, while mortar can be used to support the wall together. Grout is generally dark grey in colour, but it could be lightened incolor with the addition of more lime stone dirt, particularly when the dirt comes from lime-stone that’s white incolor, where it’s observable when it is used.

See related

The best way to Hang Drape Ruffles

Drape ruffles may add your windows and graceful dash and set the fashion for the chamber. Drapes offer the sun light mild to aid and solitude filter. To get a window treatment that stresses not and the drape the rod, attempt a continental stick that pole pocket is ’sed by fits through the drape. Drape ruffles can hang as a layer that complements drapes or as one-layer. Your custom window treatment will be admired by your visitors, along with the see.

Set the drape on a tough ironing board. Press with the iron to eliminate creases in the drape. Find the coolest warmth environment suggested for the material content to prevent scorching the curtains.

Set the drapes that are pressed on a tidy, level surface to maintain the material smooth.

Measure on a strong seat or a step-ladder, if required, to install the components for the curtain rod. Indicate the place of the brackets using a pencil or a bit of tape that is removable. Fasten the screws to the wall or casement as well as the mount’s holes using an electrical screwdriver. Eliminate any tape

Add the curtain rod to the drape’s pole pocket. Mild gathers should type. Be mindful the initial section of the drape will not slip another end of the stick off. Add these mounts on each and every end of the stick, in the event the pole kit features some of end mounts.

Bring the pole and curtains. Carefully add the prongs of the pole into one wall mount. Expand the pole to fit the space between both mounts. As you add the prongs of the pole to the next mount, hold the stick amount.

So the drape ruffles hang equally fix the distribution of the material over the pole. Make an effort to cover the mounts using the upper-left and right corners of the drape.

See related

The best way to Estimate the Price to Rewire a House

The electric system of a house may become exhausted, or obsolete. In the event your home is being re-modeled, or at these times, it is necessary to really have a competent electrician make re-wiring and any adjustments. Understanding in advance the contractor estimates the price for the employment gives you the capacity to plan what changes you would like. Bill Ferrera of Ferrera Electrical in San Francisco states that operating together with the householder to match his budget together with the demands that are rewiring is a vital element of the employment of a contractor.

Draw on a map of your home inside and outside and indicate the changes in every single chamber. Much of the essential wiring will probably remain exactly the same unless the entire house is gutted down to almost nothing. Each inclusion will cost something, thus ensure that it is actually needed by you if you’re on a strict budget.

Count the receptacles and switches which you add to the house. Typical prices for every one in San Fran and may be a bit more in the event the contractor must work through the loft rather than the cellar, and is about $300 to $400 to install. In case your house in San Fran was constructed ahead of the mid-sixties, it likely has knob and tube wiring, that’ll continue to be great to make use of; yet, to expand it farther, a receptacle is set in where the extension starts, which counts as still another price. Running the cables themselves expenses between $6 and $8 for each foot.

Add the variety of further circuits up you would like. A circuit that is new runs about $175 to install. price is going to be between $1, 000 of circuits.! in the event that you are in need of a brand new electric panel to support the home,

Factor to the estimation in the expense of the supplies. Based on a web site for contractors, Networx, the copper cable alone for a typical rewiring employment can runup to $1, 000

Phone the local municipality clerk’s off-ice and request how much a license is to get a work that is re-wiring. It’s essential that any work be lawfully done. A quality contractor isn’t going to work with no proper license readily available.

See related

The best way to Eliminate From a An Inside Wood Window

Wood window frames are often painted over present layers of paint which happen to be for a long time around the framework. Windows can prevent from working correctly. At some stage you start over and have to remove all preceding layers, but paint is also rough to scrape off without aid. You take it off readily for repainting with a couple of hand tools and can dampen paint. Using stripper, it is possible to do eliminate paint from several window frames within a day.

Put on goggles and rubber gloves. Put a drop cloth round the foot of the window. Dunk a little brush in to an open can of stripper. Beginning on a single side on top, paint a liberal coating of stripper on the window-frame. Work your way across the framework until all regions that are open are covered. Wait 1-5 minutes.

Hold the end of a putty knife at a 30-degree angle from the framework where you began using the stripper. Utilizing a reasonable quantity of pressure, drive on the edge of the putty knife across the framework. The paint softens right into a gel as well as it will be slid underneath by the putty knife. When the knife is built on by the paint, allow it to drop off the knife onto the fabric. Scrape the paint off the whole framework. Allow the framework dry for half an hour.

Open the window. Brush stripper on any portions of the window which are exposed. Allow the paint gel and scrape off it. Wait half an hour. Sand the window with 100-grit sandpaper on a hand-block. The window is willing to re-paint.

See related

The best way to Lay Tile to get a Ushaped Countertop

The one most important project of any tile occupation is starting place and to find out the correct layout. You need to make sure that the layout is straight and square. In addition, you need to minimize reductions and prevent wounds or tiny wounds in a location that’s clear. Due to the constraints of a U shaped counter-top, this can be among the more difficult layouts for tile

Assess the space of the interior of the U (compared to both legs). Divide this from the breadth of the tile, as well as the breadth of the joint. This can ascertain roughly the dimensions of the cut that might be on 1 side or the other. Whether this measure shows an extremely little wound on a single side, you may need to start against among the legs with a half tile to begin, ensuring a bigger cut across another.

Set the straight edge over the edge of among the legs overlapping the foundation of the uracil Lay out the tile without any adhesive along the foundation of the U, beginning the breadth of a tile joint from the straightedge. Continue attentively spacing the tiles, installing the tiles from the bottom of the U or using spacers to maintain them the correct width. Only shove them together if utilizing tile with spacers between them.

Place out the tiles over the foundation before you get past another leg of the U. This supply you with the precise size of the cut along that leg in the event that you begin with entire tile contrary to another and can check your measure. Should you be utilizing a tile 3/8-inch to with 1/4- grout joint and you’re shut to entire tiles both legs, you can joint dimensions somewhat. can be altered by change For example, should you be using 6-inch tiles with a 1/4-inch joint on A6-foot counter, a cut by could be altered by small alteration in the joint could an inch. When possible, make use of this approach to get entire tiles along all three sides of the U.

In the event you can’t work it out to entire tiles assess the dimension of the cut across the next leg. In the event the cut will be less than about threequarters of a tile that was whole, divide the difference you possess the exact same size cuts This will give symmetry to you and also make the setup appear more balanced. Once you’ve created equally legs of the U and the startingpoint on the foundation, just continue setting the tile out utilizing precisely the same width till you get to the rear of the counter. A tiny wound on the back side is a lot more desired when compared to a modest wound contrary to the fringe of of the counter top.

See related

The best way to Repair a Badly Clogged Toilet

Most bathrooms clog at one time or another. Common causes include low-water stress that tries to flush too much simultaneously, and neglects to transfer stuff with force. Such goods are often unsuitable for bathroom clogs whereas quit stink drains could be repaired by having an additive that breaks up the clog. Warmth, which may damage the bowl is created by a few of these additives. Most are not able to make it to the clog because of the layout of the toilet. Consequently will require to un-clog your bathroom utilizing mechanical means.

Drop the Bathroom

Add enough water to protect the plunger in the event the bowl is empty.

Add the dish detergent to the water in the toilet-bowl.

Push on the plunger into the trap of the toilet’s. Place it so the rubber forms a seal across the trap.

Pull the plunger again toward the bathroom tank as you raise it to help attract out the stuff that is trapped.

Add the plunger straight down to the trap again, shoving against it into place powerfully and immediately to drive the water to the pipes to drive at through the clog.

Repeat several occasions. Repair the clog by means of a closet auger if immersing is unsuccessful.

Make use of a Cabinet Auger

Put on place a pail close to the bathroom and rubber gloves.

Strain the auger manage.

Add the conclusion of the auger to the bathroom trap. The sheath round the end of the gimlet shields the toilet against scraping and trap and fits the contour of your bathroom bowl.

Shove before you feel resistance, the gimlet manage in. The resistance is the auger cable pressing from the substance inducing the clog.

Crank the handle to rotate the cable. Push the handle in as you hook it with the conclusion of the cable or crank to split up the clog.

Expand the manage again to take away any stuff that was clogged and the cord the cable point could have hooked. Take away to the bucket.

See for the water to drain from the toilet. What this means is the clog h-AS split up as well as the stuff has flushed. Pour in the bucket back to the bathroom to flush in little quantities when the clog h-AS cleared.

If the initial effort is unsuccessful repeat the auger procedure. Get in touch with a plumber in the event that you are not able to take away the clog after several efforts.

See related

The best way to Air Out a Furnace in a Roof

All fuel furnaces have to be aired out, to permit exhaust gases in the burning process to escape. Ports should be tall enough so combusted gases way out above can not filter and a roofline again by means of a window or alternative opening back to a home. Furnaces vented through partitions are routed through conduits that go over the roofing. Furnaces are vented straight with both one conduit or a 2-pipe system, through roofs. A 2-pipe system includes a little conduit inside a bigger one. While the conduit supplies clean air for combustion, gases flow during the interior conduit.

Find the area to set up the pipe, utilizing a tape measure to determine space from a wall or another area that is identifiable. Summarize the conduit opening on the roofing with chalk and cut a round hole to the measurement of the conduit using a tool that is mutual; eliminate roof overlay to make the cut to be exposed by shingles. Place opening right over the opening on the furnace.

Run upward the port pipe through the roofing and put in a steel or PVC flashing collar over it. Match the port pipe to the furnace manufacturer’s vinyl, either sheet-metal or suggestions. Place using the broad flange in the underside on top of the roofing. Go the pipe at least one foot over the top of the roofing.

Place on the port. Make use of a cap, which fits with a few fashions, on the very top of the pipe. Install At-finish fitting, with the elbow on top of the port in the form of a “T” with openings for port gases on either side. Use elbows to to make an inverted “U” to the very top of the conduit, with the open end all the way down to enable gas to escape. Make the port cover comply with the specs of the furnace manufacturer.

Seal the borders of the cement and set roofing paper on the sides that are level. Replace shingles across the flashing, going on the underside flange. Asneeded to to suit across the port cut shingles having a utility knife. Let a shingle is extended past by the flashing but cover the best and sides with shingles.

See related

Quitclaim Deed Questions

A quitclaim deed conserves the parties cash on transfer taxes and is a fast method to transfer possession of realty –but it isn’t without pitfalls. The kind of title a vendor uses affects his legal obligation to the client. A quitclaim deed should exclusively be utilized when both parties understand the conditions and restrictions of the kind of title sort.

Does a Quitclaim Deed Ensure Possession?

A quitclaim deed transfers ownership interest of real estate from one party to a different party, but doesn’t ensure that background of possession, or the title, is free and clear from defects. Other titles, like a warranty carry a guarantee of title in the vendor to the purchaser. Since title is not guaranteed by quitclaim deeds, the vendor isn’t liable in case a legal problem arises, including the buyer being sued by another man claiming to own ownership interest in an identical property.

When Are Quitclaim Deeds Employed?

Inter-family married or transfers, including husband to wife, are typically managed using a quitclaim deed. Quitclaim deeds can also be used to clear prior mistakes in the title up. It featured an error like a typo in a receiver’s title, plus if another form of title was utilized to transfer property in a purchase, a quitclaim deed submitted after would supersedes that title. Quitclaim deeds could be executed for “specific states,” such as a parent deeding the house to your kid for estate planning goals, but keeping a life estate that offers the parent the lawful right to stay on the house until departure.

What Number of Thought Is Necessary?

Cash paid for the property transfer, or the level of thought, can usually be whatever sum the events concerned concur to. Some states need that the quitclaim deed without consideration paid demonstrate a minimal quantity including $1 itself, on the title. The county recorder’s workplace the property transfer tax that’s billed by the county recorder’s workplace is founded on the thought quantity shown on the title, therefore a quitclaim deed demonstrating a minimal quantity might be exempt from transfer tax.

Are Quitclaim Deeds Officially Recognized?

Deeds are authorized evidence of ownership when correctly performed relative to state laws. Nevertheless, quitclaim deeds are from time to time utilized in transfers including an individual transferring property into a relative in order to avoid a lien from a lender, of realty. A vendor who employed a quitclaim deed to transfer home could possibly be needed later on to file an affidavit declaring the title had not been given in fraud; when the receiver on the quitclaim deed attempts to market the home, such an affidavit could possibly be needed. Some mortgage brokers might not enable the borrower for possession like a transfer between partners, on a quitclaim deed unless exceptional conditions apply.

See related

How Do You Locate the Qualifications of Realty Brokers?

A property agent has a duty to represent customers ethically and in accordance. Because a homebuyer or vendor must trust a realtor to offer precise guidance in significant situations, before signing an agreement for representation inquiring a broker’s credentials will help shield you and make sure which you decide on an agent having a leading reputation. Using the license number in a data-base lookup get the qualifications of realty agents.

Request the realtor because of complete title that is professional and his license number and write these details down.

See the Arello web site to run a search utilizing license number or the broker’s title. This site will give confirmation of a property agent’s permit to you, supplied the confirmation database is participated in by the licensing state.

Examine the broker’s permit info by going to the property license info web site for the state of Ca (or the state where the broker is found). Enter the broker’s title or license number and click “Locate.”

Request a future broker to get a replica of her creation report for the present or most recent year to validate any productivity statements. Request the broker to get a set of customer references.

See related