Guest Picks: Neutral Upholstered Beds and Headboards

I really like the twin upholstered headboards in my guest room. Now I am on a hunt for just the right upholstered mattress and/or headboard for my bedroom also. The feel of fabric on a headboard is so comfy that I wish to experience it nightly. I am keeping the mattress itself neutral and adding color and pattern in particulars like pillows and throws. Listed below are a number of upholstered beds and headboards which are turning my mind right now. — Donna from A Perfect Gray

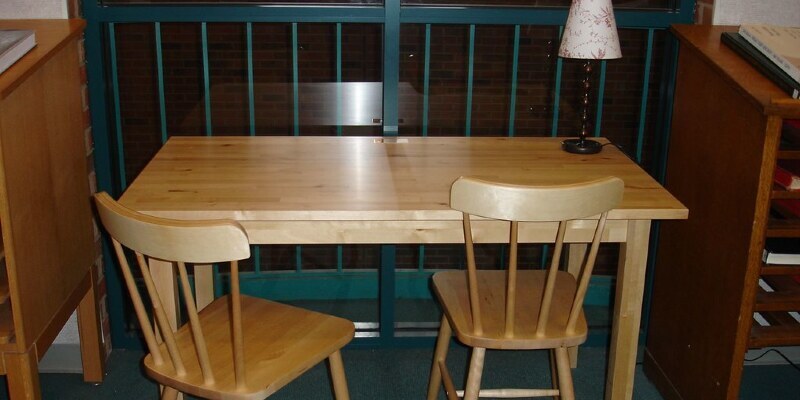
Scroll Headboard – $499

I enjoy this tall Scroll headboard with a French feel. It’s simply plain enough to be elegant but not overdone.
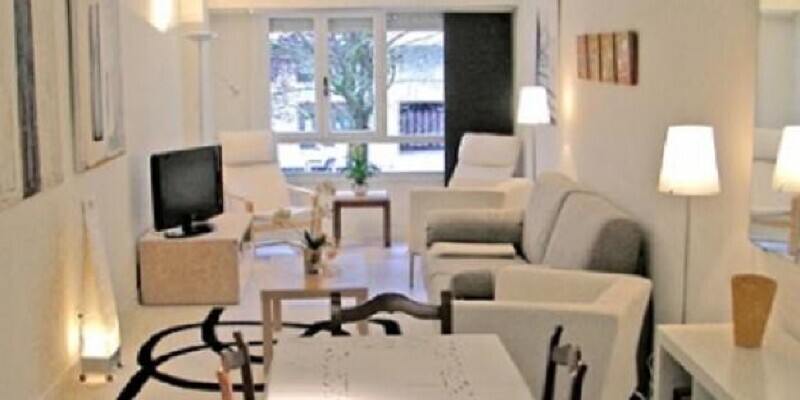
Wisteria

Upholstered Queen Headboard – $799

The French styling of this headboard has my heart. The limed wood gives it this elegant feel.
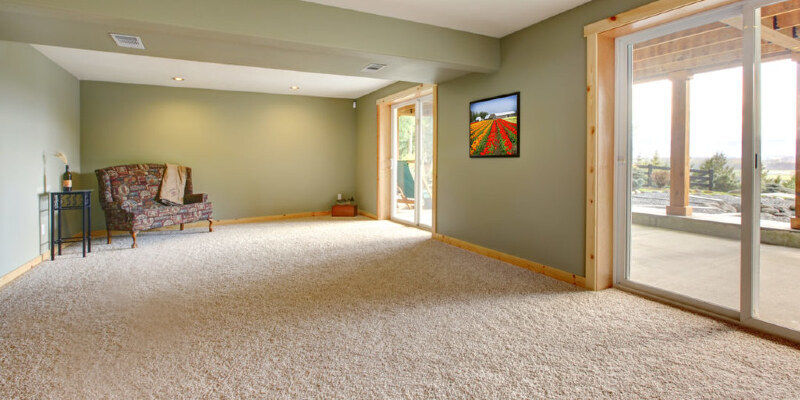
Neiman Marcus

‘Savoy’ Headboard – $699

The profoundly sloped corners on this headboard by Bernhardt make it stand out.
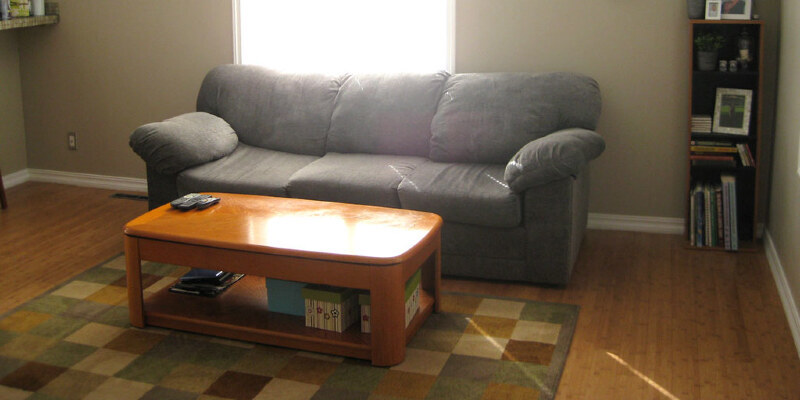
Ballard Designs

Mara Bed With Antique Brass Nailheads – $799

The clean and crisp angles in this bed give this kind of modern appearance. A couple of antique side tables would be heavenly foils for it. And needless to say, I really like the nailhead trim.

Ballard Designs

Squire Headboard Slipcover, Greek Key – $149

I enjoy the Greek key trim on this headboard. I think that it would look snappy on a couple of twin beds, as well as on a king or queen.

Amazon

Skyline Furniture Tufted Wingback Headboard – $481.80

Here is a tufted and winged headboard, and with nailhead trim to boot. Selecting between a tufted or a flat front is going to be challenging.

West Elm

Wingback Nailhead Headboard – $499

Here’s just another winged headboard, but this one has a more aerodynamic, modern feel. I think that it would feel so comfy.

Ballard Designs

Lehigh Upholstered Bed With Antique Brass Nailheads – $799

The wavy lines keep this mattress fresh. The wooden legs are a excellent warm touch.

Pottery Barn

Georgetown Tufted Headboard – $799

Here is a fine, classic headboard with button tufting and a profound channel edge. It’s substantial but not too fussy.

Neiman Marcus

‘Bristol’ Tufted Headboard – $3,499

I am throwing in an over-the-top headboard just for fun. It’s a upholstered linen headboard using antiqued mirror trim. This can be girly and glam all the way.

Restoration Hardware

Vienne Headboard With Metal Bed Frame – $1,195

I am lusting after this French-style headboard with a rustic wood frame along with an upholstered linen insert. I am liking the mix of wood and upholstery increasingly more.

Restoration Hardware

Wallace Upholstered Headboard – $1,095

I enjoy this clean and neat square shape without any nailheads. Sometimes simple is best.

Overstock.com

Safavieh Connie Beige Full/ Queen Headboard – $265.99

Here is a classic camelback shape in a neutral linen with nailhead trim. You can not go wrong with a choice like this.

Bernhardt

Landon Metal King Poster Bed

This is a really distinctive mattress from Bernhardt. It’s a metal poster bed with an upholstered headboard.

Century Furniture

Century Signature King Headboard

I enjoy the ornate design on this headboard. It’s a true standout and would work equally well in a bedroom using traditional or modern decor.

Z Gallerie

Grace Headboard, Parchment Ivory Shantung – $499

I enjoy the fanciful high arch on this headboard from Z Gallerie. I enjoy the notion of a small height on the headboard.

Bellacor

Velvet White Full/Queen Nail Button Notched Headboard – $467

This headboard has a great shape and nailhead trim, also it’s upholstered in velvet — a big plus!

Bellacor

Slipcover Twin Headboard, Ranger Twill Natural – $354

I enjoy this simple slipcovered headboard. It’s great to have the ability to clean and remove if you want to.

IKEA

Bekkestua Headboard, Light Gray – AUD 250

Ikea’s light grey upholstered headboard with button tufting comes in a great price.

HSNi

Nate Berkus Velvet Wrap Upholstered Headboard – $449.95

Folks, this might just be it. It’s just enough of a wing to feel comfy, as well as a somewhat masculine vibe.

Following: 12 Ways to Turn a Bedroom Into Your Own Sanctuary

See related

How to Repair a Wood Table With a Peeling Water-Damaged Top

In case you have a peeling coating on almost any dining table, odds are it’s veneer. Strong wood will not peel. It cracks or splits. Immediate water vulnerability or perhaps condensed moisture may cause veneered timber on any table to peel or twist if the surface coating has been compromised or simply worn off. When a table gets to this point you can bring it back to a suitable condition by using resin adhesive. This sort of adhesive dries hard and can be colored to look like wood. Use maple-colored adhesive for a natural look, or walnut paste if you want to blot the table.

Sand the surface of the table by hand using a hand block with 100-grit sandpaper. Sand parallel to the grain just. Sand off all the loose fibers which are curled up or separated from the surface of the table.

Spray air across the table with a air compressor equipped with a air nozzle to remove any chips, debris or loose fibers that may have worked themselves below the veneer. In case a number of them are stubborn and wont come out, use the suggestion of a putty knife to gently scrape them out.

Mix the powdered resin paste with water per manufacturer’s instructions. Dip the tip of a putty knife to the adhesive. Add the moist putty knife under any loose pieces of the veneer and allow the paste to scratch off under it. Stretch a piece of masking tape tight across the loose area and press down hard to secure the loose slice. It’s OK if the adhesive oozes out.

Dip the knife to the paste and use it like a small trowel to fill larger areas where splinters are missing or there are cracks or splits. When you’ve filled and taped down all the loose spots, allow the adhesive to dry for 24 hours.

Eliminate all the tape. Sand the surface of the table by hand with a hand block and 100-grit sandpaper until smooth, sanding parallel to the grain just. Blow air across the table with the air nozzle to remove any debris or chips.

Dip the putty knife into a open can of timber coin. Fill all the fine cracks, small holes or any other small pits or defects which you might have missed with all the resin adhesive. Sand the table lightly with the hands cube and 100-grit sandpaper. Sand it parallel with the grain with 180-grit sandpaper on the hand cube.

Spray air across the table with an air nozzle till free and clean of any dust. Fill a one-quart pressurized spray gun with lacquer. Hold the gun 8 inches from the surface of the table at a 30-degree angle. Spray overlapping bands of lacquer till the table is wet. Permit the lacquer to dry for 30 minutes.

Sand the table gently, parallel to the grain, by hand with a hand block using 180-grit sandpaper. The sanding will produce a fine, white powder. Do not wipe off the powder. This can be lacquer dust which will aid in curing the next coat.

Spray the table just as you did before until it’s completely moist with lacquer. Wait 48 hours before using the table.

See related

How to Eliminate Excess Stain From Wood That Is Dry

Staining wood is a intricate process because different pieces of wood absorb stains at various prices. Because of the inconsistency in absorption rates, you need to always practice your staining technique on a piece of scrap wood to test for color and texture. The wood will look dark and blotchy in case you do not eliminate enough stain until it dries. Removal is a simple, but delicate process if you have excess stain just on small areas of the wood. In case you have excessive wood stain over the whole wood, you must sand the wood and begin the staining process again.

Excess Stain Through the Wood

Sand the wood with 100-grit sandpaper by hand using a sanding block. Sand with the wood grain and operate till you eliminate all of the wood stain. It is possible to try to sand just the areas with surplus stain, but this method usually results in less than stellar results.

Clean the sanded surface to eliminate any dust. Use a vacuum or compressed air to blow off the surface.

Wipe the sanded surface with a damp sponge to remove any remaining dust residue to prevent it from contaminating the wood stain during application. Permit the surface to dry before implementing any stain.

Apply stain to the sanded surface with a sponge brush or rag. Let the stain to penetrate the wood until the proper shade is reached. Wipe off excess stain with a clean rag. The longer the stain remains on the forests surface, the darker it will become.

See related

The Way to Eliminate Pine Needle Tannin Stain From a Wood Deck

Pine needles contain tannin, which can be a brownish secretion that could leave stains. As a result of this, it is important to sweep pine needles from the wooden deck. If you don’t, the pine needles can secrete tannin and also make walnut needle-shaped stains on the wood. The tannin can also be sticky and produce the deck unpleasant to walk . You can wash the deck using a strong cleanser to remove these stains.

Mix a tannin cleaning solution based on the manufacturer’s directions. Use a cleaning solution intended for use on wood. Most of them are made out of oxalic acid.

Dip a scrubbing brush together with the solution and wash it on the surface of the wood deck along with the tannin stains. Brush with the grain of this wood. Work until the wood is completely clean and the tannin stains are gone.

Fix a pressure washer to its lowest setting. Wood can’t handle very high pressure.

Rinse the wood deck together with all the pressure washer to remove the tannin cleaning solution.

Allow the wood deck dry for two days.

See related

Could You Use Mayonnaise?

Mayonnaise is a condiment with several uses. It excels as a salad dressing, without a preparation of deviled eggs or tuna salad would be the same without it. Real mayonnaise may also be a furniture cleaner and polish. You would not reach for it to clean scuff marks or eliminate a coating of yellowish wax, but if the finish has turned cloudy, a jar of vegetable oil-rich mayonnaise may be just the remedy you need.

Cloudy Finishes

Nitrocellulose lacquer is one of the most frequent wood finishes, also it does not perform well in the presence of moisture. If the atmosphere is humid when lacquer has been applied, the finish can turn cloudy, a state that finishers telephone”blushing.” This happens because moisture gets trapped under the top layer of the finish as it hardens. A lacquer finish can turn cloudy even after it heals if moisture penetrates the surface layer. Moisture causes the white rings that mar the finish when you leave a teapot or liquid-filled cup on a table.

Mayonnaise to the Rescue

One of the main components is vegetable oil, also it is the ingredient that makes mayonnaise an effective remedy for water marks and cloudiness. When you let oil to stand on a moisture-damaged complete, it seeps through the surface and slowly displaces the water also eliminates the cloudiness. Spreading mayonnaise on a moisture-damaged finish is more powerful than distributing oil — oil immediately melts away, whereas, mayonnaise has enough consistency to stay moist. This is important, because the petroleum needs time to penetrate the finish and do its own job.

How to Utilize Mayonnaise

To get rid of a water stain from any furniture finish, just spread a generous coating of mayonnaise with a spatula and allow it to sit for several hours — preferably overnight. When you wipe it off, the stains should have vanished. To keep your pets from feasting on what smells and looks like a yummy treat, cover the mayonnaise with a paper towel or paper. The oil penetrates better if you scatter smoke or wood ash on the stain and rub it in with a cloth before implementing the mayonnaise.

The Limitations of Mayonnaise

The components in mayonnaise — oil, lemon juice and juice — make it a fantastic furniture polish. Mayonnaise isn’t any substitute for a detergent if you’ve got to clean dirt and grime from your own furniture, however, nor can you use it instead of mineral spirits to remove wax buildup. Similarly, mayonnaise is an ineffective treatment for water stains that have penetrated the finish and stained the wood. These stains, which are normally dark instead of white or gray, often need bleaching; to effectively bleach wood and take out the stains completely, you must strip the finish.

See related

How to Distress and Age a Mirror

Add renaissance charm to your home decor by distressing and aging a mirror . Pieces and bits of ephemera from the peek during the reflection, creating. New mirrors operate for this particular project, but you can also purchase mirrors that are discarded from yard sales, thrift stores or auctions. It isn’t important if they obsolete silvering, that’s the beginning of the look you would like to attain and have chipped.

Choose a well-ventilated area. A garage floor or table in a garage offer choices that are safe. Cover your work surface with layers of newspaper.

Eliminate and set it aside. If the mirror has a cardboard backing set it aside.

Wash out the front of the mirror with paper towels and window cleaner. Lay the mirror face down on your ready surface.

Oven cleaner, randomly, in small patches over the surface of the mirror. The silver disappears in the place of the stains. Create stains big enough to your chosen papers to reveal through the glass. There is, When the oven cleaner is applied to the back of the mirror. Before spraying the mirror, then test the cleaner on newspaper to ascertain size and the force of the program.

Permit the oven cleaner to set for 5 minutes. Put on rubber gloves. Using a plastic putty spatula or knife, then scoop the oven cleaner, as you remove the cleaner scraping the silvering. Wipe off the remaining residue with paper towels. Rub the region with steel wool, In case the silvering is not totally eliminated from the sprayed section.

Dip a cotton ball in household bleach. Randomly blot, trickle and stroke on the silvering of this mirror. Permit the bleach until the regions that are wet turn black to set. Wipe off the bleach and the entire trunk of the mirror with a damp rag.

Opt for the ephemera — pole or greeting cards, bookmarks — or background needed to fill in the bare areas from the mirror’s silvering. If is unique, you may want to print copies on your own printer. If copies are used, spray the surface of the paper with a light mist of clear acrylic spray sealer to set the ink. Permit the sealer to dry.

Cut the papers bigger than the bare spots on the mirror. Apply decoupage medium to the very front of the papers with a sponge brush. With the back of the mirror place the papers or cards face down on the bare areas. Smooth the papers with your fingers to press bubbles and wrinkles out. Permit the medium. Apply a thin coating of medium over the back of the papers.

Reattach the frame and financing.

See related

The Way to Eradicate Sour Smells in a Couch

Upholstery has a knack for holding onto filthy scents, especially sour ones. The cushions and thick material covering sofas and couches make it easy for odor-causing liquids to soak through quickly, and also a fundamental surface cleaning does little to eliminate the scent left behind. Cloth-upholstered sofas are relatively straightforward to clean, whilst leather asks a bit more maintenance. For your best results, treat scents once you notice them, and clean up spills and accidents quickly to prevent them from penetrating too far beneath the sofa surface.

Eliminate the Supply

Sour odors develop as the source dries, while it’s spilled milk or pet pee. Drenching the region in water reactivates the source, allowing you to suck it away together with the excess moisture. Saturate the area where the offensive odor is most powerful with cold, clean water; don’t use warm water, as this can set the stain. Wait for about five minutes, and then thoroughly vacuum the region using a wet-dry vacuum. Allow the area dry and then smell the sofa. If needed, repeat this procedure until the place is chiefly smell free when dry. As an alternative, use an upholstery shampooer having an enzyme-based or odor-eliminating shampoo.

Neutralize the Odor

When outlines of sourness remain behind even after cleaning, use a neutralizing merchandise to freshen the upholstery. Baking soda or a charcoal-activated carpet powder break down offensive scents and freshen the fabric, instead of simply coat it in deep fragrances. Scatter either on the sofa, and let it sit for about one hour. Then vacuum it up thoroughly using a bristle attachment. Strengthen the product by misting it with water straight after you sprinkle it about. This allows it to better penetrate the fabric. Once dry, vacuum it away.

Deodorize Leather Sofas

Leather sofas need special care, since they cannot be drenched in water. Rather, mix Castile soap in a bucket of warm water, just enough so that suds form. Dip a very soft rag in the way, wring it out, and rub down a little section of the sofa. Wipe away the soap using a clean, wet rag and then a dry rag. Then move on to Another Part. With leather, it’s vital that you never oversaturate the material. When you are done, sprinkle the sofa with baking soda and let it sit for four to six hours; don’t wet the baking soda. Vacuum it up to remove sour odors. Baking soda may be abrasive, especially on untreated leather, so check these methods in a hidden place before cleaning the whole sofa.

Calling a Skilled and Other Tips

Some scents are just too powerful for household goods to manage, and certain fabrics and leathers cannot be cleaned with household methods. If cleansing and baking soda don’t or won’t function, contact a professional cleaner. Read your furniture maintenance manual or contact the sofa maker before cleaning, and analyze any options on the lower back corner of the sofa or another hidden area before treating the whole area. A light spritzing of fabric refresher after cleaning can remove any traces on fabric upholstery, while a leather conditioner rehydrates and freshens newly cleaned leather.

See related

The simplest Way to Get Dried Paint Away of Hardwood Floors

The best time to remove paint from a floor is when it’s still moist; once the paint has dried, then you’ve got to either scrape it or dissolve it with a solvent. Oil-based paint is far more difficult to remove than latex as it’s harder, and the solvents that dissolve it can damage the floor finish. Whether the paint is water- or oil-based, it’s best to try other removal methods before you resort to solvents.

Scrape Hardened Paint

Paint that has not completely cured is usually soft enough to scrape off the floor. A stiff plastic putty knife is your best tool to use for your own job; you can tap it with a hammer to break up hardened paint with no fear of damaging the floor finish. If the paint has settled to the gap between a set of boards, use a pull scraper to gently remove it in the side of each plank. You can also utilize the corner of this pull scraper to remove paint from wood grain depressions.

Insert Some Heat

Some kinds of paint, like striped gloss tooth, heal to such a tricky consistency you may have trouble removing them with a plastic scraper. Instead of graduating into your knife, which may scratch the end, try warming the paint with a hair dryer. Put the dryer on maximum heat and wait about 3 inches in the paint to get 10 to 20 seconds. After removing the heat, then you’ll probably find that the scrapes away more readily. Avoid more powerful sources of heat, like heat guns; they can damage the finish.

Rub with a Solvent

Another way to get paint out of crevices is to rub it with a solvent, provided that you use the appropriate one. Latex paint remover is the ideal solvent for removing latex paint, but it won’t work on oil-based paint. Several solvents will remove oil-based paint, however, mineral spirits is the strongest one you can safely use on hardwood, and you should use it sparingly. Dampen a rag, dab the floor and touch the end. If the feels fragile, stop using the arc and downgrade to rubbing alcohol, which will most likely be effective with some elbow grease.

Extreme Steps

Thin splotches of paint that have melded with the end inside the grain are the toughest to remove, and you may be unable to perform it without scraping off a few finish. If it comes to this, the very best way to remove the end is to utilize a pull scraper, running it along the grain to remove a thin layer. After all the paint is gone, spread a touch-up layer of finish over the affected area with a rag or paintbrush. If you scraped carefully enough to avoid exposing the timber, the fix won’t be noticeable when the finish dries.

See related

How to Remove Stickers From Most Notable

If you have ever bought a used item or dealt with children, you are going to encounter a couple decals stuck where they do not belong. At times, stickers are quite difficult to remove, particularly if they’ve been in position for a while. Household liquids remove stickers in some cases, while at others, heat does the trick. Commercial citrus-based removers also come in handy to remove that last piece of deposits.

Heat Treatment

A hair dryer helps release the adhesive from some types of stickers, such as bumper stickers from a vehicle or stickers to a dresser. If you are dealing with a large sticker, first heat the middle of this sticker, holding the hair dryer set on hot very close to the sticker. Heating the edges last, then slip a thin razor blade or putty knife under one of the advantages once you’ve pulled an advantage. If the surface you are dealing with may be scratched, use a plastic credit card in place of steel. Pull the sticker with one hand while pushing the blade or card under the sticker to publish it. This method may require reheating the sticker if the sticker doesn’t readily come off.

Sharp Decision

A razor blade, craft knife or utility knife remove stickers from pretty much any surface but are best used when dealing with a material under, such as glass, that won’t scratch when scraped with a sword. To remove a sticker this manner, slide a sword under one edge, holding the sword at an angle so it fits completely under the sticker. Shove the blade in short bursts, lifting more of this sticker with each push. If a number of this deposits remains, use the blade or a fingernail to scrape it off. Softening it with a little water in this stage might help.

Vanishing With Vinegar

White vinegar removes stickers from several surfaces such as plastic, glass, metal or wood. Soak a paper towel in vinegar and then break it over the sticker for a couple of minutes or till the sticker has absorbed some of the vinegar. Rub away the sticker with your finger along with a dry paper towel.

Goodbye, Goop

A natural, commercial goop-removing cleaner removes stickers from almost any substance but might cause a slightly oily place on items such as paper or cardboard. Squirt a small quantity of the substance over the sticker; a bit goes a very long way. Pull away the sticker with your fingers after a couple of minutes, then wipe the cleaner off the item. Examine the substance on an inconspicuous area or browse the manufacturer’s label before applying to guarantee the cleaner will not damage the item under the sticker.

See related

Old-Fashioned Perennials

Old-fashioned perennials are steeped in history. Some long-time preferred flowers have even been around for hundreds or thousands of years. Typically, the aboveground part of the plant dies back every winter as well as the roots sprout a new plant in the spring. If you plant perennials from seed, expect most of them to begin producing flowers in the next year.

Towering Flowers Stalks

Hollyhocks (Alcea rosea) Scatter towering flower stalks and a few varieties develop 59 to 70 inches tall, including “Black Beauty” using its blackish-purple blossoms that feature yellow eyes. These striking perennials are indeed old, hollyhock remnants were discovered in a 50,000-year-old grave of a Neanderthal man. In the U.S., hollyhocks were one of the first plants brought by the colonists, who gave seeds into the Cherokee Indians. Hollyhocks make amazing borders, come in many different sizes and colours, and are hardy at U.S. Department of Agriculture plant hardiness zones 2 through 9. They attract butterflies and hummingbirds.

Charming, Bright White Blossoms

The magical, upward facing, bright white blossoms of “Becky” Shasta daisy (Leucanthemum “Becky”) includes contrasting eyes at yellow. It’s said that Ida Mae of Georgia, a successful florist and nursery proprietor, was the first to market this cultivar of their quintessential daisy in the 1960’s. It caught her eye in her neighbor’s garden and she asked for a clump so that she could develop them herself. This vintage blossom has a very long bloom season, attracts butterflies to your yard, reaches 40 inches tall and is hardy in USDA zones 4 through 9. It’s excellent for containers and naturalistic landscape designs.

A Vintage Fragrant Evergreen

The history of lavender (Lavandula) dates back to ancient Egypt, where it had been an ingredient to scent cologne and incense. Dioscorides, a Greek naturalist, extolled its value as a medicinal plant in the first century A.D.. It was also regarded as an aphrodisiac in the Middle Ages. English lavender (L. angustifolia) is the most commonly cultivated species of the perennial and grows in USDA hardiness zones 5b through 8. It bananas stalks 12 to 36 inches tall which bear a whorl of lavender blooms. Add lavender to a own herb garden as a standalone specimen or plant it en masse.

Grows as a Shrub

Confederate rose (Hibiscus mutabilis), also known as tree lotus, has a shrub-like growth habit. In cooler climates, it grows 6 to 8 feet tall and shouted back each year. In warmer climates, it grows a woody trunk and grows 12 to 15 feet tall. Despite its title, this old-fashioned perennial is neither native to the former Confederacy nor a rose. It’s really native to China and a member of the hibiscus family. Confederate rose was brought to Europe before 1632 and grows in USDA hardiness zones 8 through 10.

See related