How to Prune a Nishiki Willow

“Hakuro-nishiki” willows provide far more beauty than pussy willows. Think pale leaf-flames of cream, pink and soft green in the springtime, stems barely pink turning brilliant red in the winter, and also a tousled contour moving toward fountain as it matures. The “Hakuro-nishiki” willow (Salix integra “Hakuro Nishiki”), also known as the dappled willow, lights along a sunny corner of your lawn. Dappled willows thrive in U.S. Department of Agriculture plant hardiness zones 5 though 9. Left unchecked, they grow into shrubs 6 feet tall and wide, but you can prune them back in winter.

Prune out all dead branches. These are normally a dark color and simple to recognize. To confirm a branch is dead, slice a thin strip of outer bark with a sharp knife. If the layer beneath is green, then the branch is alive. Cut back dead branches to the point of origin, either the main stem or the ground.

Eliminate genital or broken limbs. Cut out crossing or rubbing branches. Trim all cut branches back to a lateral branch using a diameter of twenty that of the cut branch.

Trim selected tall branches back to ground level each year if you would like a small, compact tree. This keeps the height of the tree and promotes new growth. To maintain the willow even shorter, crown-trim in July, taking off the top third of the branches. Make the cuts in lateral branches and prevent stubs.

Tip-trim that the willow regularly to permit the lush new growth to provide its variegated spring screen. Prune branch tips approximately 6 inches, which makes the cuts over a leaf bud or lateral branch.

See related

Flowering Strawberry Plants

Strawberries, among the absolute most commonly grown fruit in house gardens, all start their lives as fragile white blooms on plants. Proper growing states will encourage more blossoms and thus more fruit, but improper maintenance can significantly impact the following spring’s harvest. Whether your flowering strawberry crops are June-bearing or everbearing, providing the ideal combination of soil, water and sun will maintain top quality of the flowers and fruit.

Plant Forms

June-bearing strawberry crops initiate blossoms when days are short, and they produce a crop of fruit through a 2- to three-week period in the spring. Everbearing strawberries have three phases of flowers and fruit through spring, summer and fall, while day-neutral strawberries blossom and produce fruit throughout the growing season. There is a huge variety of cultivars in every kind of berry plant, but many gardeners choose to plant each of three to extend the growing season.

Flowers

Flowers, or inflorescences, develop from terminal buds on the crown of the strawberry plant and also typically have five sepals and five white petals. Branch crowns, or smaller crowns that branch off from the primary crown, can have one or even two extra flower clusters on each. Poor light, low temperatures and too little water negatively affect the size and health of blossoms and later, the berries. With June-bearing strawberry crops, removing flowers as soon as they look the initial year will encourage runner and root development and a bigger crop the following year. With day-neutral and everbearing plants, remove blossoms through June and abandon the rest thereafter to place fruit for summer and fall harvesting.

Planting

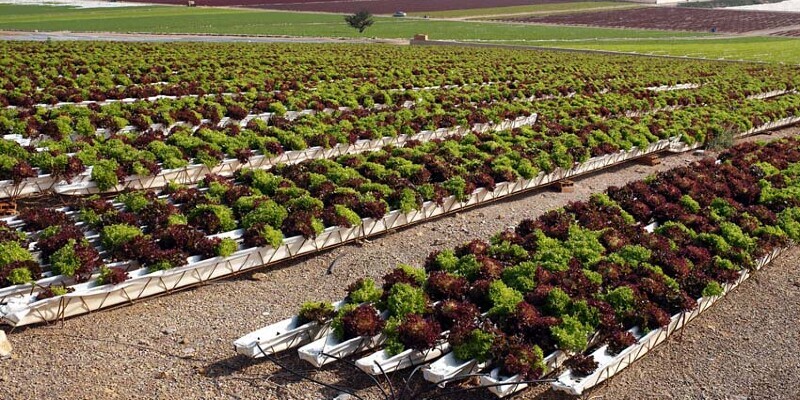
The three procedures for planting flowering strawberries include the matted-row system with plants spaced 18 to 24 inches apart in rows 3 to 4 feet apart, appropriate for June-bearing cultivars; the ribbon-row system, that limits the number of daughter plants and is more labor intensive, but yields more blooms, berry yields and fewer diseases; and the mountain system, where plants have been put around 1 foot apart in multiple rows and all runners are removed, that is acceptable for day-neutral and everbearing cultivars. Berry plants also grow well in containers.

Cultivation

Plant flowering strawberries as soon as the soil can be worked in the spring. The very best place for plants is a sunny place in well-drained, sandy, loam soil with a pH between 5.5 and 7.0. Approximately six weeks after planting and before flowering, apply 2 pounds of 10-10-10 fertilizer for each 100 linear feet of rows, and also utilize another 2 pounds in early September. This will foster the growth and development of blossom and fruit buds. Note that fertilizer needs will vary by region; your county extension office will know the specific kind required for your area. All strawberry plants require about 1 inch of water each week, either by irrigation or rain, to encourage flower growth.

Harvest

The time from blossom bloom to harvest will be different from 18 to 45 days depending on the form of strawberry plant, sunlight and temperatures. Pick berries, together with the caps on and 1/2 inch of stem attached, in the morning when it’s cool and plants are dry to assist prolong berry shelf life. Harvesting vegetables each other day can help boost high-quality. Store harvested berries in temperatures around 33 to 34 degrees Fahrenheit.

Pests and Disorders

Two of the most frequent diseases in flowering strawberry crops are verticillium wilt and botrytis fruit rot, which influences blossom petals, flower stalks, fruit caps and fruit. Insects such as the strawberry bud weevil, which partially severs stems, can also lead to the loss of blossoms. An all-purpose fruit spray may be implemented just as the first blossoms open and at full bloom. Additionally, avoid putting berries in soil where other strawberries, brambles or crops in the tomato family — including potatoes, peppers and eggplants — happen to be developed to prevent verticillium wilt contamination. Eliminate overripe and rotted berries to decrease insect and disease problems.

See related

Mango Tree Spray

The mango (Mangifera indica) is a tropical evergreen tree characterized by a wide, dense layer of leaves, fragrant flowers, and big, thick-skinned fruits that are treasured the world over for their aromatic, sweet taste. If properly cared for in the home garden, mature mango trees are generous with their fruits, bearing prolific amounts. A variety of kinds of mango tree sprays are available that work to help increase overall plant health and fruit yield, in addition to protect the tree from harmful bacterial diseases.

Nutritional Sprays

Mango trees growing in less than perfect soils, such as rocky, calcareous soils, could benefit greatly from an yearly foliar increase of nutrition. For the tree’s initial four to five decades, apply a pre-mixed foliar spray that contains vital nutrients such as zinc, copper, manganese, and boron (a nutrient that helps blossom and fruit production). Following the initial five decades or so, apply a spray that only contains zinc and manganese, with low levels of boron if needed. Trees grown in neutral or acidic dirt may benefit from nutritional sprays of copper and boron in an “as required” basis.

Organic Sprays

For those who prefer organic methods, seaweed tonic is just a mild choice that may be sprayed on mango trees to strengthen tree health, prevent pests and help inhibit diseases such as mildew and blight. There’s little risk of accidentally harming the tree from over-applying seaweed tonic. It may be made readily by putting raw cedar in a bucket of rainwater with a loose lid and leaving it for 2 weeks to a year. After at least three weeks, then pour the seaweed water to a spray can and implement to the leaves.

Fungicide Sprays

Mango trees are notoriously susceptible to powdery mildew and anthracnose, fungal pathogens that wreak havoc on new flowers and fruits. If applied before infection sets in, fungicide sprays may be effective at preventing fungicide. Fungicide will not work if applied after the fungus is present. The fungicide should include copper and sulfur, and also be applied twice to young panicles: the very first time, once the panicles are all about half-mature, and 10 to 21 days later.

Flower-Inducing Sprays

Chemical flower-inducing sprays may be used to encourage higher fruit yields. Fruits are often bigger when the tree is sprayed with flower-inducing sprays. Select a spray that includes potassium nitrate, which gives the tree its required dosage of potassium, or a spray that includes potassium nitrate. Flower-inducing sprays shouldn’t be used on trees that are unhealthy or under ten years old. As with other sprays, it’s rendered ineffective if applied during rainy weather.

See related

The way to Use a Golf Cart for Yard Work

Golf carts can effect a laborious task like gardening much easier because you can use the cart to lug gardening equipment, plants and tools back and forth. While garden carts and wheelbarrows make transporting substances much simpler, you must still exert the power to lift, thrust and balance the cart or wheelbarrow. A golf cart works best for gardening if you’ve got a freight area or rear seating row. Golf carts are much more compact compared to trucks, allowing you to move around your property without damaging the terrain.

Stack bagged mulch, gravel, compost or potting soil in the rear of the golf cart and use the cart to lug the bags to the desired location. In case you’ve got a compost pile, you can bend a plastic bin to the golf cart and use the bin to take bulk compost.

Toss weeds into the rear of the golf cart as you tend your flower beds if you’ve got a cargo area rather than rear seating. When the cart is full, you can transport the weeds to some compost pile or trash can.

Strap 5-gallon buckets to the rear seats with elastic cords or nylon straps. Fill the buckets with gravel, manure or garden refuse and transport them across the lawn.

Rake leaves or grass clippings on a tarp. Tie the tarp to the golf cart with soft twine and tow the leaves or grass throughout the yard or to a compost pile.

Secure a string to small fallen trees and protected the other end to your sturdy bar or tow hitch, if available. Slowly drive forward in the golf cart to pull on the tree where needed. You can use the exact same strategy to transfer tiny stumps and stones, but you must cease if you notice any strain on the golf cart.

Install a trailer hitch to the rear of the golf cart, using a trailer hitch assembly kit that comprises the hitch, receiver hitch, pins and all necessary mounting hardware. Together with the trailer hitch installed, you can attach a small utility trailer to the golf cart so you can haul more material at one time. It also cuts down on rugged wear so you don’t hurt the golf cart.

See related

Mounting Ceiling Fans on a Sloped Ceiling

Most ceiling fan kits are designed for mounting to your braced junction box on a level ceiling. Fortunately, some companies sell modification kits for mounting ceiling fans on a sloped ceiling. The mounting bracket in the junction box for these instances is usually a ball-and-socket-style swivel mount, allowing the fan to be set up on anywhere from a flat to a 12/12 pitched (45-degree) ceiling. The fan will also need to be fitted using a downrod to provide the blades clearance so they don’t strike the ceiling.

Switch off the breaker to the electrical circuit to the junction box and then switch to which the fan is going to be connected. Eliminate the filter area covering the switch using a screwdriver, and place the tip of a noncontact electrical ripped contrary to the wires around the side of the switch. If the light in the tester turns on, then there’s power in the circuit. Turn off more breakers or the main move to the home and recheck until the tester verifies that the power is off. Reinstall the switch plate.

Expand a stepladder and get rid of the fixture on the junction box in the ground if one is set. Then loosen the screws holding the junction box to the ceiling and then pull the box out of the hole. When there’s no supporting brace in the ceiling capable of holding a ceiling fan, position a fan brace between the joists over the hole, and tighten the brace with an adjustable canopy. Insert the electrical cable to the cable clamp, then place the junction box mounting bracket above the brace and then mount the box by tightening the two locking nuts to the brace using a 1/4-inch nut driver. Tighten the screw on the cable clamp to hold the electrical cable set up.

Eliminate the outer sheathing of the electrical cable using a utility knife, then strip 1/2-inch of insulating material in the ends of the electrical wires in the box.

Install the ball from a ceiling fan threaded bracket to the end of a downrod of the correct length to your ceiling’s toss and blade width (see Resources). Insert the end of the downrod through the ceiling fan’s canopy, then insert the wires in the ceiling fan through the downrod and secure the downrod to the fan engine. Slide the downrod pin through the mounting hole and then secure the downrod pin with a cotter pin. Then tighten the setscrews and locknuts to hold the downrod to the fan engine.

Mount the hanger bracket to the junction box using the fan brace screws. Then lift the fan engine and downrod to the junction box, and slide the ball of this downrod to the socket of this hanger bracket.

Connect the white wire from the ceiling fan to the white cable from the junction box using a wire nut. When there’s a red cable present in the junction box, connect it to the blue wire in the ceiling fan. When there’s no red wire in the junction box, twist the black and blue ceiling fan wires together, then connect the 2 to the black wire in the junction box using a wire nut. Lastly, connect the green wire of this ceiling fan to the bare wire from the junction box. Gently tuck the wires to the junction box over the bracket.

Slide up the canopy the downrod and attach it to the mounting bracket using the four screws included with the fan.

Attach each fan blade to your knife bracket using three blade mounting screws, then attach each blade to the fan motor using two motor mount screws.

Attach the light kit to the base of the lover, if one was included. Connect the blue wire from the fan to the black wire of this light kit using a wire nut, then connect the wires in comparable fashion. Tighten the mounting screws to secure the light kit to the fan before installing the globes and light bulbs.

Turn on the circuit breaker and then analyze the ceiling fan using the light switch.

See related

The way to Excavate High Areas in a Yard

Possessing an uneven yard can interfere with landscaping plans. High spots often cause problems while mowing the grass and may have a negative impact on drainage as well. Eliminating high spots requires a redistribution of the soil that makes them up, but care must be taken so that you don’t bury the nutrient-rich topsoil that your grass and other plants will grow best in. You can also use this as an chance to incorporate organic material to your topsoil or boost your soil drainage.

Eliminate the grass in the high spot and surrounding regions with a shovel or other implements. Dig out the topsoil layer, removing up to 6 to 8 inches of soil and putting it in a stack for later use.

Till the exposed dirt to a depth of 6 inches. Remove any bits of plants, plants and rocks larger than one inch in diameter that you encounter while tilling.

Rake the soil having a heavy rake to smooth it and match the caliber of the backyard. Roll the dirt having a lawn roller to better identify uneven areas, raking or tilling them more as essential.

Cover the tilled and leveled area with the topsoil that you previously eliminated, raking the soil again to spread the topsoil evenly over the region.

Sow grass seed over the ground or lay sod to cover the bare dirt.

Run your yard roller above the ground again, pushing the seeds to the dirt or settling the sod over the newly leveled area.

See related

Boric Powder for a Black Ant Infestation from the Yard

Boric acid comes from the form of an absorbent, absorbent white powder that looks like powdered sugar. Combined with water and added to candy bait, it is a slow-acting way of killing ants that is much less toxic than chemical pesticides. It functions both in the digestive tracts of ants and also by absorbing the exterior wax that shields them from drying out.

Black Ant Types

Black carpenter ants (Camponotus pennsylvanicus) typically nest in stumps and fences (See Reference 1). Black carpenter worker ants have been from 1/4 to 1/2 inch long and do not work in trails as they search of food. They bite but do not sting. Little black ants (Monomorium minimum), about 1/16 inch shiny and long, live in rotten wood and beneath objects. They follow trails as they forage for food. They do not bite or sting. Both kinds of ants such as sweet baits such as peanut butter or jelly.

Scouting Black Ant Colonies

Attempting to kill ants using boric acid when they’re foraging away from their colony isn’t efficient. You can kill some ants this way, but never eliminate their nest. To locate their colony, sprinkle sweet food and adhere to the ants as they go home. As soon as you have discovered their colony, you can put your boric acid bait where it will be most effective.

Boric Acid Bait Formulas

Texas A&M; University’s AgriLife Extension recommends 1 portion of boric acid powder to 100 parts of peanut butter, jelly or other sweet lure. Montana Integrated Pest Management Center suggests combining 1 1/4 cup of boric acid powder to 1/2 cup jelly, peanut butter or other sweet that may attract ants. Another formulation is 3/4 teaspoon of boric acid powder added to 4 tablespoons of peanut butter and 6 ounces of honey. Stronger formulations do not kill ants more efficiency and might dissuade them from eating the bait.

Baiting Tactics

One approach is to take small quantities of bait on pieces aluminum foil or about bottle caps and put them in different areas where you see ants foraging for food, preferably close to a colony. You can also use a squeeze bottle with appointed tip to dump the lure into 2-inch-long parts of soda straws. Another way is to set the lure in a jar, screw the lid back and punch holes in it just large enough for the ants get in and out. Seal the lid with tape and set the jar on its side so the ants can discover the holes. Should you discover dead ants round the jar, then reduce the amount of boric acid from the lure. Should you still find ants following a week to ten days, add more boric acid.

See related

Concrete Block Styles

Concrete masonry units, or CMUs, form the building blocks of many constructions. They are a less expensive alternative than poured concrete, are available in a variety of fashions, and a few manufacturers offer a selection of colors other than gray. The face, or even exposed front facet of the concrete cube, may be smooth or it might have a layout element, like texture. Two common uses for CMUs are foundations and retaining walls.

ATSM Classifications

The American Society for Testing and Materials, or ATSM, designates CMU types. ATSM C 90 blocks are acceptable for load-bearing wall installation, while ATSM C 129 is for non-load-bearing walls. The standard size CMU is an 8-by-8-by-16-inch cube. Half blocks can be found in all fashions so that you do not have to cut them. Some blocks are solid, while others have open places within their center and ATSM sets minimum thicknesses for almost any CMU with an opening in its middle. ATSM also establishes that the water resistance of almost any lock and designates a few blocks as waterproof, which means that they are acceptable for outdoor installations. Blocks also receive passion retardation ratings from ATSM.

Split-Faced Blocks

Split-faced CMUs give a wall the overall look of natural stone. The production process moulds two blocks together, then splits them apart. The splitting procedure leaves a rough surface and also exposes the rock aggregate used in the concrete mix. Blocks are available with the rough surface on either side or on one side only. Some manufacturers let you personalize the colour of the aggregate used in the blocks. The rough surfaces are perfect to use on walls in which you do not want graffiti because the surface is difficult to paint.

Vertical Scores

Scored CMUs give the illusion of using more blocks than you really use. You can align the shallow vertical marks cut into the face of the blocks in a number of patterns. Standard vertically scored blocks have two, three, five or seven vertical lines etched into their faces.

Ribbed Blocks

Ribbed CMUs are created by molding the concrete in fluted molds. The moulds create vertical ribs along the face of the cube. Blocks have four, six or eight ribs. The ribs might have rounded edges or they may be squared. You must align the ribs during installation. It is difficult to get rid of excess mortar that’s caught from the ribs, so you must take particular care to maintain the faces clean when setting ribbed CMUs.

See related

How Foreclosure Delaying Services Work

Struggling homeowners that want to keep their homes have several options for delaying foreclosure. As the number of foreclosures nationwide increased throughout the housing market fall, more foreclosure delay or “property retention services” and businesses came into existence. Foreclosure delay providers utilize every lawful way, including filing suits, to put off a homeowner’s foreclosure for as long as possible. With sufficient time, a homeowner in foreclosure may have the ability to block the procedure.

Nonjudicial Foreclosure Delay

Most foreclosure delay providers utilize lawyers to challenge bank foreclosure procedures by searching for foreclosure errors. Foreclosure delay providers in California, for instance, may challenge foreclosing lenders above lost paperwork and lost promissory notes. But states like California allow nonjudicial or non-court-ordered foreclosures using trustees, and such trustees generally take good care to avoid legal errors in foreclosures.

Continuances

Judicial foreclosure is the other form of foreclosure employed with lenders. In judicial or court-facilitated vandalism, foreclosure delay support lawyers work to delay foreclosure instances employing procedural challenges. Normally, foreclosure delay service lawyers first record written answers for their clients, which can buy an additional 30 to 60 days. In addition they record for continuances or time to prepare foreclosure guards for their clients. Judges often grant these types of continuances.

Challenges

Legal struggles to foreclosure cases filed by lenders are common delaying tactics. Legal challenges in foreclosure cases comprise for authority, especially when out of state lenders are involved. Foreclosure delay service lawyers challenging lenders over authority usually ask that county courts move these cases to the federal courts. Lawyers may also challenge a lender’s legal standing by forcing the lender to prove it really possesses the loan.

Buying Homeowners Time

Foreclosure delay providers are just that — and they don’t generally get foreclosures canceled altogether. They can buy critical time for homeowners facing imminent foreclosure to find workable foreclosure alternatives. With sufficient time, a homeowner facing foreclosure could lineup mortgage reinstatement funding using state-offered grants, for example. Foreclosure delay also can give struggling homeowners sufficient time to find buyers or at least an alternate living arrangement.

Other Alternatives

Even though it can be a drastic measure, filing for bankruptcy can delay a busy foreclosure case. Both Chapter 7 liquidation and Chapter 13 reorganization bankruptcy feature automatic stays that halt all creditor collection activities, including foreclosure sales. Using Chapter 13 bankruptcy, a homeowner could even permanently stop foreclosure working with a three- to five-year repayment program. Through Chapter 13 bankruptcy’s repayment period, delinquent mortgage payments plus lender lending costs can be gradually mortgages and repaid reinstated.

See related

Are Foreclosure Deeds Public Knowledge?

While they’re unfortunate, foreclosures are very common. When you take out a mortgage loan to get a house, the lender assumes the risk that you won’t repay the loan. To safeguard against these loses, the lender retains the right to foreclose on your property and market it for the unpaid loan balance. Every state has its rules and regulations concerning the foreclosure process. Many states, such as California, promote every step including the last foreclosure deed.

Notice of Default

As soon as you default on your mortgage payments, the lender contacts you about the status of your loan. In California, the lender has to offer some form of assessment of your financial situation or information that will help you to prevent a full foreclosure. However, if you can not make a payment in a specific period after the first touch — typically 30 days — the lender issues a notice of default. It is filed on public record with the county recorder’s office where the property is situated.

Notice of Sale

Once the notice of default is filed, the lender should wait a specific period for you to remit a payment — generally that is about 90 days — before the lender can actually hold a sale to the property. If you are unable to pay back what you owe within that span, the lender issues a notice of sale. This file is also filed on public record, as well as being posted on the outside of your house and at the courthouse. The note is also advertised in a local paper. Normally the sale is scheduled for about 21 days after the notice will be filed.

Foreclosure Deed

Anyone can attend the foreclosure sale and bid on the property. Commonly, the lender enters the starting bid at the sum of the unpaid loan balance. The winning bidder is issued a deed granting him possession of this property. This deed has to be filed on public record. In a upcoming title investigation, the bidder will look as the property’s owner or title holder. If no one bids on the property, the lender takes possession.

Factors

Most foreclosures in California have been nonjudicial — done without going to court — so the trustee working on behalf of the lender manages the foreclosure proceedings and conducts the sale. He’ll also issue and sign the foreclosure deed if the sale is successful. At times, judicial foreclosures, which involve a lawsuit, will happen. In this event the entire case a part of public record, exactly as with any other lawsuit.

See related