Fruit Displays Sweeten Summer Interiors

Fruit may be a great source of dietary fiber, packed with nutritional benefits and high vitamin content, however, the designer in me can’t help loving it to its styling capabilities. Much like showing fresh flowers, a fruit arrangement adds life for the interior and offers a refreshing punch. This summer, take a hint from nature and display your fruit prior to digging in.

Dear Lillie

Clementines are flanked by new greens, all artfully displayed in a bit from Ikea’s Fintorp collection.

HUISSTYLING

Accessorizing your outdoor dining table is essential. Display Granny Smith apples in a large, clear bowl for a go-to centerpiece.

Charmean Neithart Interiors

A happy home has an organized pantry. Have a cue from Charmean Neithart and separate and exhibit your fruit in open wicker baskets.

CCS ARCHITECTURE

A huge wooden fruit bowl delivers the perfect contrast from a sleek white Carrara marble counter tops.

Arcanum Architecture

Mix it up and exhibit various fruits in various bowls. Variety is the spice of life!

Pc, Mojo Stumer Associates.

While fruit is perishable, fruit art is not.

RemodelWest

Fill a small, narrow boat with flowers and water and set it at the middle of a larger vase. After that, hide the container by encircling it with fruit to the ultimate summer arrangement.

Pottery Barn

Stackable Fruit Crates – $119

Separate and exhibit your fruit in style using stackable farmer’s market- inspired crates.

Vanessa De Vargas

Adding fruit into a neutral interior is an excellent method to play around with new color schemes.

How can you celebrate summer fruit in your home? Leave a comment and tell us!

See related

Étagère Herb Gardens Keep Flavor Within Reach

Brand new, healthy herbs make wonderful companions to each of your favorite foods, but running back and forth to the shop to pick up them might be time consuming and pricey. It is easy to plant some of your favorite picks either inside or out without needing to make a special, dedicated bed in your yard. An étagère — a mild, staircase-like bit of shelving makes an perfect place for growing and keeping all of your favorite herbs directly at your finger (or scissor) hints all year round.

Since herbs grow so well in a group, keeping them together in an étagère, as user Dedeme68 has done in her backyard in Australia, can help them thrive. This is a superb way to keep fresh herbs without the dedication of a plant bed.

Simple, easy-to-find terra-cotta pots are one of the most perfect houses for herbs. They are naturally porous, allowing water and air to move through readily and supplying the perfect environment for healthy root development.

Kim Woods

If you are short on space in your étagère shelves, planting numerous herbs in 1 pot is a superb alternative. Basil and curly parsley both appreciate water, which they make great companions. Rosemary, sage and oregano thrive in drier environments and do nicely together.

Gardener’s Supply Company

Vertical Wall Garden – $59.95

One of the most intriguing things about herbs is that they can have a beneficial connection to one another. Basil, chamomile and chamomile, by way of instance, are exceptional herbs to plant together because basil’s growth is aided by chamomile while oregano’s growth is aided by basil.

Charleston Gardens

Literary Herb Markers: Thyme, Basil, Rosemary, Mint (Set #1) – $48

If some one of your herbs is looking wilted or feeble, think about finding one of its companion herbs to plant nearby.

Gardener’s Supply Company

A-Frame Plant Stand Set – $109

Employing an étagère can also be an excellent way to plant an indoor herb garden. Make sure to put it in a sunny place where the herbs will receive mild at eight hours a day.

Remember that indoor herbs can be subject to pest problems because they aren’t exposed to the winter frosts that kill pest eggs. To free your indoor garden from insects, just have a bottle of sterile water and spray all sides of the leaves before the bugs are all gone. Soap kills the eggs but doesn’t harm the crops.

Wisteria

Three-Tier Iron Plant Rack – $119

Another bonus to étagère herb gardening is that, on a stand such as this, you can choose to use 1 row for herbs and the others for different decorations.

Supermarket

Herb Garden Stakes – $24

It can be easy to combine herbs up, especially in the event that you plant them from seeds. Beautiful garden stakes such as these make sure that you don’t feed the kitty cilantro or flavor your cocktail using catnip!

See related

Guest Picks: Springtime Gardening Tools

Everybody is knowledgeable about the idiom “April showers bring May flowers,” and it functions as a positive reminder that finally the rain will withdraw and be replaced by bright, sunny skies. After long and dreary winters, the spring months are a welcomed sight as well as the outdoors. Spend some time in your backyard this month and reap all of the benefits of outside living. With a few simple tools it is possible to pick the latest blossoms and get started fostering for the year’s vegetables. — Lauren from Lauren Elise Crafted

Terrain

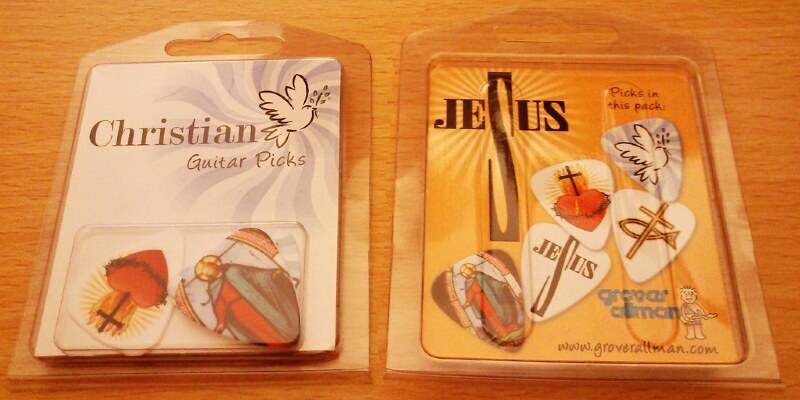
Lemon Utility Watering Can – $34

A hose may be the more practical choice and better for people with large gardens, but it’s hard to resist the allure of this cheerful, yellow watering can. Take this along as you stroll through your own nursery and refresh those plants that are looking a bit dry.

Terrain

Okubo Shears – $38

A pair of sharp garden shears is essential. Snip a few blossoms to produce an arrangement for your home. Prune away dead leaves. Sculpt a topiary. These steel shears are delicate in design, but sharp and powerful to get tough work.

Gardener’s Supply Company

Everlasting Alliums – $36.95

Unfortunately, spring blossoms cannot last annually, but these everlasting alliums can add colour to a garden anytime. These steel orbs come in springtime colors and also have gold accents for a little bit of sparkle. They are designed for all weather conditions. You may even fool some guests to believing they are real.

Gardener’s Supply Company

Vertical Wall Garden – $59.95

Short on space? A vertical wall backyard may be your solution for developing kitchen herbs, succulents and flowers. This collection comes with a mountable grid and recycled pots. The pots get clipped on the grid and you can configure them as you would like. This could be a great present for a cook that wants to grow his or her own herbs and have all of them within easy reach.

Ruche

Dainty Gardener Hose In Teal – $34.99

Not all hoses are destined to be green. This 25-foot backyard hose is teal.

Ethel Gloves

Tudor Gloves – $22

This is not your average garden glove. Ethel Gloves are designed especially with women in mind, not only because of all the colors and patterns available, but also due to the form and fashion. And do not allow the colors fool you. These gloves can do heavy-duty work equally and their drab counterparts.

Etsy

Dirt Bag By South Fifth – $7

Johnny Appleseed went around planting apple tree seeds. Have a cue from him and get started sprinkling your yard with all these seed bombs. Seed bombs are packages of organic soil, compost and seeds that are the perfect contained environment for encouraging the growth of wildflowers. Once increased, the blossoms will attract pollinators and butterflies.

Etsy

Working Hands Soap Round By RootsSoapCo – $5.50

Busy gardeners are bound to get their hands dirty, and exfoliating soap is sure to wash away the dirt. This soap bar contains pumice and simmer to get a thorough clean and almond oils for moisturizing. This bar is handmade and Earth-friendly with natural ingredients.

SPROUT HOME

Daisy Watering Can – $54

The beautiful floral pattern with this particular watering can actually has historical importance. It was a pattern initially released as wallpaper by Morris and Company from the 1860s. The design may be classic, but the watering can is quite contemporary.

Brook Farm General Store

Spool Of Twine – $17

Cotton twine is a helpful household item, especially for someone who works with blossoms. Combine simple bouquets with this simple twine and present them to family and friends.

SPROUT HOME

Bacsac Outdoor Modular Planters – $39.75

Huge vases and baskets can get so heavy, making it a challenge to move them around. Some plants and flowers are sensitive and you may need to move them in and out of sunlight and shade. With Bacsac figurines you are able to certainly do that with ease. These Bacsac planters are weightless, portable and their natural and durable material will match any garden.

Stanley & Sons

Standard Apron With Cloth Straps – $118

Gardening is messy. Protect your clothes with a full-body apron, like this one from Stanley & Sons. Not only will it keep your clothes clean, but the pockets can keep you organized and your resources within reach.

Gardener’s Supply Company

Paper Pot Maker – $19.95

If you want to start developing some seedlings, you will need little, individual pots for each plant. A pot maker will transform paper bits into small pots that are the perfect size for your growing seeds. Once they have developed enough, you can plant the seedling along with the paper pot into the floor. These small containers are absolutely cute. Wrap them with some twine and flip them in to party favors for nature fans.

Brook Farm General Store

Market Basket – $42

These French-style market bags would be the perfect bag for trips to the flower market. They are nice and big to accommodate all your favourite blossoms.

Gardener’s Supply Company

Gardener’s Wellies – $59.95

It’s possible to protect the majority of your body using an apron, but a fantastic pair of rubber wellies will help keep your toes dry also. They are especially useful in wet climates. These wellies are comfy enough to get all-day wear and stylish enough to appease your tastes.

Etsy

USA Insect House And Bee Hotel By WudwerxUSA – $27.50

If you’re into blossoms, then you’re also likely into bees. Bees are nature’s pollinators and you ought to welcome them in your backyard. Place this wood hut at a sheltered area to encourage the bees to move in and remain.

Gardener’s Supply Company

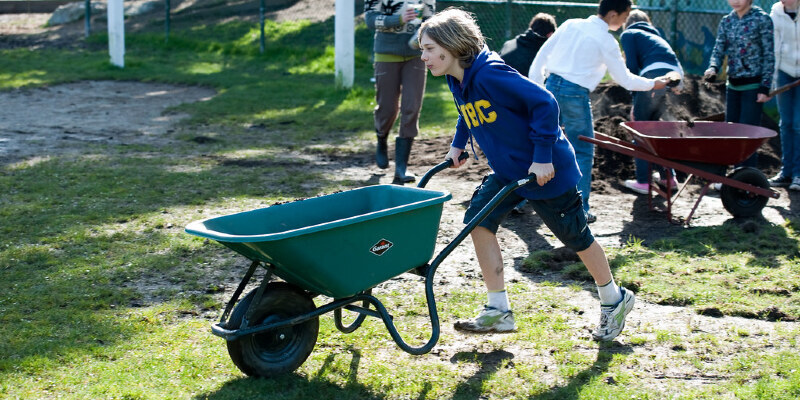
All-Terrain Landscaper’s Wagon – $129

If you’re an avid gardener, a wagon or cart could be a great investment. Keep all your equipment on your own cart and wheel it across the yard with you. This way all your equipment remains portable and easy to access. Even take it along with you to the nursery to pick up new equipment.

Olive Manna

Wire Tote Baskets – $46

Perhaps your garden involves some fruit trees. After the fruit comes into blossom utilize these wire baskets to collect your most recent batch of peaches, plums or apricots.

Orchard Supply Hardware

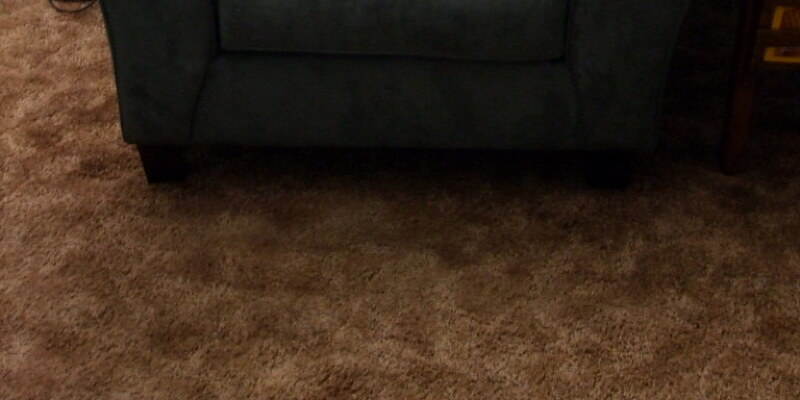
Contractor Wheelbarrow – $129.99

For thick landscaping, a steel wheelbarrow will pull its weight. Move dirt round, transfer soil to your flower beds and even use it for home improvement jobs.

Anthropologie

Test Tube Vase – $68

After you have done all the work and employed tools to keep your backyard, you need to be able to enjoy the blossoms you nurtured. A beautiful vase will help your blossoms shine as the focal point in your home. Experiment with flower arranging and mix unique varieties to earn fascinating displays. Make sure you share your own handiwork as well. A present of flowers, especially homegrown ones, is always appreciated.

Next: Guru Photo Styling: Say It With Flowers

See related

Dill Seed Vs. Dill Weed

Common dill (Anethum graveolens) has naturalized in North America after its introduction from the native southwestern Asia. Dill is easy to grow, giving textural visual interest to the garden with its 3- to 4-ft tall, feathery foliage and 6-inch broad umbrels of bright yellow blossoms. Dill foliage is food for black swallowtail caterpillars, so it is recommended as a host plant from blossom gardens. However, dill really shines from the kitchen. The sweetly pungent taste is concentrated in the leaves and the seeds, making dill a popular herb for a vast assortment of culinary uses. Dill weed is simply another name for dill foliage.

Growing

Dill prefers full sun in well-drained soil. It grows easily from seed from U. S. Department of Agriculture plant hardiness zones 8 through 10. Sow seeds 1/4 inch deep in loose soil in the first spring. Make successive sowings every two to three weeks for a continuous supply. Successive sowings permit you to allow the ancient plants mature so it’s possible to use the seeds when cucumbers are all set to pickle. Later plantings give you a source of fresh dill weed through the entire year. In desert regions, plant dill in late summer and early fall to avoid extreme heat. Water newly planted dill to aid germination, and irrigate sometimes throughout the entire year to maintain the dirt from completely drying out. As seedlings grow, thin them to stand about 18 inches apart. An easy method to grow dill is to let it reseed directly in the garden.

Harvesting

Young dill plants which you lean from the garden are ideal to thicken for tender, fresh dill weed. Although you can trim dill foliage at any opportunity to utilize new, the leaves have the best flavor before the umbrels blossom. Trimmed dill continues to grow new leaves until the plant flowers, so it is possible to replicate harvest the foliage. Harvest dill seeds from mature plants after the blossoms plant seeds. The blossom umbrels become clusters of seeds that pertain to the plant until they are fully mature. Snip off the seed heads once the seeds are brown and dry before the seeds scatter. Hold a tote or big bowl under the heads and snip — allow the seed heads fall into the container.

Maintaining

Wash fresh dill weed and wash it dry, chop it, then freeze it in tiny containers or suspend it flat on a baking sheet to move to small containers. To dry dill weed, loosely tie together a few branches at the base with rope or a rubber band and hang on the bundles upside-down in an airy place out of sunlight. Bruising the branches may cause stains of decay or mold, so handle the dill gently. You might also use an electric dehydrator to dry dill weed quickly. A dehydrator assists the dried leaves retain the bright green colour of fresh dill. Shake the dry dill seeds from the stalks into a bowl, sorting out the stalks for disposal. Store dried dill weed and dill seeds in airtight containers in the cabinet.

Uses

Is dill an herb or spice? It’s both. Herbs are leaves, so dill weed is an herb. Legendary as a flavoring for fish, dill weed is excellent in soups and stews, dips and sauces, also to taste vegetables, rice and omelets. Dill seeds are regarded as a spice because they are parts of the plant which are leaves. Use whole or ground seeds to taste dill pickles and to make flavored vinegar, and add them to sauerkraut, breads and rolls, cakes and cole slaw. Dill seeds include zip to roasted root veggies, and they include sweet pungency to curry powder. Dill weed also produces a lovely foliage replacement for ferns in flower arrangements. It adds odor as well as colour, and lasts several days in a vase of water.

See related

Chain Size of the John Deere CS56

The John Deere CS56 is a heavy duty series saw designed for farm and home use. It can be used for cutting firewood, removing or pruning tree limbs, and cutting down small trees. It’s equipped with a 0.325-inch pitch, 0.05-inch gauge series that is offered in three bar lengths: 16, 18, and 20 inches.

Definition of Measurements

To determine the pitch, or size, of the series, assess the space between three successive rivets on the chain and divide by 2. The gauge refers to the thickness of the drive connection where the chain fits into the groove on the guide bar. The bar, or cutting length, is the space from the front of the saw into the tip of the link at the end of the bar rounded off to the nearest inch.

See related

Most Energy Efficient Hot Tubs

The final thing you need to worry about when lounging in your spa is that the cost to run it. Most new hot tubs strive for energy efficiency, but maybe not all of hot tubs are constructed the same. When looking for the most energy efficient spa available on the current market, find out more about the materials and methods of construction. If you purchase a spa with two pumps instead of one, though it may cost more in the beginning, you are able to reap the benefits on its own energy usage over time.

Energy Efficient Components

The primary components of a hot tub that affect its energy efficiency begin with filtration, the pump valve and system, and end with construction, shell insulating material and whether the spa has a cover. Since warm tubs sit unused for the vast majority of the moment, the costs to keep up the heat, even if not in use, directly influences its energy efficiency. Start looking for hot tubs that satisfy the American National Standard for Residential Swimming Pools to guarantee energy efficient electrical parts in the spa. Hot tubs that use LED light and programmable controls cost less to operate.

Two Pumps Better Than 1

A spa that provides two pumps originally costs more to purchase, but costs less to operate than a spa with a two-speed pump. By using a low wattage pump only for water flow, and a separate pump for your jet system, an operator can lower the monthly costs of operation since the jet system simply works by turning it on to be used. A two-speed pump motor runs the energy bill up due to the higher electrical drain on pump. Additionally, start looking for a spa that delivers an economy mode setting for heating when not in use. Some spa systems also spend the pump heating exhaust and use it to heat the water and decrease energy consumption.

Insulation and Construction

Hot tubs constructed with conductive polyurethane foam keep the heat in the bathtub rather than let it escape. The identical foam used to insulate commercial freezers, this high-density foam affects the hot tub general energy efficiency. A fully insulated spa operates more effectively than one with insulation in only a couple of places. Hot tubs without full insulation and sealed covers permit energy to escape, which raises monthly operating costs, especially when installed in colder climates.

Other Ways to Conserve

Don’t overheat your own body, as a couple of degrees can make a major difference on your electric bill. A spa that has a cushioned heating thermostat allows you to place the warmth if you need it and also reduces energy intake if you do not. With the addition of a layer of floating insulating material beneath the water and beneath the cover reduces evaporation and retains the heat in the bathtub. Regularly clean or replace worn-out filters as dirty filters create pumps and heaters work more difficult. When you put in a spa outside of the Bay Area in California, such as in a region with extreme weather conditions, put the hot tub in a gazebo or outside construction to raise its efficiency.

See related

How to Clean a Wood Desk Using a Leatherette Top

The leather-top desk is a timeless style of writing desk. While antique versions of this design feature genuine leather, modern upgrades often make use of synthetic materials like leatherette or delicate vinyl instead. Leatherette is not as porous as actual leather, and is therefore easier to clean. A very simple detergent solution will work to clean both the wood and leatherette regions of the desk securely.

Dry clean each the desk’s surfaces using a vacuum cleaner, using a soft brush attachment so as not to scratch or scuff the wood or leatherette.

Prepare a solution of 1 tbsp household dish soap or liquid soap in 1 pint of warm water. Pour the solution into a handheld spray bottle and shake to mix.

Spray the cleaning solution on the leatherette and scrub gently with a soft brush to remove dirt and grime.

Wipe with a soft cloth to remove cleaning solution residue. Rinse leatherette surface using a clean dampened soft cloth.

If the wood component of this desk has any oil-based stains or grime, dampen a soft cloth with mineral spirits.

Spot-test a small amount of mineral spirits in an unnoticeable border of the wood. If it doesn’t cause a response, use the cloth to gently rub away oil-based stains. Be careful not to press too hard or allow the wood absorb too much of this mineral spirits.

Spray a fresh cloth with the detergent solution, and use it to clean out the remainder of the wooden surfaces, working on a small region at a time. Change fabrics as necessary.

Rinse with a fresh cloth dampened with water.

See related

The way to Give Paneling a Drywall Look

The effect of wood paneling on space air can be hard to ignore, and the dark wood tomes don’t fit with every design motif. In case a remodeling job has brought you to the stage of either removing the paneling or covering it with drywall, it may be relaxing to know that you don’t need to do. All you need to do in order to produce the paneling resemble drywall would be to skim-coat it using joint compound. While skim-coating can be tricky to do correctly, it is easier than the choices, and you don’t need to employ a professional to do it.

Inspect the paneling for loose borders or warping, and fasten loose sections securely to the studs using ring-shank nails. Sink all nail heads with a hammer and nail set.

Wash the paneling using a mix of 1/2 cup of trisodium phosphate detergent per gallon of warm water. This mixture not only cleans dirt and grease in the paneling, but it etches the end. Let the paneling dry, then scuff the surface together with 150-grit sandpaper to etch it even more.

Paint the paneling with a coat of interior latex or shellac-based wood tip. Apply the primer with a medium nap roller and paintbrush.

Tape the seams between panels using drywall tape in exactly the same manner you would tape routine seams seams. Spread a layer of joint compound along the flux using a 4-inch drywall knife, lay moistened drywall tape and scrape it flat with the knife. Immediately topcoat it with another layer of joint compound and scrape the chemical flat.

Let the taped seams dry, then topcoat with one or 2 more layers of joint compound. Scrape with a 6- to 8-inch blade, feathering the edges into the wall to make flat seams.

Skim-coat by spreading a thin layer of joint compound over the entire wall using an 8-inch drywall knife. Start in one of the best corners, applying hardened all-purpose joint compound on the wall using a paint roller or drywall knife and scraping the knife along the grain of the timber to flatten the mud. The layer shouldn’t be any thicker than about 1/8 inch.

Wait for the first skim coat to dry, then sand it with a pole sander and 120-grit sandpaper. Wipe off the sanding dust using a rag and, even if you can still see wood grain or tape seams, apply a second coat. Sand that coat when it dries and wipe off the sanding dust. Repeat a third time, if needed.

Apply a coat of PVA — or drywall — primer to the wall using a medium-nap roller and paintbrush. Let the primer dry, then paint the wall or hang wallpaper, as desirable.

See related

The way to Use Gel Stain on Unfinished Oak Furniture

Gel stain, an oil-based choice to fluid wood stain, contains enough urethane you don’t need to employ a top coat, though you can if you would like to have more protection and higher shine. Thicker than fluid stains, gel stains provide immediate gratification to those who prefer to utilize wipe-on colour on bare oak furniture. They are also less cluttered, since they don’t drip like fluid stains, plus they provide a more shade, since they don’t run.

Remove any drawers in the furniture and unscrew the knobs from the drawers. Set the knobs and screws aside.

Put on a dust mask and mud the oak furniture using 180-grit sandpaper, followed by 220-grit sandpaper to open the pores of the oak and allow it to take the gel stain evenly.

Blow the sawdust off using a hair dryer, vacuum cleaner or can of compressed air. Vacuum sawdust off the floor.

Apply a coat of wood conditioner to the full surface of the furniture using a white cotton fabric or foam brush. Allow it to dry for 15 minutes and apply another coat. Allow the second coat to dry for 2 hours.

Stir the gel stain thoroughly using a paint stirrer to mix.

Put on a set of rubber gloves and dip a cotton rag to the gel stain.

Wipe the stain over the surface of the furniture, working in the direction of the grain. If the stain is thicker than you want, wipe off the extra with another white cotton fabric.

Keep changing wiping cloths until all the excess stain has been absorbed, to prevent seeing streaks and darker regions. Use an old dry paintbrush to get excess stain out of crevices.

Allow the stain to dry for eight to ten hours. Apply two layers, letting the second to dry for eight to ten hours and the previous coat to dry overnight.

Sand the furniture quietly using 600-grit sandpaper or 0000 steel wool. Blow Off the sawdust as you did in Step 3.

Employ one more coat of gel stain if you would like the timber to be darker. Allow this coat to dry overnight.

Employ a polyurethane top coat using a sponge brush if desired to give the furniture more protection and shine. Allow the top coat to dry overnight before replacing the drawers and knobs and using the furniture.

See related

How to Wash Large Custom Curtains

Not only do dirty drapes detract from the beauty of a room, they also result in a potential increase in airborne allergens. If your windows are adorned with large customized drapes, you may be intimidated to attempt to wash them. If left untreated, however, curtain fabric can turn irreversibly dingy while also triggering asthma and allergies.

Ditch the Dirt

If you have ever opened your own drapes and discovered yourself consumed by a cloud of dust, then you know just how much debris a set of drapes can gather. The very first step in maintaining your large custom drapes clean is regular dusting or vacuuming. An assortment of cleaning implements — by a feather duster into a vacuum cleaner’s suction attachment — may also be used to remove dirt from drapes. Work from the top down so anything which falls can be cleaned later, and make sure you take care of either side. Check in the folds and hems where hidden debris accumulates and wipe down dusty windows and windowsills.

Steam It Out

While dusting ought to be carried out weekly, steam cleaning may be done on a less frequent schedule or as needed. Based on your budget, purchase an inexpensive handheld steam cleaner or even rent one. Before beginning the procedure, consult the manufacturer’s label to be sure that you wo not hurt the drapes with this method. Make sure you follow the manufacturer’s directions about the amount of water to add and heating time, as it fluctuates depending on unit. When the steam cleaner is ready to go, begin with the back of the curtain and then work from top to bottom, holding the steamer 2 to 3 inches in the fabric. When you finish the back side of the curtain, then repeat the procedure on the front. Following a 15-minute drying interval, you can determine whether you need another round of steaming or place cleaning.

Machine Clean

Even large customized drapes can fit inside super-sized washing machines, although you may need to wash them one or two at a time based on the capacity of the unit. Machine washing drapes is a snap but some techniques are more effective than others. Again, read the manufacturer’s label to make sure the drapes are machine washable. Always use the delicate cycle as fabric can deteriorate when exposed to sunlight. Cold water is ideal to minimize fading and shrinking, although heavily soiled fabrics may require a warm atmosphere. Look for a detergent formulated for maintaining color as sun-exposed fabrics especially are vulnerable to fading.

Clean and Quick

Most people underestimate the cumulative impact of the sun’s beams on fabric. Curtains are household workhorses and can have short life spans if not treated with adequate caution. Simply clean drapes when it is absolutely crucial. If dusting does not do the trick but a complete washing is not to be able, use a lint brush to slough away embedded dirt or execute a quick spot clean using a moist cloth. A tag which reads, “Dry Clean Only” needs to be honored. All dry cleaners aren’t created equally, though, so check to see if your neighborhood dry cleaner comes with expertise working with large customized drapes.

See related