Cellulose Insulation & Water Damage

Blow-in cellulose insulation is manufactured from recycled newspaper and treated with borate to leave it fireproof and insect-proof. It’s not watertight, but this’s usually not a problem unless the roof flows, a pipe bursts behind a wall or a levee is breached during flood season. Once cellulose insulation has been thoroughly soaked it becomes a problem in urgent need of a solution.

Cellulose Insulation and Moisture

Cellulose insulation is frequently installed damp, and its insulating properties have been undamaged by routine seasonal humidity. When cellulose insulation becomes inundated with water, nevertheless, it’s likely to sag and settle, leaving sections of the ceiling or wall cavity unevenly filled. Once that happens, the cellulose won’t function as an effective insulating substance.

Cellulose Insulation and Damage

Thanks to its borate therapy, mold won’t form on cellulose insulation. But mould will form on timber studs and drywall in contact with moist cellulose. That is why it’s urgent to eliminate water-soaked cellulose and replace it with new insulation.

See related

How to Sand & Stain a Dresser

Sanding and staining are significant steps in achieving a professional finish on a hardwood dresser. Sanding smooths the wood grain during the prep stage and removes dust throughout the finishing stage. The correct application of stain provides rich tones that improve the dresser’s natural beauty. While none of these tasks requires specific skills, they are time-consuming and require attention to detail for the ideal outcome. Remove all the old finish about an present dresser before beginning.

Prep Sanding

Remove dresser drawers and put each one on end, on a drop cloth, together with the drawer front facing upwards. In case the drawers came with installed pulls, remove them using a screwdriver. Put on goggles and a respirator mask before sanding.

Start sanding using 80-grit sandpaper or a sanding block, using smooth and even strokes and sanding in the exact same way as the wood grain. Unfinished dressers include presanded, but this is nevertheless an important measure to eliminate scratches or blemishes and to smooth wood grain which may have enlarged due to moisture. Run your fingers over the wood as you mud to make certain all roughness is eliminated.

Switch to your finer, 160-grit sandpaper or sanding block to provide a very smooth surface before applying stain. While there certainly are finer-grit sandpapers, 160-grit is adequate. Should you use a very fine grit, you risk polishing the wood surface, which can hinder stain absorption.

Applying Stain

Brush off sanding dust using a brush, or vacuum it away and crack a window before rinsing. Solvent fumes in wood stain can leave you feeling a little dizzy if you apply the stain in a closed room. Wear rubber gloves.

Brush on a thin but also coat of wood stain using a new paintbrush or utilize a stain applicator pad. The caveat when applying stain would be to function from the surface of the dresser down and also to restrict staining to a part at a time. For instance, do the dresser top first, then 1 side, then another side, then the front. Stain every single drawer face entirely.

Allow the wood stain soak in a few minutes or till the wood reaches the desired shade and then wipe it off completely using soft, absorbent rags. Pay special attention to details and crevices in the wood. If any stain remains on the wood, it can impact the dresser’s finish coat.

Final Sanding and Finishing

Allow the wood dry completely before lightly sanding with 220-grit sandpaper. Staining causes the wood fibers to swell slightly. Use a light touch to keep from sanding off any of this color.

Wipe down the dresser and drawer fronts with tack cloth before apply a light coat of wood finish and let it dry.

Sand the dresser involving every finish coat to eliminate pieces of dust which may adhere to the finish before it’s completely dry. Use 400-grit silicon carbide sandpaper and a very light touch. This is more of a polishing measure than anything else.

See related

Which type of Gladiolus to Plant With Tomato Plants?

Gladiolus (Gladiolus spp.) Grow from corms and will return every year under the ideal conditions. They prefer full sun, well-drained, rich soil and constant watering. Gladiolus are hardy in U.S. Department of Agriculture plant hardiness zones 4 through 11, based on the particular variety. Tomatoes have similar growing conditions. Any type of gladiolus will grow with tomatoes.

Gladiolus Grandiflora Hybrids

Gladiolus hybrids grow from 4 to 6 ft high with flowers up to 5 inches over on tall stalks. Up to 40 flower buds are on each stem. Plant them in the back of the tomatoes so the tall sword-shaped leaves do not block the sun. The flowers come in every color. Some unusual colours include green, black and brown. The petals may be ruffled and you could also find double or semi-double flowers. A few varieties are streaked with a contrasting color or the petals are edged using a different color. The tall stems may need staking in windy places or where there’s heavy rainfall.

Butterfly Gladiolus

Shorter than grandiflora, butterfly gladiolus, the nana set of hybrids, grow from 2-3 feet tall having smaller flowers splashed with contrasting color. The flower spikes have around 12 buds and blossom in pink, pink, salmon and an almost red. These are the sole summer-blooming gladiolus that could be left in the ground in USDA zones 4 and over. The shorter varieties makes an intriguing border at the front of the bed or even perhaps clustered as focal points within the tomato plants.

Winter-Blooming Gladiolus

South Africa’s cape area has more than 100 different species of gladiolus, and these types do well in warm, frost-free spaces, such as Mediterranean-type climates. The flowers are not as showy as summer-blooming sorts and you might have to purchase these sorts from specialty retailers.

Location

In warm-winter areas, such as USDA zones 8 through 10, the corms can stay in the ground all winter. Mark where you have implanted the gladiolus so you don’t accidentally dig up them when planting the strawberries. Plant the corms from 2 to 5 inches deep. Sandy soil requires deeper planting.

Kinds of Tomato Plant

Tomatoes are either indeterminate or determinate. Indeterminate keep creating and growing all season, with flowers, immature fruits and ripe fruits on the exact same plant in the exact same moment. They tend to become leggy as they keep growing. Determinate tomatoes stop growing and put their energy into ripening their harvest all over a week to ten days. Because determinate tomatoes are tidier, they’re a much better fit with gladiolus.

See related

How to Run Sprinklers to Guard Fruit Trees

When fruit trees are developing and growing the flowers that will eventually create the fruit, they are vulnerable to cold or icy problems. Since the booming stage and early stages of fruit development of several fruit trees occurs throughout early spring, icy is definitely a concern with growers. There are numerous tactics to fight freezing temperatures, but none more unique and somewhat perplexing that spraying the trees with water. Most wouldn’t feel that adding a layer of water, that will turn to ice, would be the way to go when protecting a tree in the cold, but it functions. The layer of ice forms around the blooms or infant fruit and insulates it from harsh winds and the cold.

Run hose line from water sources, like a well or tanker. Place hoses far enough apart for full coverage by the sprinklers, allowing for some overlap to be protected.

Attach adjustable sprinklers to the hoses and aim them upward toward the branches. Test each sprinkler and adjust it, if needed, in order for the water to reach the branches.

Set sprinklers that are between trees in a circular pattern and sprinklers along the edge of a row of trees at a back and forth pattern, so as not to waste water.

Start sprinklers before temperatures fall to freezing, since water that begins to freeze at the atmosphere or the instant it strikes the tree will do the trees no good. Coating the trees using a layer of water that will gradually freeze when temperatures fall is better. Start sprinklers when it is 33 degrees Fahrenheit. Cease sprinklers once the trees are totally coated in a layer of ice and temperatures have dropped enough that the ice will not melt.

Keep applying water if the temperature fluctuates around the freezing mark, but doesn’t get over 38 degrees F. Stop sprinklers when temperatures rise above 38 degrees F.

See related

How to Design a Moss Dish Garden

Bringing moss into your home using a dish garden can add a gorgeous natural indoor feature. With minimal preparation and attention, your dish garden can thrive with lush greenery. Moss is a visually interesting plant that does not flower or have roots. In favorable conditions, it can form a mounding green mat. While homeowners can become frustrated by outside mosses competing with turf at the lawn, this hardy plant can be welcomed inside in a container because of the little maintenance needed.

Decide on a dish or terrarium of any size without drainage holes or using a saucer underneath. Put about three inches of potting soil in the dish.

Gather moss outside using a hand shovel to dig the plant up alongside a small quantity soil where it is growing or purchase moss from a nursery or online; collect enough moss to cover the whole soil surface of your dish garden. Search for various kinds of moss to enhance the visual appeal. Collect objects such as small stones, sticks, and small accent plants to have in your dish garden.

Spray the soil of the dish garden with water so it is thoroughly moist. If you’d like to get a mounded impact immediately, build up the soil in 1 place of the dish garden so it is slightly higher than the remainder of the garden.

Press down firmly on the soil throughout the dish garden, as moss grows on firm surfaces and this will prevent soil from washing out from under the moss.

Firmly press one section of moss into the soil at a time, piecing the borders of the sections together until the whole soil surface is covered. Incorporate any extra elements, such as rocks, sticks, or other plants, in the dish garden in this time.

Spray the top of the moss with water once it is all implanted and put your dish garden at the desired place; moss typically prefers shade.

Water your moss dish garden frequently for the first three weeks after it is implanted ensuring the plants don’t become dry.

See related

How to Prune White Meidiland Roses

White meidiland roses (Rosa “Meicoublan”) feature showy white double blooms in a prostrate form, growing just 1 to 2 feet tall with a spread of 4 to 6 feet. Grown in U.S. Department of Agriculture plant hardiness zones 4 through 9, white meidiland roses work well in group plantings as groundcover where they can blossom from spring until frost. Unlike many upright rose cultivars with fussy pruning needs, white meidiland roses only need light to moderate pruning to shape the plant. The ideal time to prune is in late winter to early spring once the buds begin to swell.

Wash all of the tools with rubbing alcohol to avoid spreading disease among plants. Wipe the blades often while pruning, particularly after cutting a diseased branch. White meidiland roses have relatively thin stems, so bypass pruners are all you need to want to prune the plant.

Wash all dead foliage from around the plants so you can more easily observe the framework of the canes. Discard the leaves instead of composting to stop from spreading foliar diseases.

Cut any dead canes back to the healthy, green portion of the stem; dead canes are generally brown or black. Cut at an angle just above a healthier outward-facing bud. If the whole cane is lifeless, then cut the cane back to the ground or at the graft union.

Eliminate as much as one-third of the old canes to make room for fresh canes. Cut these back into the ground.

Eliminate any rubbing or crossing branches, especially toward the center of the plant. Instead of removing the whole cane, cut branches back to the junction with the parent cane or just above a healthy, outward-facing bud to support the plant to branch away from the plant facility.

Trim additional canes and divisions as required to form the plant. When possible, always cut back the canes above an outward-facing bud and remove the buds that face the interior of the plant. Aim to keep the plant open and encourage it to continue spreading from the center, instead of allowing it to develop into a tangled mess at the center with sparse growth on the outside.

Eliminate the spent blossoms during the flowering period in order that your plant continues to make fresh flowers into fall. Cut the stem at an angle just above a five-leaf set.

See related

The way to Grow Pumpkins in a Mold to Create Faces

Pumpkins (*Cucurbita pepo*) create a colorful addition to your lawn. This annual crop comes in a variety of shades and sizes and fits in well in the event that you have the space. Many people split their initials into jack-o-lanterns from the fall, but it is possible to present your pumpkin a face without ever picking up a knife. Instead, use a mould to form the pumpkin as it rises to get something decorative and unusual.

Start Your Own Pumpkins

Pumpkins are a warm-season crop that grows in a lot of the USA. They should be planted after all danger of frost has passed. If you would like them for Halloween, the University of Illinois Extension recommends planting pumpkins in late May for northern climates through early July for warmer, southern areas. It gives them time to develop without maturing so early they turn to mush before Halloween. Plant four to five seeds per hill, spaced 5 to 6 feet apart for the vining classes and 4 feet apart for bush varieties.

Find a Mold

To present your pumpkin a face, you’ll need to find a mould you want. Suitable molds are offered from various nurseries, specialty shops and online sources. They are generally made from aluminum or plastic and are reusable. If you are handy you can also create your own of timber, hammered metal or any other good material. The material has to be tough enough to include the growing pumpkin or the face shape won’t take.

Place the Mold

Pumpkins must be put into molds while they are still young. Should you wait too long they wo not take the form of the mould well and they may crack. The pumpkin must fit in the mould and be small enough it can be held in place by the mold’s backing, straps or other devices. You can use tape to maintain your pumpkin from the face mould, but do not really tape the fruit.

Remove the Mold

Remove the face mould in the pumpkin when the fruit has grown big enough to completely fill the mould. Now the design is put along with the pumpkin will keep the face shape the remainder of its existence. Continue to look after the pumpkin as ordinary. Provide water through prolonged dry spells and hoe around your plants to help keep the weeds down. Harvest your pumpkin when it is mature and fully ripe, usually in late September or the first part of October. Cut it in the plant, leaving 3 to 4 inches of stem attached, and store it in a cool, dry location.

See related

What Is Wrong with My Ficus Tree if the Leaves Are Turning Light Green?

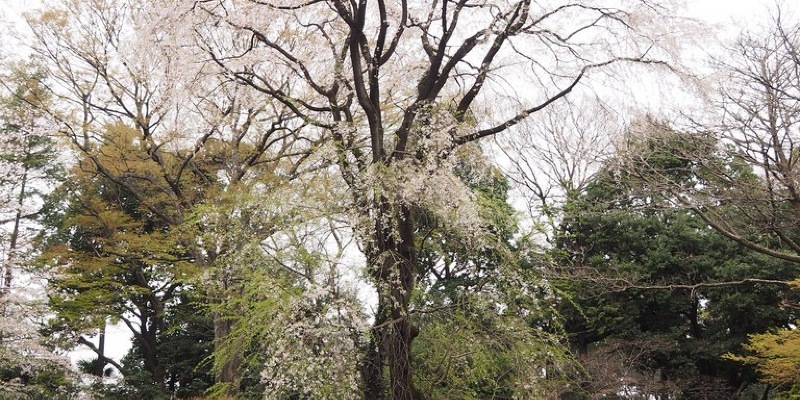
Commonly grown ficus trees (Ficus spp.) Contain the rubber tree (Ficus elastica) along with the weeping fig (Ficus benjamina). Both of these are hardy outdoors all year in U.S. Department of Agriculture plant hardiness zones 10 through 12 and develop as houseplants in any USDA zone. The weeping fig has its name from its pendulous branches and certainly will become 40 to 50 feet tall outdoors but generally no more than 10 feet tall when grown indoors in a pot. The rubber tree has tough and sturdy, dark-green leaves which rarely change shade, however, the weeping fig sometimes signals a problem when its leaves turn light green, but in some situations the color change is not a cause for concern.

A Normal Response

If only young leaves to a contaminated fig are light green, old leaves are darker and the tree is healthy, then the tree probably does not have a difficulty. Leaves contain the green pigment chlorophyll, which youthful leaves actively produce. So new leaves can appear lighter than adult leaves because they haven’t yet produced a full quantity of pigment; the newest leaves must gradually darken withing one or two weeks. Leaves of a indoor weeping fig can turn light green when the tree was recently moved from a bright location to a less brightly lit place or when the plant is a newly purchased greenhouse-grown tree accustomed to brighter light. Leaf colour change in this kind of weeping fig is not a problem, provided no leaves turn yellow or drop in the tree. Nevertheless, you may set up an artificial light source, such as a rise light or full-spectrum fluorescent bulb, several feet from an indoor weeping fig to assist its leaves darken.

Too Much Water

If leaves of different sizes and ages begin to turn light green to a weeping fig, the switch could indicate overwatering, particularly if light-green leaves eventually turn yellow and drop. As opposed to following a predetermined watering schedule, analyze your weeping fig’s soil before watering it to ascertain whether the tree needs water. Check the top 2-3 inches of a weeping fig’s soil on a regular basis, whether the tree grows outdoors in the ground or in a container inside or outdoors, and water the soil only when it feels dry to your fingertip. Water thoroughly, allowing the water to drain in the bottom drainage holes of a potted tree’s container, but never leave the container in a water-filled saucer. If a weeping fig is planted in the ground, use a soaker hose or drip irrigation to water its dirt, allowing the water penetrate the ground gently but deeply.

Poor Nutrition

Weeping fig needs fertilizer about each month throughout the growing season — normally spring through the summer, and its leaves might begin to turn light green if the soil’s nutrient levels become low. If the weeping fig is planted in the ground, then scrape a granular fertilizer using a nitrogen-phosphorus-potassium ratio of 3-1-2 into the top few inches of its soil, applying it in a speed of about 1/3 pound per 100 square feet of soil surface area below the tree’s canopy, and also water the fertilized ground well. If you have a container-grown weeping fig, utilize a balanced, water-soluble fertilizer, such as a 10-10-10 formula, diluted to one-half strength. Achieving a one-half strength dilution typically requires mixing 1/4 teaspoon of this fertilizer with 2 gallons of water, but follow your fertilizer’s label directions. A weeping fig should not be fertilized during autumn or winter so it can break.

Potential Pests

Weeping fig is vulnerable to a number of insects which suck plant juices and might cause leaves to turn light green or even to turn yellow, curl and eventually fall. Those insects comprise scale insects, which appear like raised brown spots on stems and leaves, and are best destroyed by touching every one using a cotton swab which was dipped in rubbing alcohol. Spray a huge tree once every month using an all-season olive oil which was diluted in water; the dilution rate is generally 2 1/2 tablespoons of this horticultural oil per 1 gallon of water, but check the product’s label for specific directions. Other pests that affect weeping fig are aphids, which can be miniature, greenish-yellow insects which leave behind a sticky residue, and spider mites, which can be microscopic and make weblike coverings on young leaves and branch tips. Rid the tree of those pests by spraying it until it’s dripping wet with insecticidal soap which was diluted at a speed of 5 tablespoons per 1 gallon of water; spray the tree every 2 weeks if needed to eliminate the insects.

See related

When to Harvest Red Torpedo Onions

When you desire a mild and sweet-flavored onion, the red torpedo onion (Allium cepa var. Cepa “Red Torpedo”) is 1 type you’ll want to consider. At maturity, red the heirloom torpedo onion, which originated from the Italian region of Calabria, measures 6 to 8 inches long with a diameter of approximately 3 inches. They are named using a torpedo shape and red to purple skin. Red torpedo onions grow in U.S. Department of Agriculture plant hardiness zones 3 to 10.

Life Cycle of Red Torpedos

Red torpedo onions are a type of long day onion. The bulbs on this form of onion form when the plants receive 14 or more hours of sunlight every day. Typically, you plant red torpedo seeds or places in the spring and then harvest them around six months later. They are classified as biennials but are generally raised as annuals. Sometimes, red torpedo onions are harvested at scallion size. You may pull on the onion plants when they are 6 to 8 inches tall and the diameter of a pencil. But wait to harvest the fully formed bulbs to take advantage of the light, sweet onion flavor.

How to Harvest

When the torpedo-shaped onions rise slightly out of the ground, then they are ready to harvest. If you are not sure, pull a few onions and then check their size. The tall leaves generally begin to turn from green to yellow and fall over when the onions reach a harvestable size. When approximately one-half of those tops fall over, thrust the other tops above by hand and then wait a week. After a week, the tops will turn brown and wither. Loosen the soil around the onion lamps using a garden fork and then pull on the onions. Allow the onions to air-dry from the garden for a single day. If the weather is very hot and sunny, dry the onions from the shade. If blossom stalks have formed, then utilize the onions instantly and do not store them.

Prepare Onions for Storage

After drying in the garden for a day, transfer the onions to a dry shelter. Expand the onions in a single layer on elevated screens or pliers or hang the onions in tiny bunches. Provide decent air circulation and allow the onions to dry for two to three weeks. Braid the tops cut the tops off 1 inch in the onion bulb. Trim off any tiny roots.

Storage of Red Torpedos

Red torpedo onions are generally bad onions for long-term storage. However, they will keep up to 3 months in storage if you prepare yourself and store them carefully. Select onions using a dry outer skin and tight neck for storage. Hang the braided onions, then place them in mesh bags or keep them on the screens or slats. Store the onions over 32 degrees and below 40 degrees Fahrenheit. Above 40 degrees F, they will sprout. Don’t store onions in the fridge. Avoid storing onions, since the potatoes will release a ripening gas that may cause the onions to become fragile.

See related

Could I Use Miracle-Gro LiquaFeed Plant Food on Grass?

A yard requires a bit tending to keep it lush and green. Supplying the grass with nutrients by fertilizing it will help to keep the lawn healthy and vigorous. You can kill two birds with one stone by fertilizing your lawn with Miracle-Gro LiquaFeed fertilizer when you water it.

Grass Fertilizer Needs

Grass needs varied nutrients, based on factors like the kind of turf grass, the era of a yard and the sort of soil. Without a soil test to determine the specific requirements your bud needs, the University of Florida IFAS Extension recommends having a fertilizer with a grade of 3-1-2 or 4-1-2. The 3-1-2 grade translates into a ratio of 12-4-8, which is the formula of Miracle-Gro LiquaFeed. These numbers signify nitrogen, phosphorus and potassium, which are main nutrients. Miracle-Gro LiquaFeed also supplies manganese and zinc — two micronutrients that keep grass healthy and green.

When to Fertilize

Warm-season grasses, such as bermudagrass (Cynodon dactylon) in U.S. Department of Agriculture zones 7 through 10 and zoysiagrass (Zoysia spp.) At USDA zones 5 through 10, require fertilizing only as soon as they begin to green up in the spring. Cool-season grasses, such as tall fescue (Festuca arundinacea) in USDA zones 4 through 7 and perennial ryegrass (Lolium perenne) in USDA zones 3 through 6 do not have to be fertilized during the warmer months. Begin fertilizing in the autumn, particularly in September.

The Way To Use

To provide 1 pound of nitrogen for each 1,000 square feet of grass, which is the recommended rate of nitrogen for a lawn, you must do some math to compute this rate if you use a granulated fluid. But if you utilize Miracle-Gro LiquaFeed, the calculations are already done for you. Every single LiquaFeed feeder bottle fertilizes 400 square feet of yard and can be implemented in 15 minutes. The suggested reapplication speed is every seven to 14 days.

How to Apply LiquaFeed

The Miracle-Gro LiquaFeed feeder attaches to the end of a garden hose and also holds the LiquaFeed refill bottle. After removing the cap to the LiquaFeed filter bottle, attach it to the LiquaFeed feeder by twisting it set up. Turn on the water and spray on the yard to fertilize it — the fertilizer will mix in the perfect proportion with the water. In case you have a small patch of yard to fertilize, you may apply it into your yard with a watering can. Utilizing the supplied dosing spoon, squeeze the refill bottle to fill the spoon. The dimension to the line is for mixing in 2 gallons of water, and the lower-line measurement unites in 1 gallon of water. Each gallon fertilizes a 10-square-foot location.

See related